5. Transition Area
The transition area is used to select which video source buses will be included in the next transition and what type of transition will be performed. The Cut and Auto buttons and the fader are used to perform transitions.
The function of the buttons on the Transition area differ between Carbonite and Acuity®.
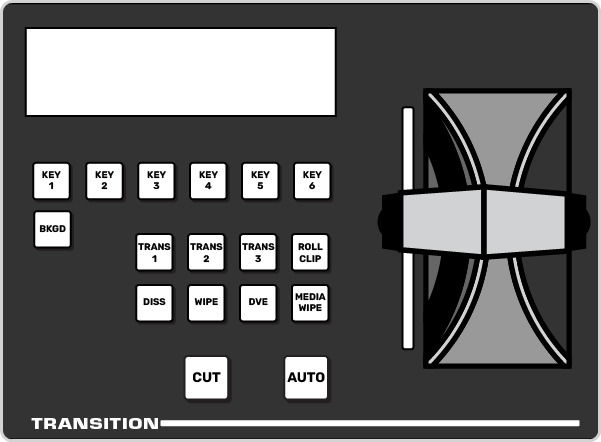
Carbonite Configuration

| Button | Function |
|---|---|
| BKGD | Include the background in the next transition. |
| KEY X | Include a key with the next transition. |
| TRANS X | User assignable buttons. |
| ROLL CLIP | Tie the playout of a clip to the next transition, or have the clip play immediately. Roll clip only works with external devices that are being controlled by the switcher. |
| DISS | Select a dissolve as the next transition type. |
| WIPE | Select a wipe as the next transition type. |
| DVE | Select a DVE wipe as the next transition type. |
| MEDIA WIPE | Select a MediaWipe as the next transition type. |
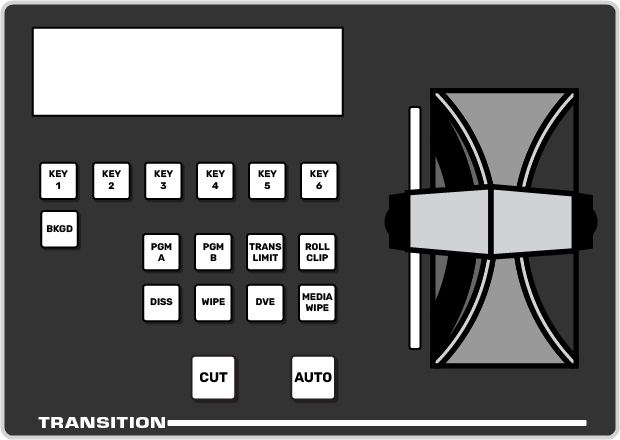
Acuity® Configuration

| Button | Function |
|---|---|
| BKGD | Include the background in the next transition. |
| KEY X | Include a key with the next transition. |
| PGM A | Assign the Transition module and buses on that row to Program A of the configurable program output. |
| PGM B | Assign the Transition module and buses on that row to Program B of the configurable program output. |
| TRANS LIMIT | Set the point where a transition will stop. This allows you to have a transition proceed only half way and stop. The next transition is performed from that stop point, back to the original starting point. |
| ROLL CLIP | Tie the playout of a clip to the next transition, or have the clip play immediately. Roll clip only works with external devices that are being controlled by the switcher. |
| DISS | Select a dissolve as the next transition type. |
| WIPE | Select a wipe as the next transition type. |
| DVE | Select a DVE wipe as the next transition type. |
| MEDIA WIPE | Not used at this time. |
