
To Record to a Media Button
The video input (video+audio) for the channel pair can be recorded as video with audio (Video Media Button), audio only (Audio Media Button), or as a still image (Still Media Button).
-
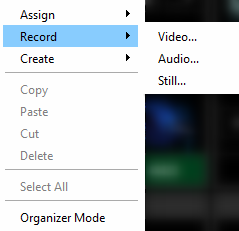
Right-click on the empty Media Button that you want to record to.
-
Select Record and click on the type of media you want to record. The type of media sets the type of Media Button you are
creating.
- Video — a Video Media Button containing video with or without audio.
- Audio — an Audio Media Button containing audio without video.
- Still — a Still Media Button containing a still image without audio.
-
Select the track and clip information you want to record.
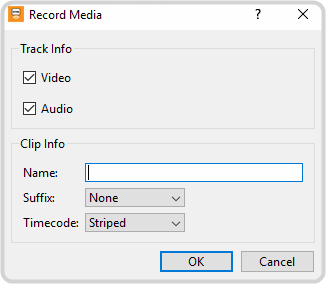
Setting Description Track Info - Video — record the video track.
- Audio — record the audio tracks.
Clip Info - Name — enter a name for the media file. The name is also applied to the Media Button but can be changed later.
- Suffix — automatically add a sequential number (Numeric) or the current time of day (Time of Day) to the end of the name.
- Timecode — the timecode for the clip can start at zero (Striped) or use the external timecode input
(External LTC).Note: The External LTC setting uses LTC or ATC, depending on how the timecode is configured for the channel pair.
-
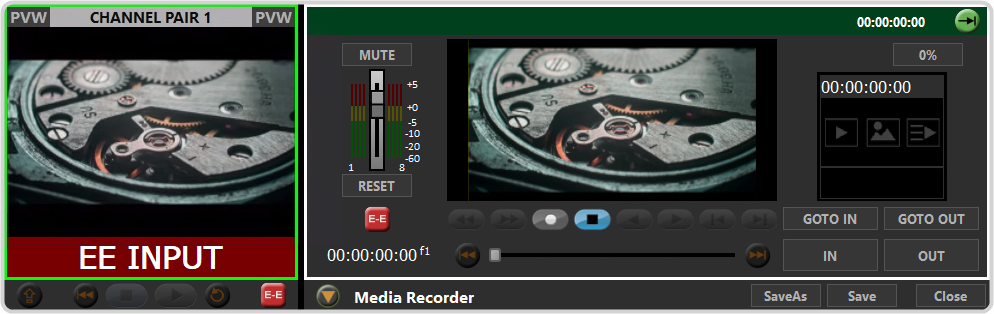
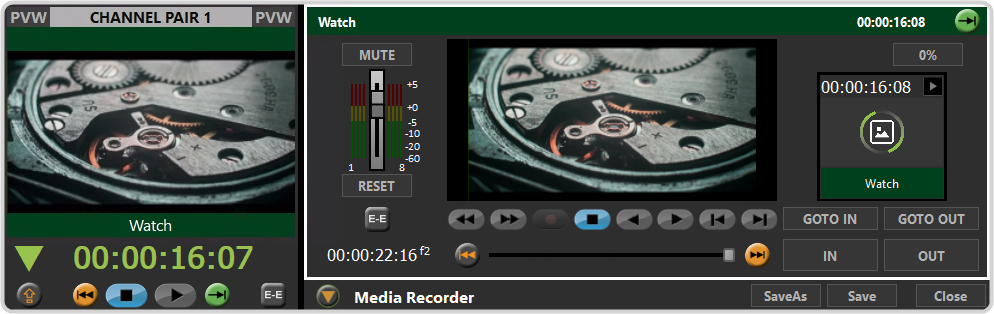
Click OK. The Video Preview Media
Player goes into EE mode and the Media Recorder
opens.
-
Click Record (
 ) to start recording.
-
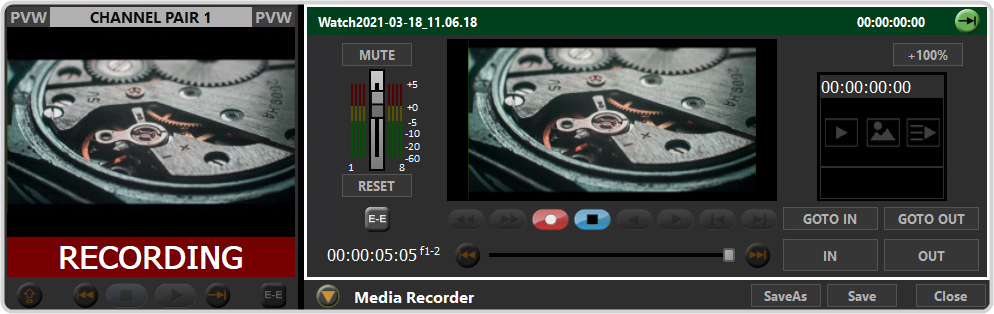
When you are ready to finish recording, click Stop (
 ).
).
-
Trim the IN and OUT points of the clip and adjust the audio level as required.
Tip: Click on the thumbnail image to generate a new thumbnail from the current frame of video.
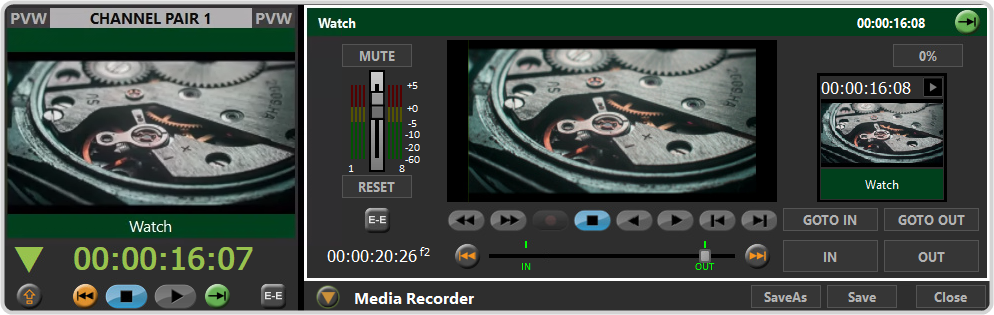
- Click Save to save the new media item to the Media Button.
- Click Close.