Setting Up Creative Console
This section describes how to set up Monogram Creative Console modules to control supported PTZ cameras or PT heads, in conjunction with the Ross Video DashBoard Facility Management application.
The procedures in this section assume that the PTZ cameras or PT heads you want to control are already installed, and that they have been added to DashBoard running on the Windows operating system. Ensure that all PTZ cameras or PT heads are fully operational before you set up Monogram Creative Console .
This section includes the following topics:
- “Unpack and Connect Modules”
- “Install Monogram Creator”
- “Start Monogram Creator”
- “Apply Firmware”
- “Set Preferences in Monogram Creator”
- “Download and Load a Configuration Profile”
- “Configure DashBoard”
After you assemble and configure your Monogram Creator , you can physically rearrange the modules to suit your ergonomic needs and preferences. You can also customize the console by assigning different functions to the controls. For more information, see “Customizing the Creative Console”.
The use of Monogram Creative Console in conjunction with DashBoard is supported only on computers running the Windows operating system. It is not supported on Apple Mac OS or Linux.
From time to time, Ross Video may provide updated versions of software and/or configuration files for your Monogram Creative Console . Updates may include new features and/or security improvements. The steps in this section describe how to install the latest version, so there is no need to check for updates right away. We recommend you check for updates occasionally over the life of the product. For more information, see “Updating Software”.
Unpack and Connect Modules
Each set of Creative Console modules includes a Core module. The Core module features two push buttons and an LCD screen. Using the provided USB cable, connect the Core module to a USB port on the DashBoard computer.
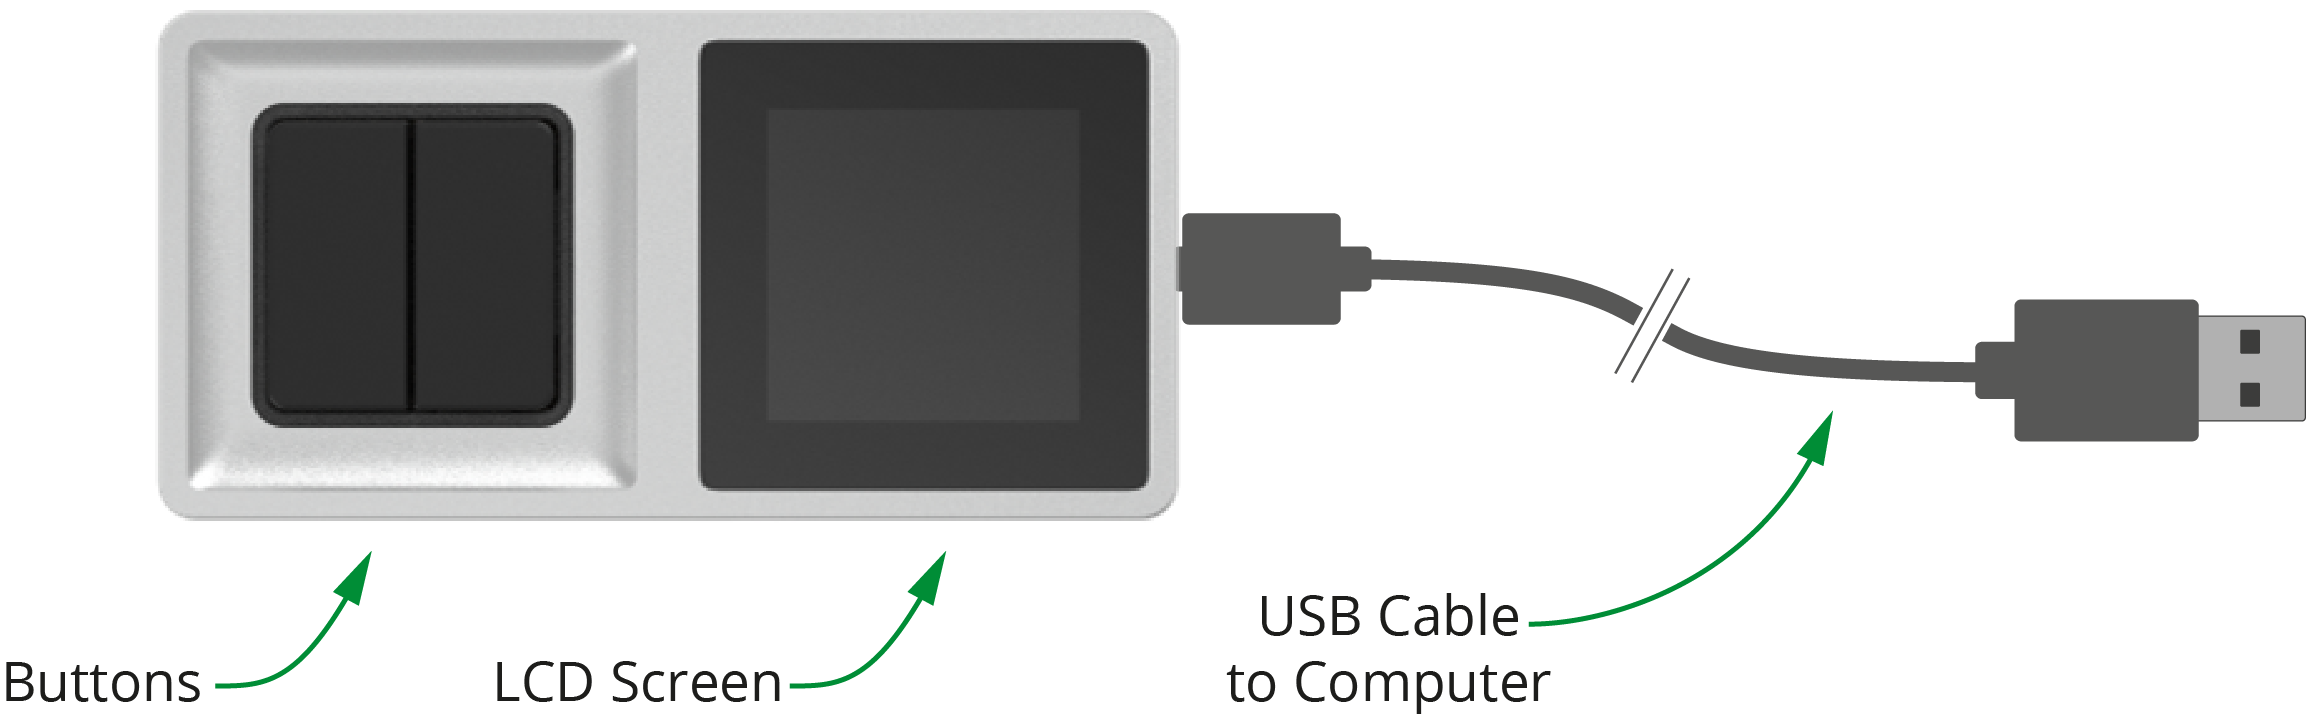
Figure 1 - Core Module, showing Buttons, LCD Screen, and USB Cable to Computer
The other modules attach magnetically to the Core module and/or each other. Each module has one set of connection pins and multiple sets of connection pads (Figure ??).
Attach each additional module, ensuring that its connection pins are aligned with a set of connection pads on either the Core module or on an already-connected module.
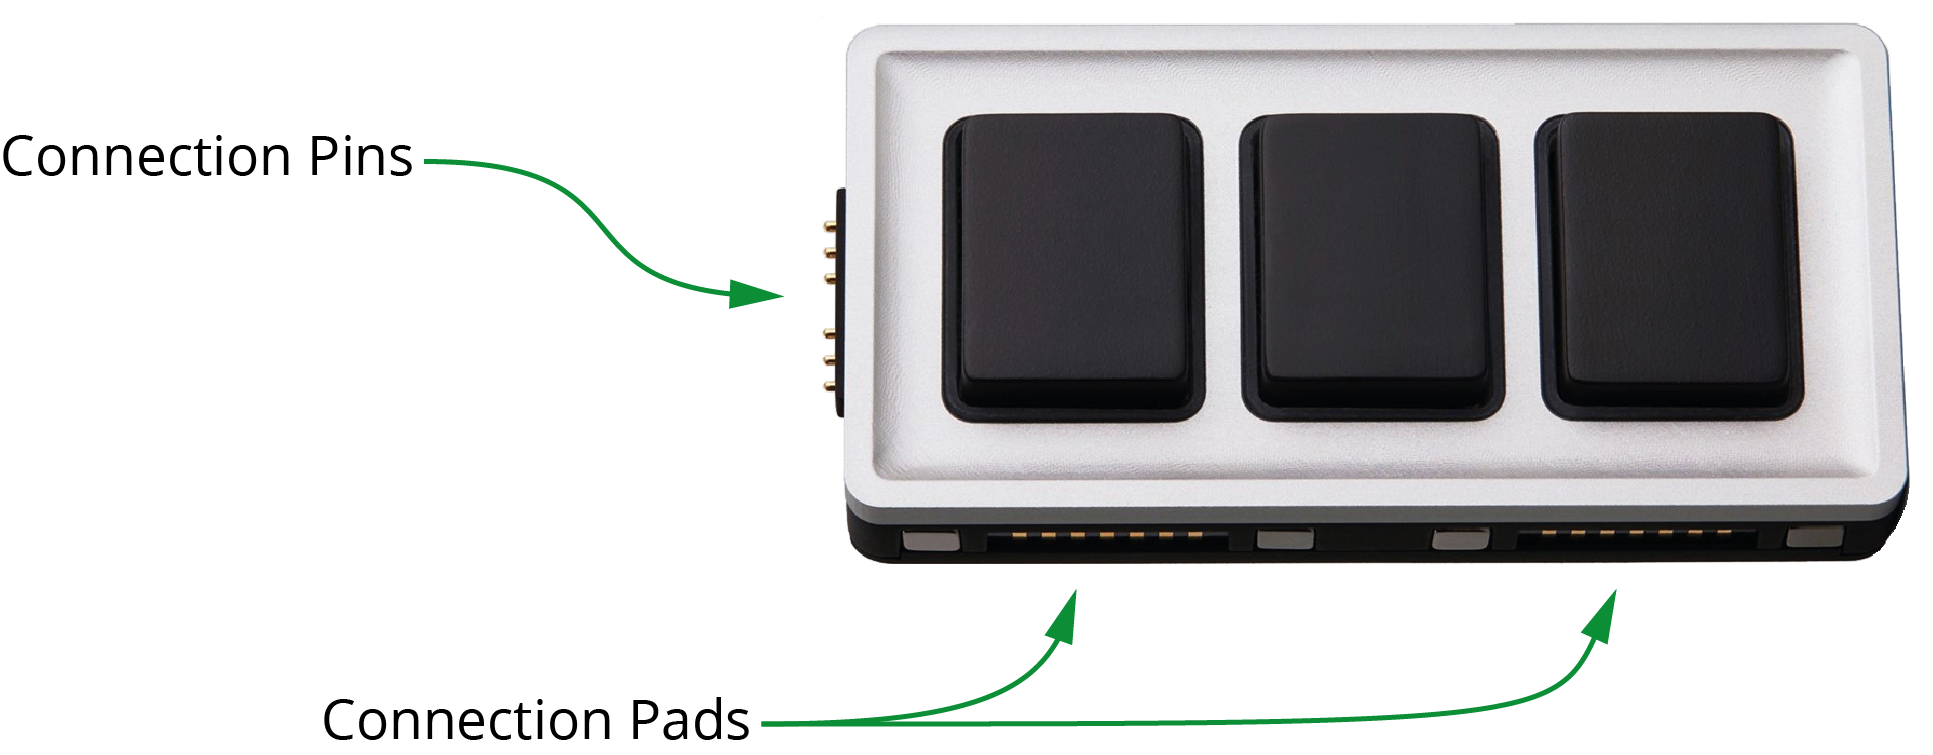
Figure 2 - An Essential Keys Module, showing Connection Pins and Connection Pads
For initial setup, arrange the modules in accordance with the recommended layout for the Monogram package you purchased:
- PTZ Starter Package
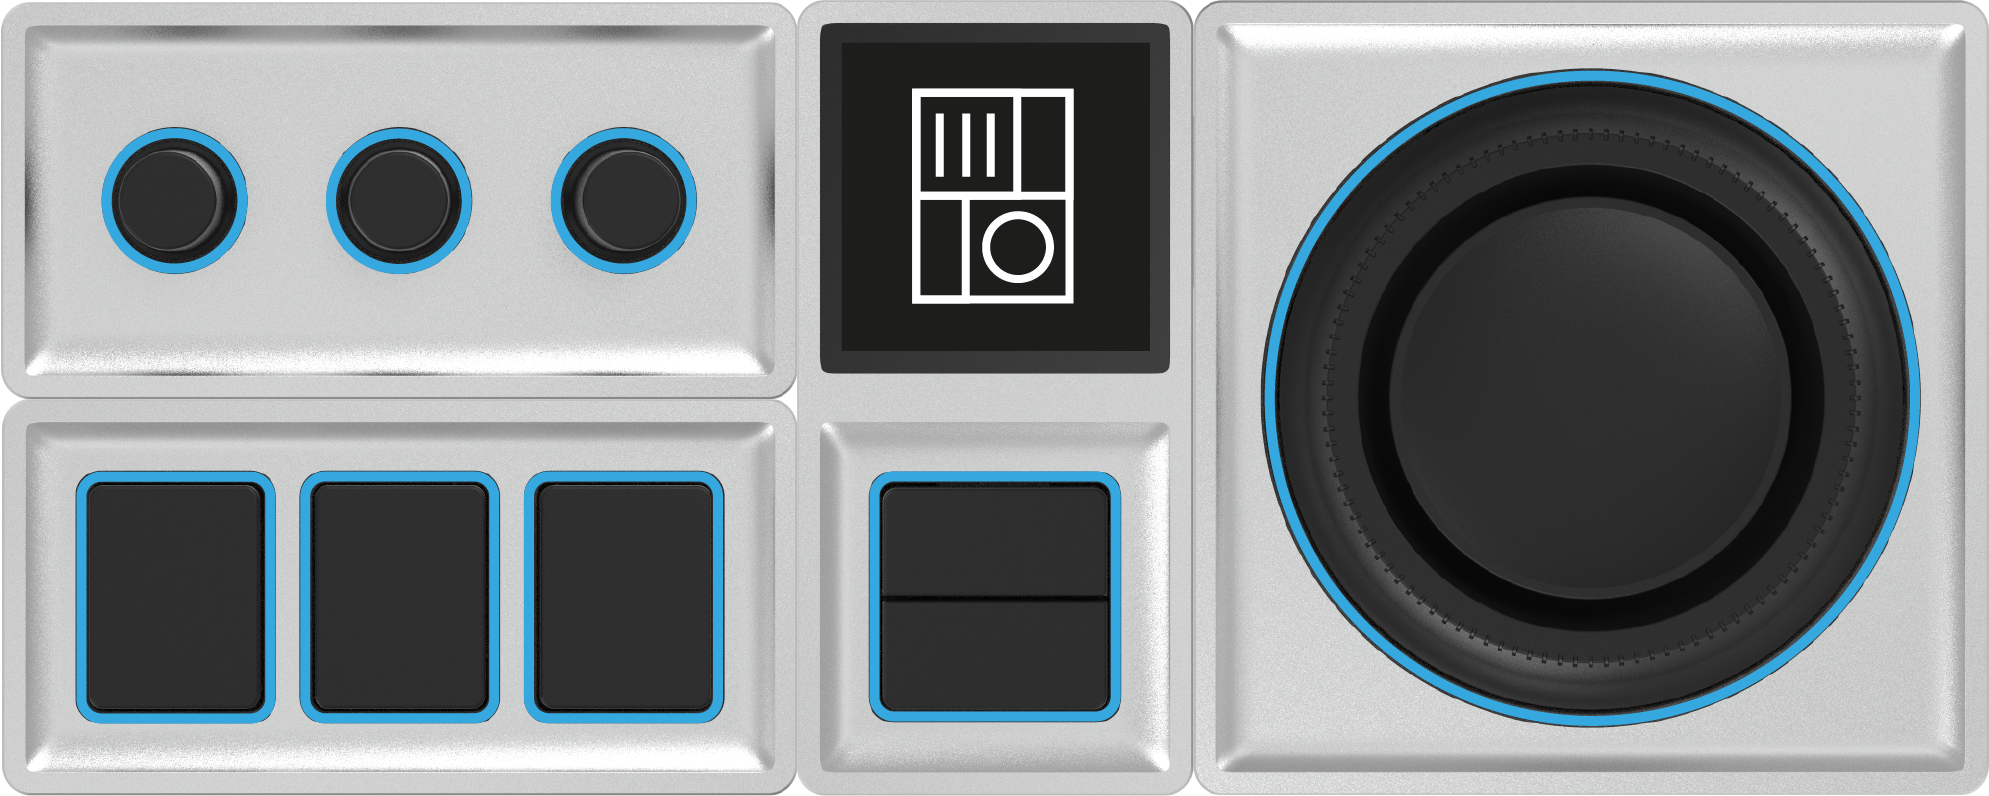
Figure 3 - PTZ Starter Package (Core Module, Orbiter Module, Dial Module, and Essential Keys Module)
- PTZ Pro Package
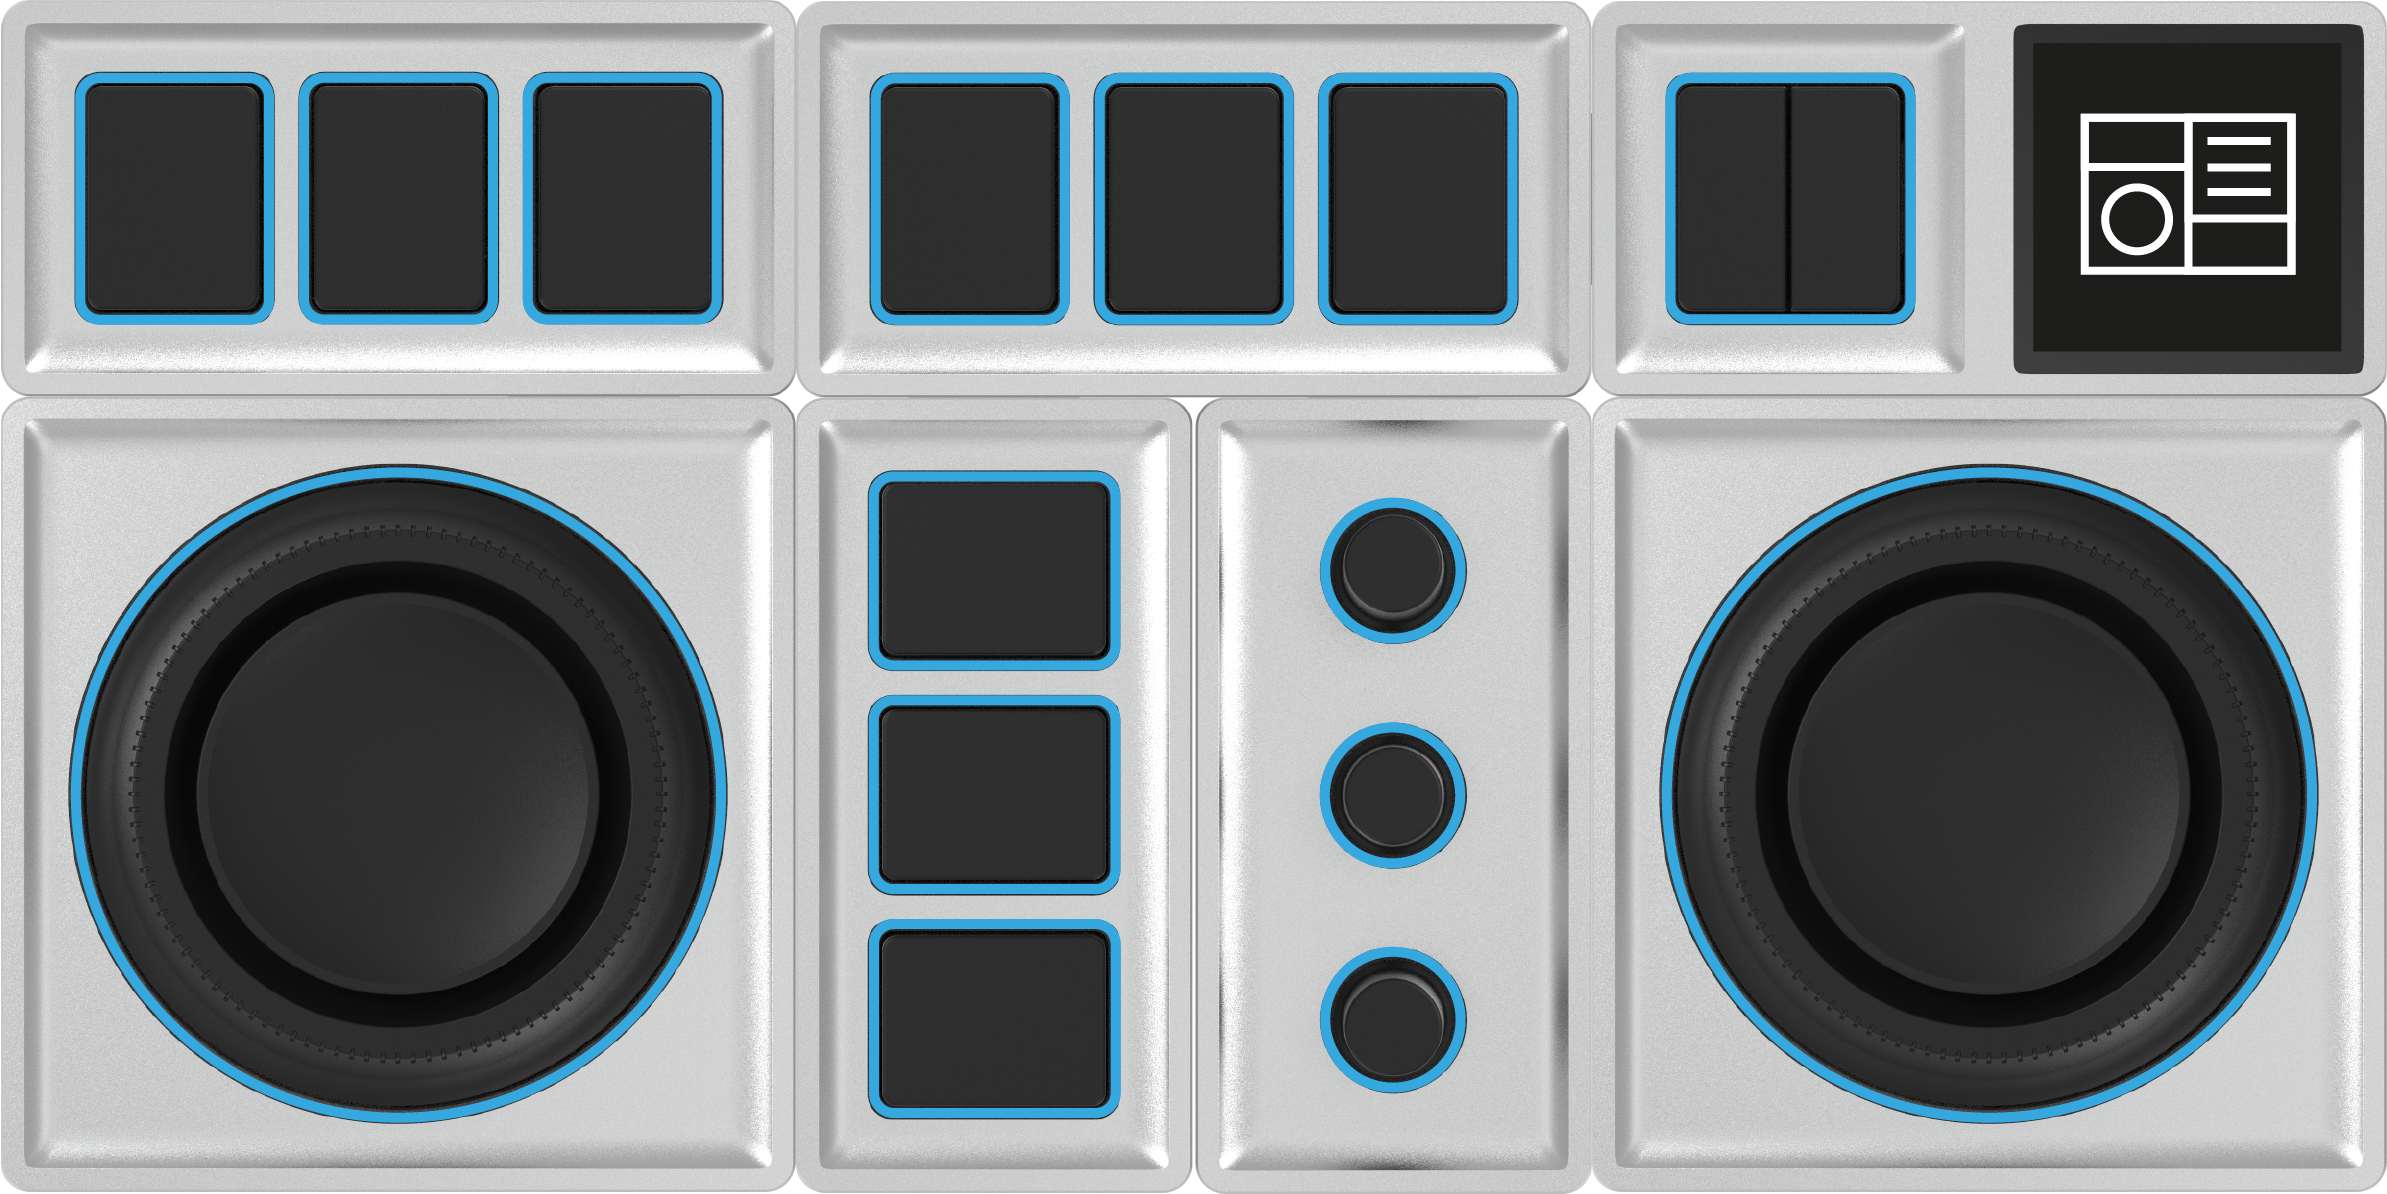
Figure 4 - PTZ Pro Package (Core Module, two Orbiter Modules, Dial Module, and three Essential Keys Modules)
As you connect each module, blue rings (halos) light up around each control. If halos do not appear when you connect a module, check that its connection pins are aligned with connection pads on a module that has lit halos.
Install Monogram Creator
Monogram Creator is a software application that enables you to load, modify, and save configuration profiles, which define the behavior of each control on the Monogram Creator. A special version of Monogram Creator is available from the Monogram website, through a download link provided later in this section.
Special configuration profiles for Monogram Creator are included when you buy a Monogram package from Ross Video. The PTZ Starter package includes a configuration profile for controlling up to three PTZ cameras. The PTZ Pro package includes two configuration profiles; one for controlling up to six PTZ cameras, and one for controlling up to six PT heads.
This section describes how to download and install a special version of Monogram Creator.
The Monogram website provides download links for multiple versions of Monogram Creator . It is important that you use only the download link provided in this document to access the 5.6.1 version of Creator that has been tested with DashBoard and configured to prevent automatic updates. Other versions may not be fully compatible with DashBoard control of PTZ cameras and PT heads.
Because the special offline version of Monogram Creator software does not receive updates and does not require network access to function, we strongly recommend that you minimize security risks by configuring Windows Firewall to deny Internet access to all Monogram applications.
To download and install Monogram Creator :
-
In a web browser, navigate to the following URL:
https://portal.monogramcc.com/ross-video-offline-installer-windows/
-
Download and the Monogram installer file.
The file is saved to the Windows Downloads folder.
-
In the Windows Downloads folder, find the installer file.
tipThe file name is similar to monogram-5.6.1-windows-x86-x64-installer
-
Unzip the Monogram_Installer_offline.exe file.
The Monogram Creator Setup Wizard appears (Figure ??).
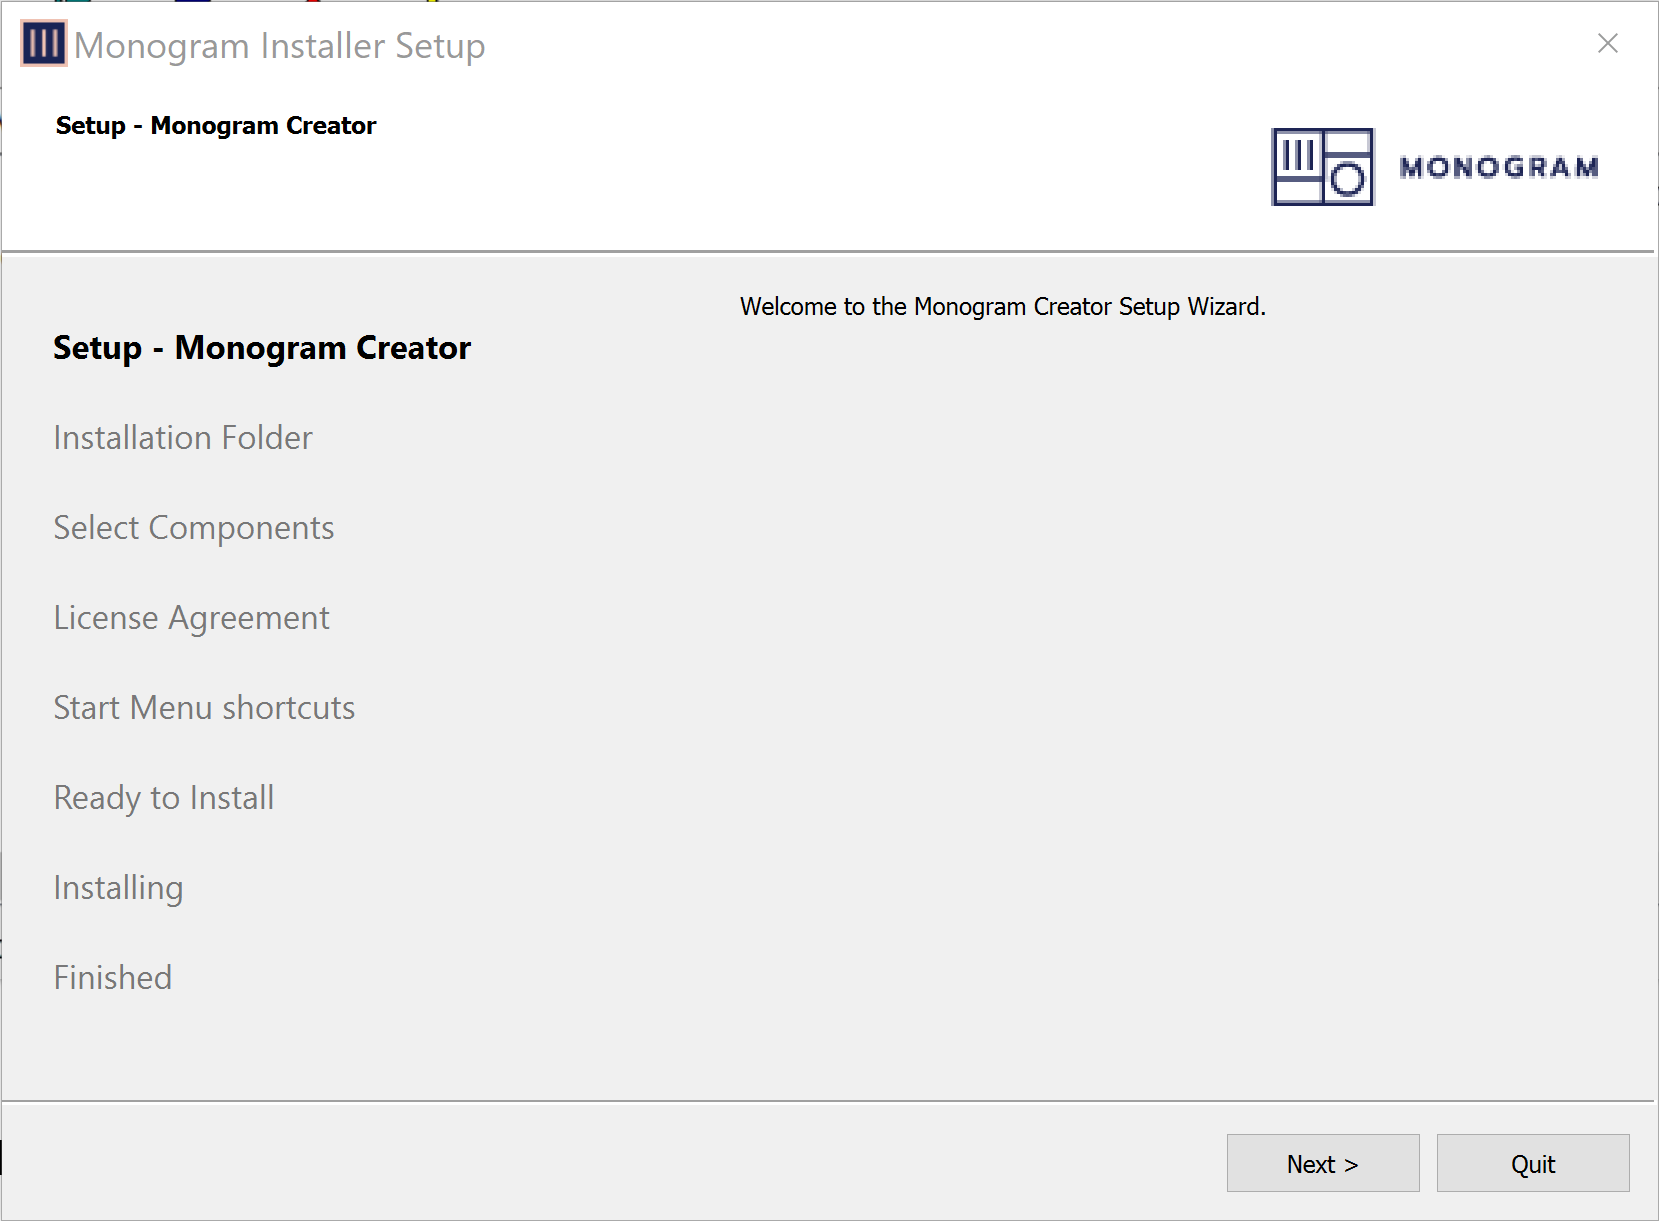
Figure 5 - Monogram Installer
-
Select Next .
The License Agreement dialog box appears (Figure ??).
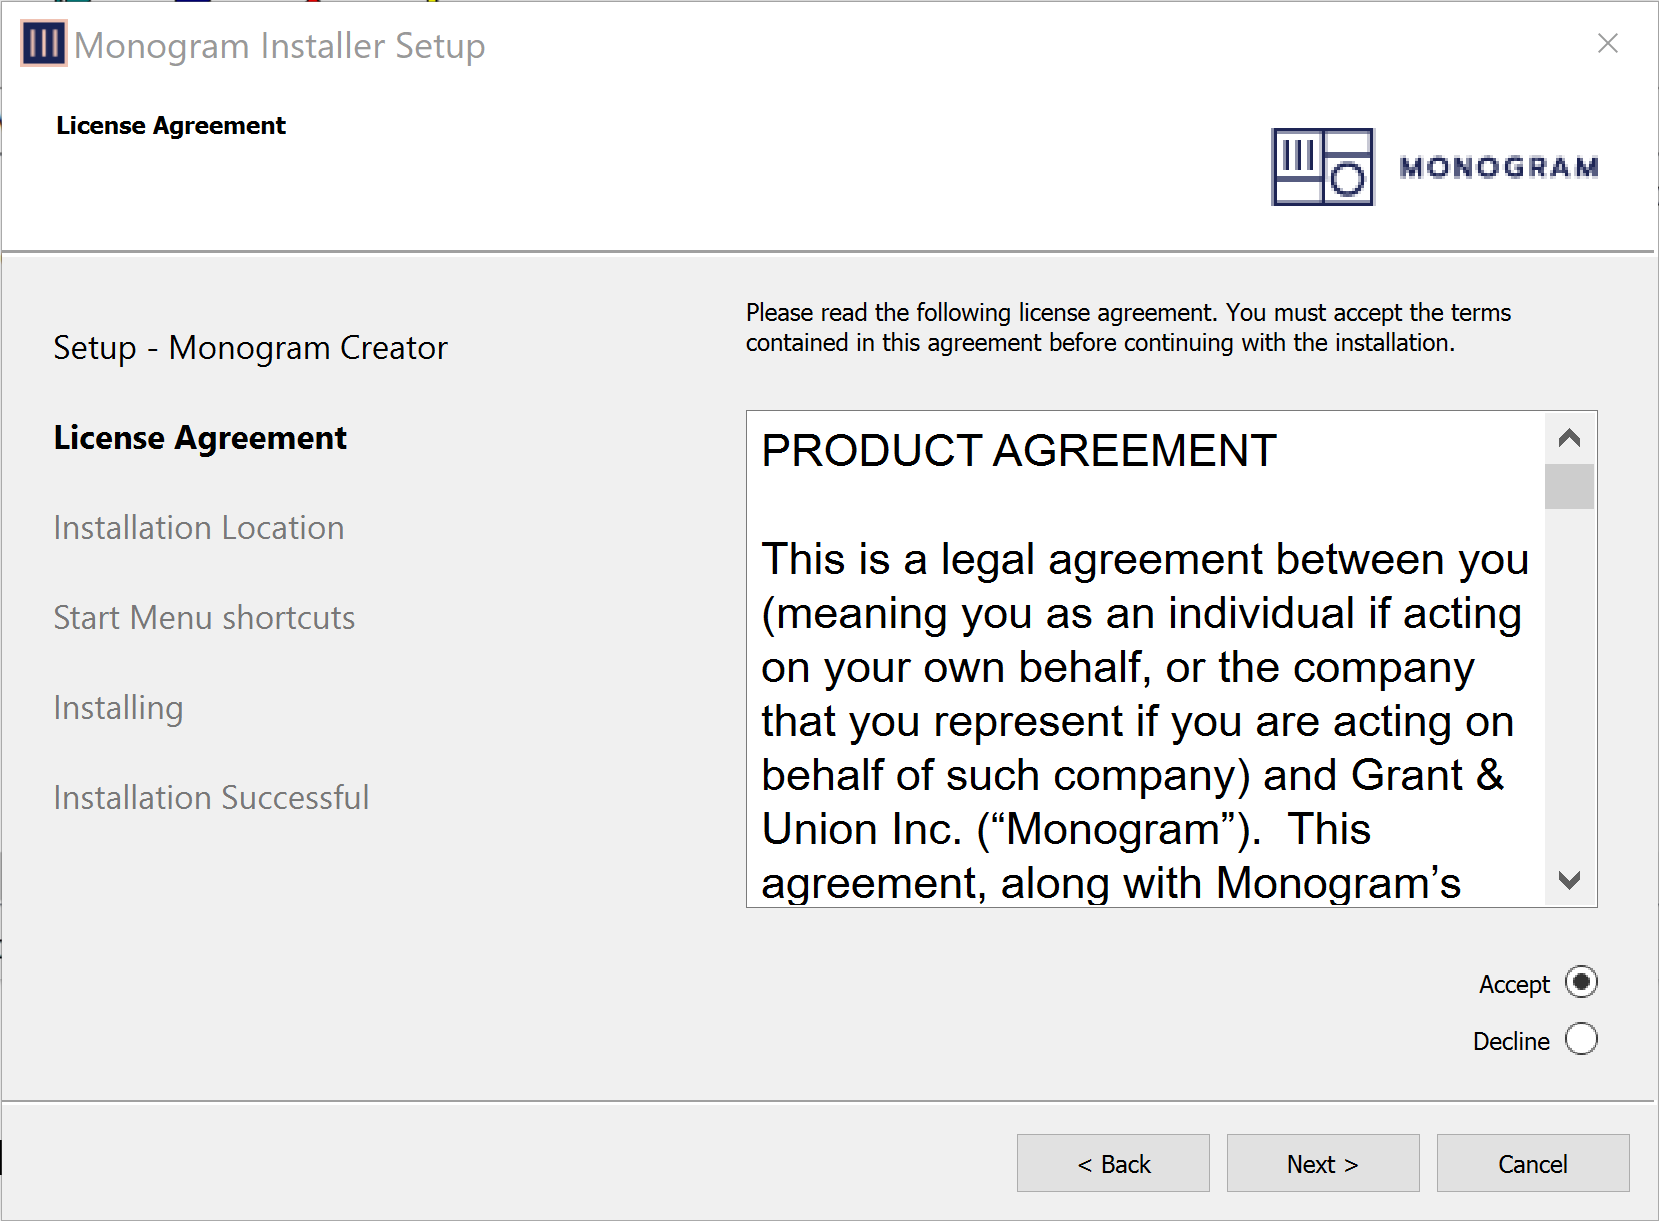
Figure 6 - License Agreement
-
Read the agreement, select the Accept option, and then select Next .
The Installation Location dialog box appears (Figure ??).
noteCreator Installer requires either an empty install folder or new one. The current install folder will not update.
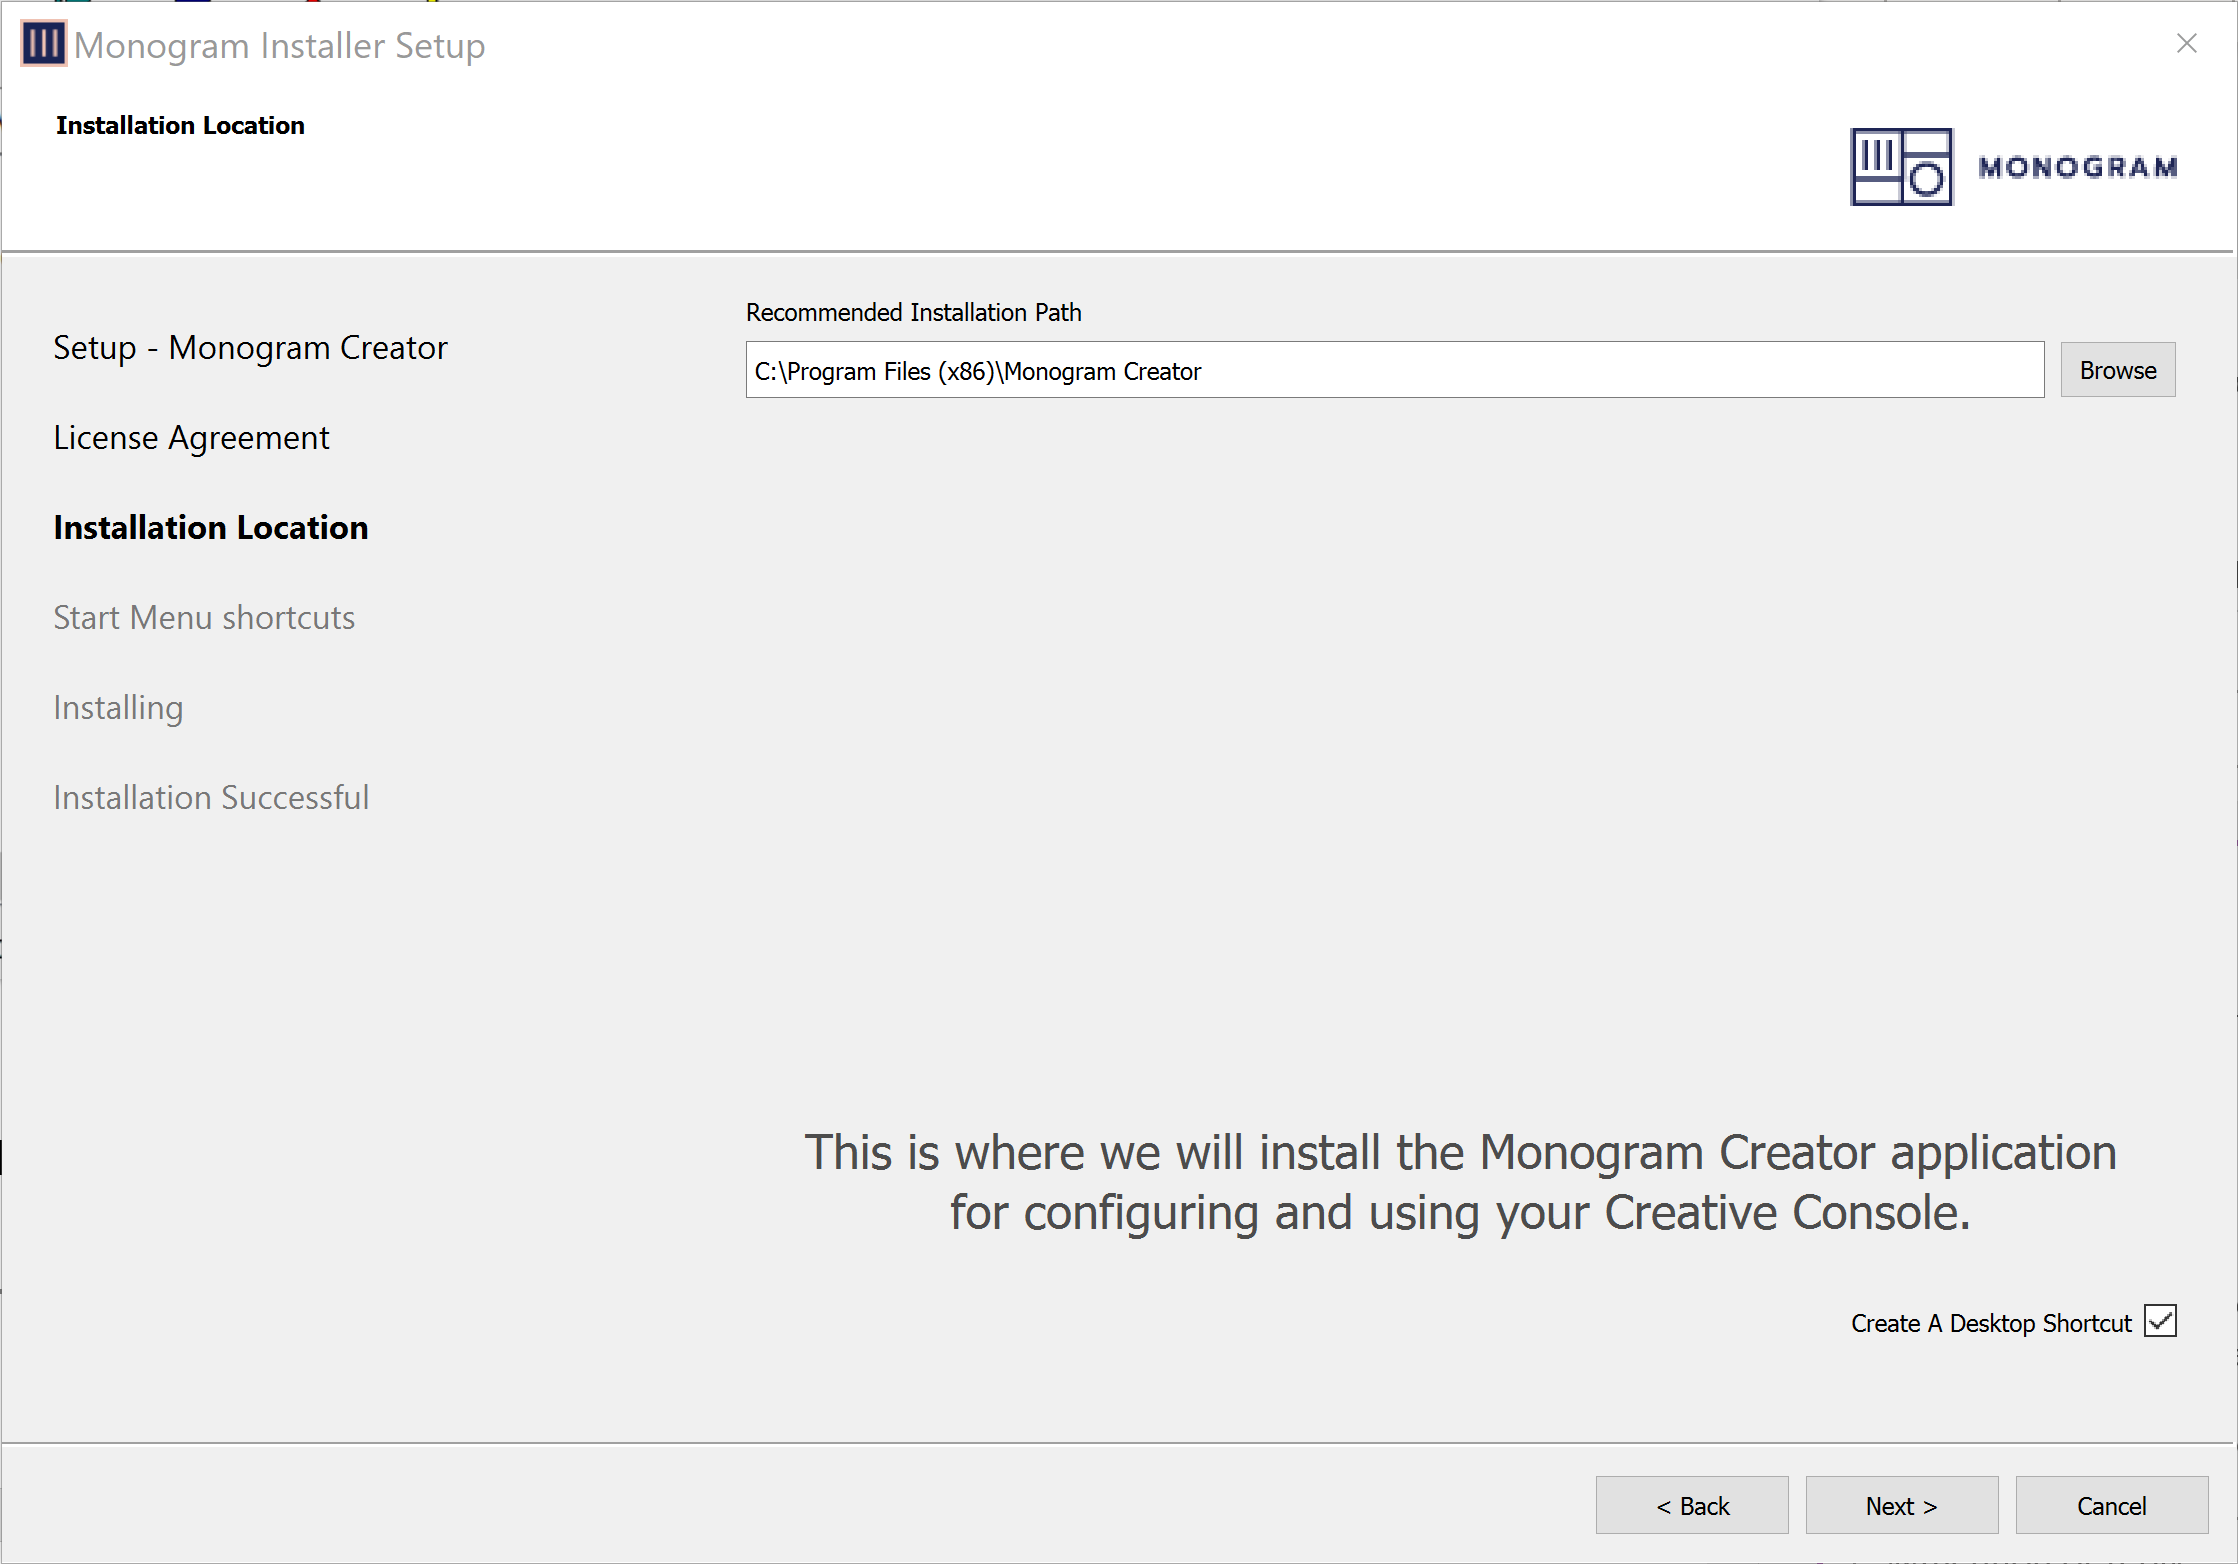
Figure 7 - Installation Location
-
Select Next .
The Menu Shortcuts dialog box appears (Figure ??).
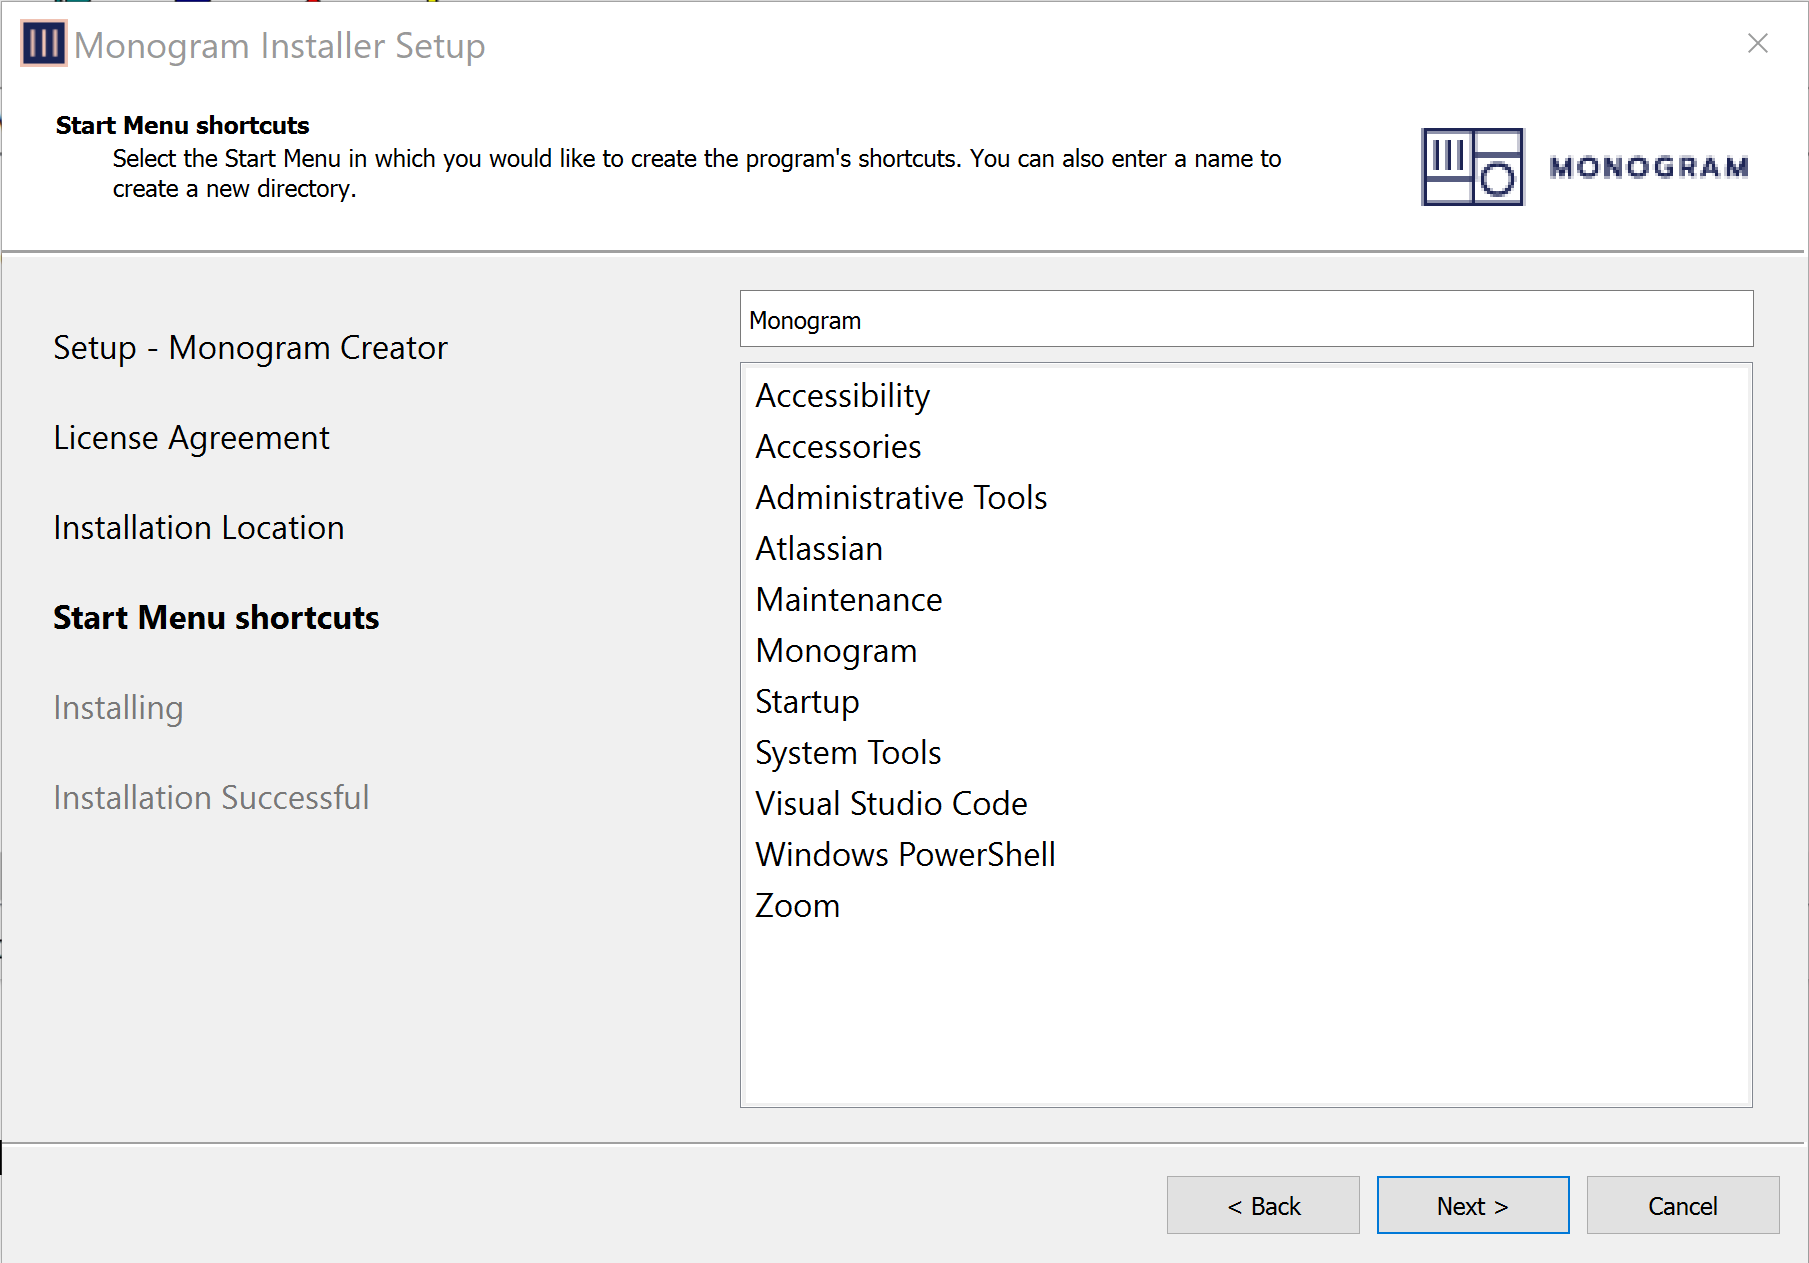
Figure 8 - Menu Shortcuts
-
Select Next .
If a dialog box appears, asking you to confirm that you want to allow the installation, respond by allowing the installation.
The installation begins, and a status bar shows the progress (Figure ??).
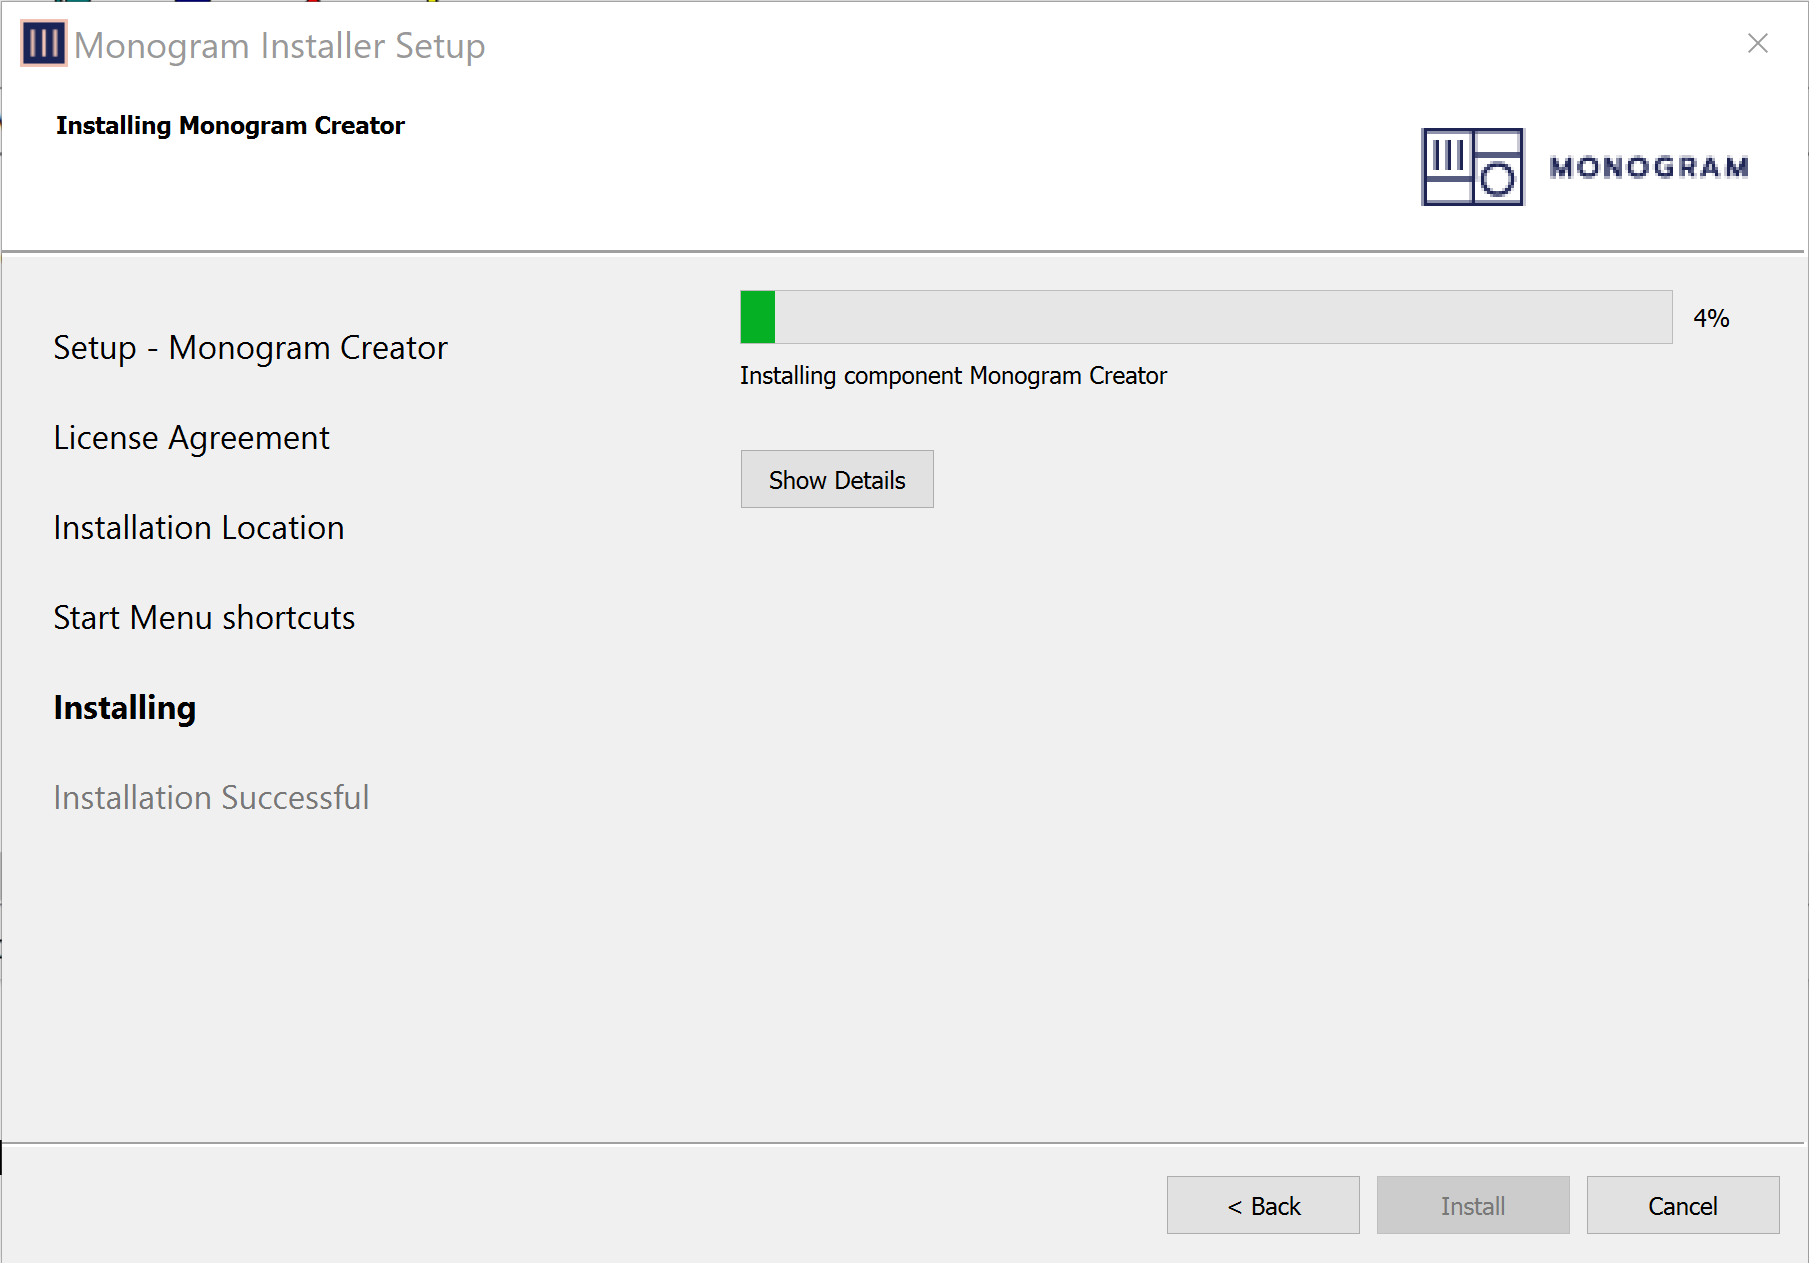
Figure 9 - Installing Monogram Creator Files
-
After a few minutes, an Installation Successful message appears (Figure ??).
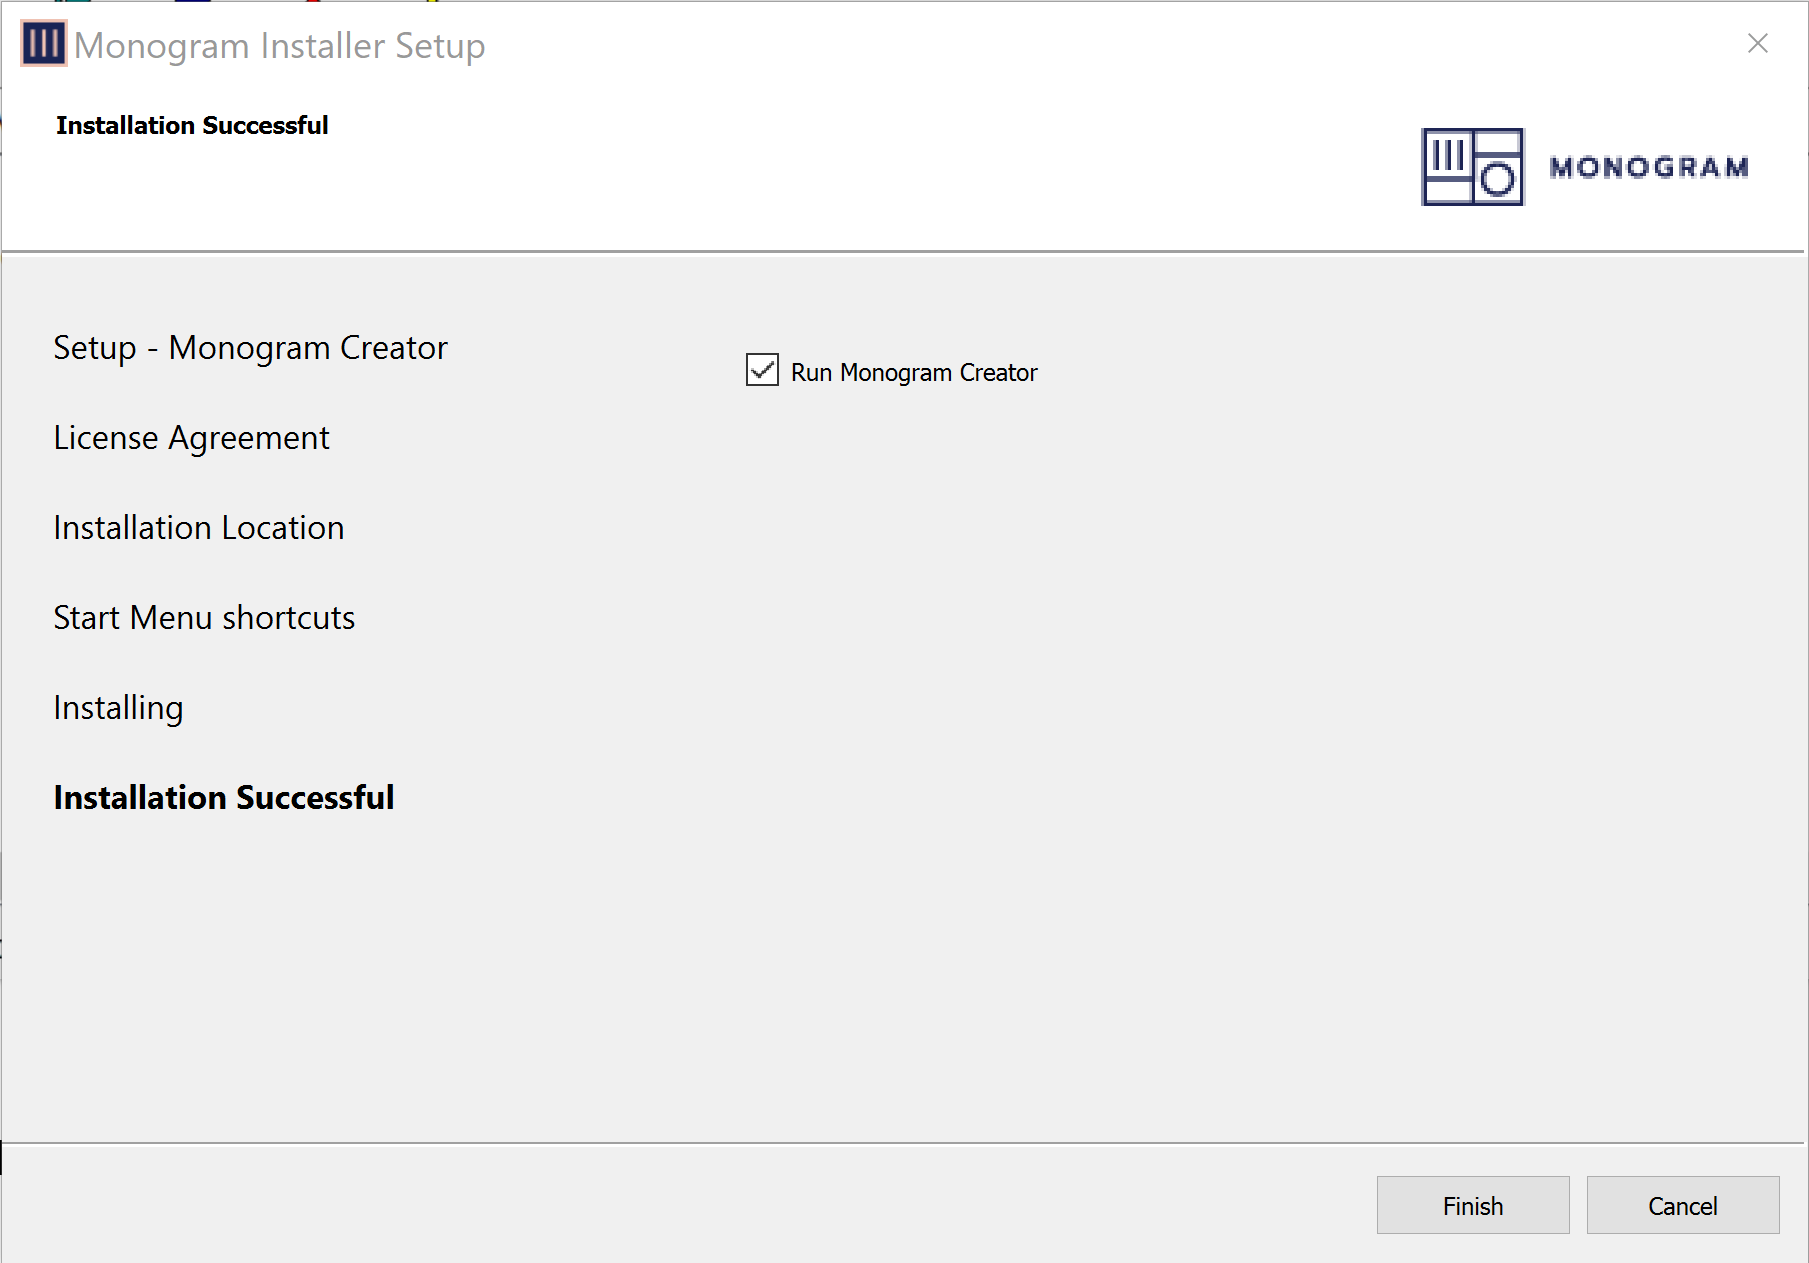
Figure 10 - Installation Successful
-
Clear the Run Monogram Creator check box, and then select Finish . The installer closes.
Start Monogram Creator
Monogram Creator must be running whenever you use Monogram Creator modules.
This section describes how to start Monogram Creator for the first time.
INLINE_LI_IMG_JSON:{"s":"/img/docs/monogram/5100dr-093-1b/setup/setup/images/MG-icon-Creator-SysTray.png","a":"MG-icon-Creator-SysTray"}If you previously followed the steps in this section and in the section “Set Preferences in Monogram Creator”, Monogram Creator is always running. To access the Monogram Creator user interface, expand the Windows System Tray and then select the Monogram icon (shown at left). Skip the remainder of this section.
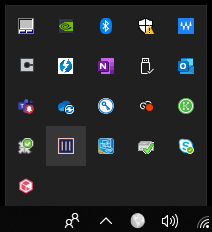
Figure 11
To start Monogram Creator for the First Time:
-
On the Windows Desktop, open the Monogram Creator shortcut.
The first time you start Monogram Creator , the product registration dialog box appears (Figure ??)
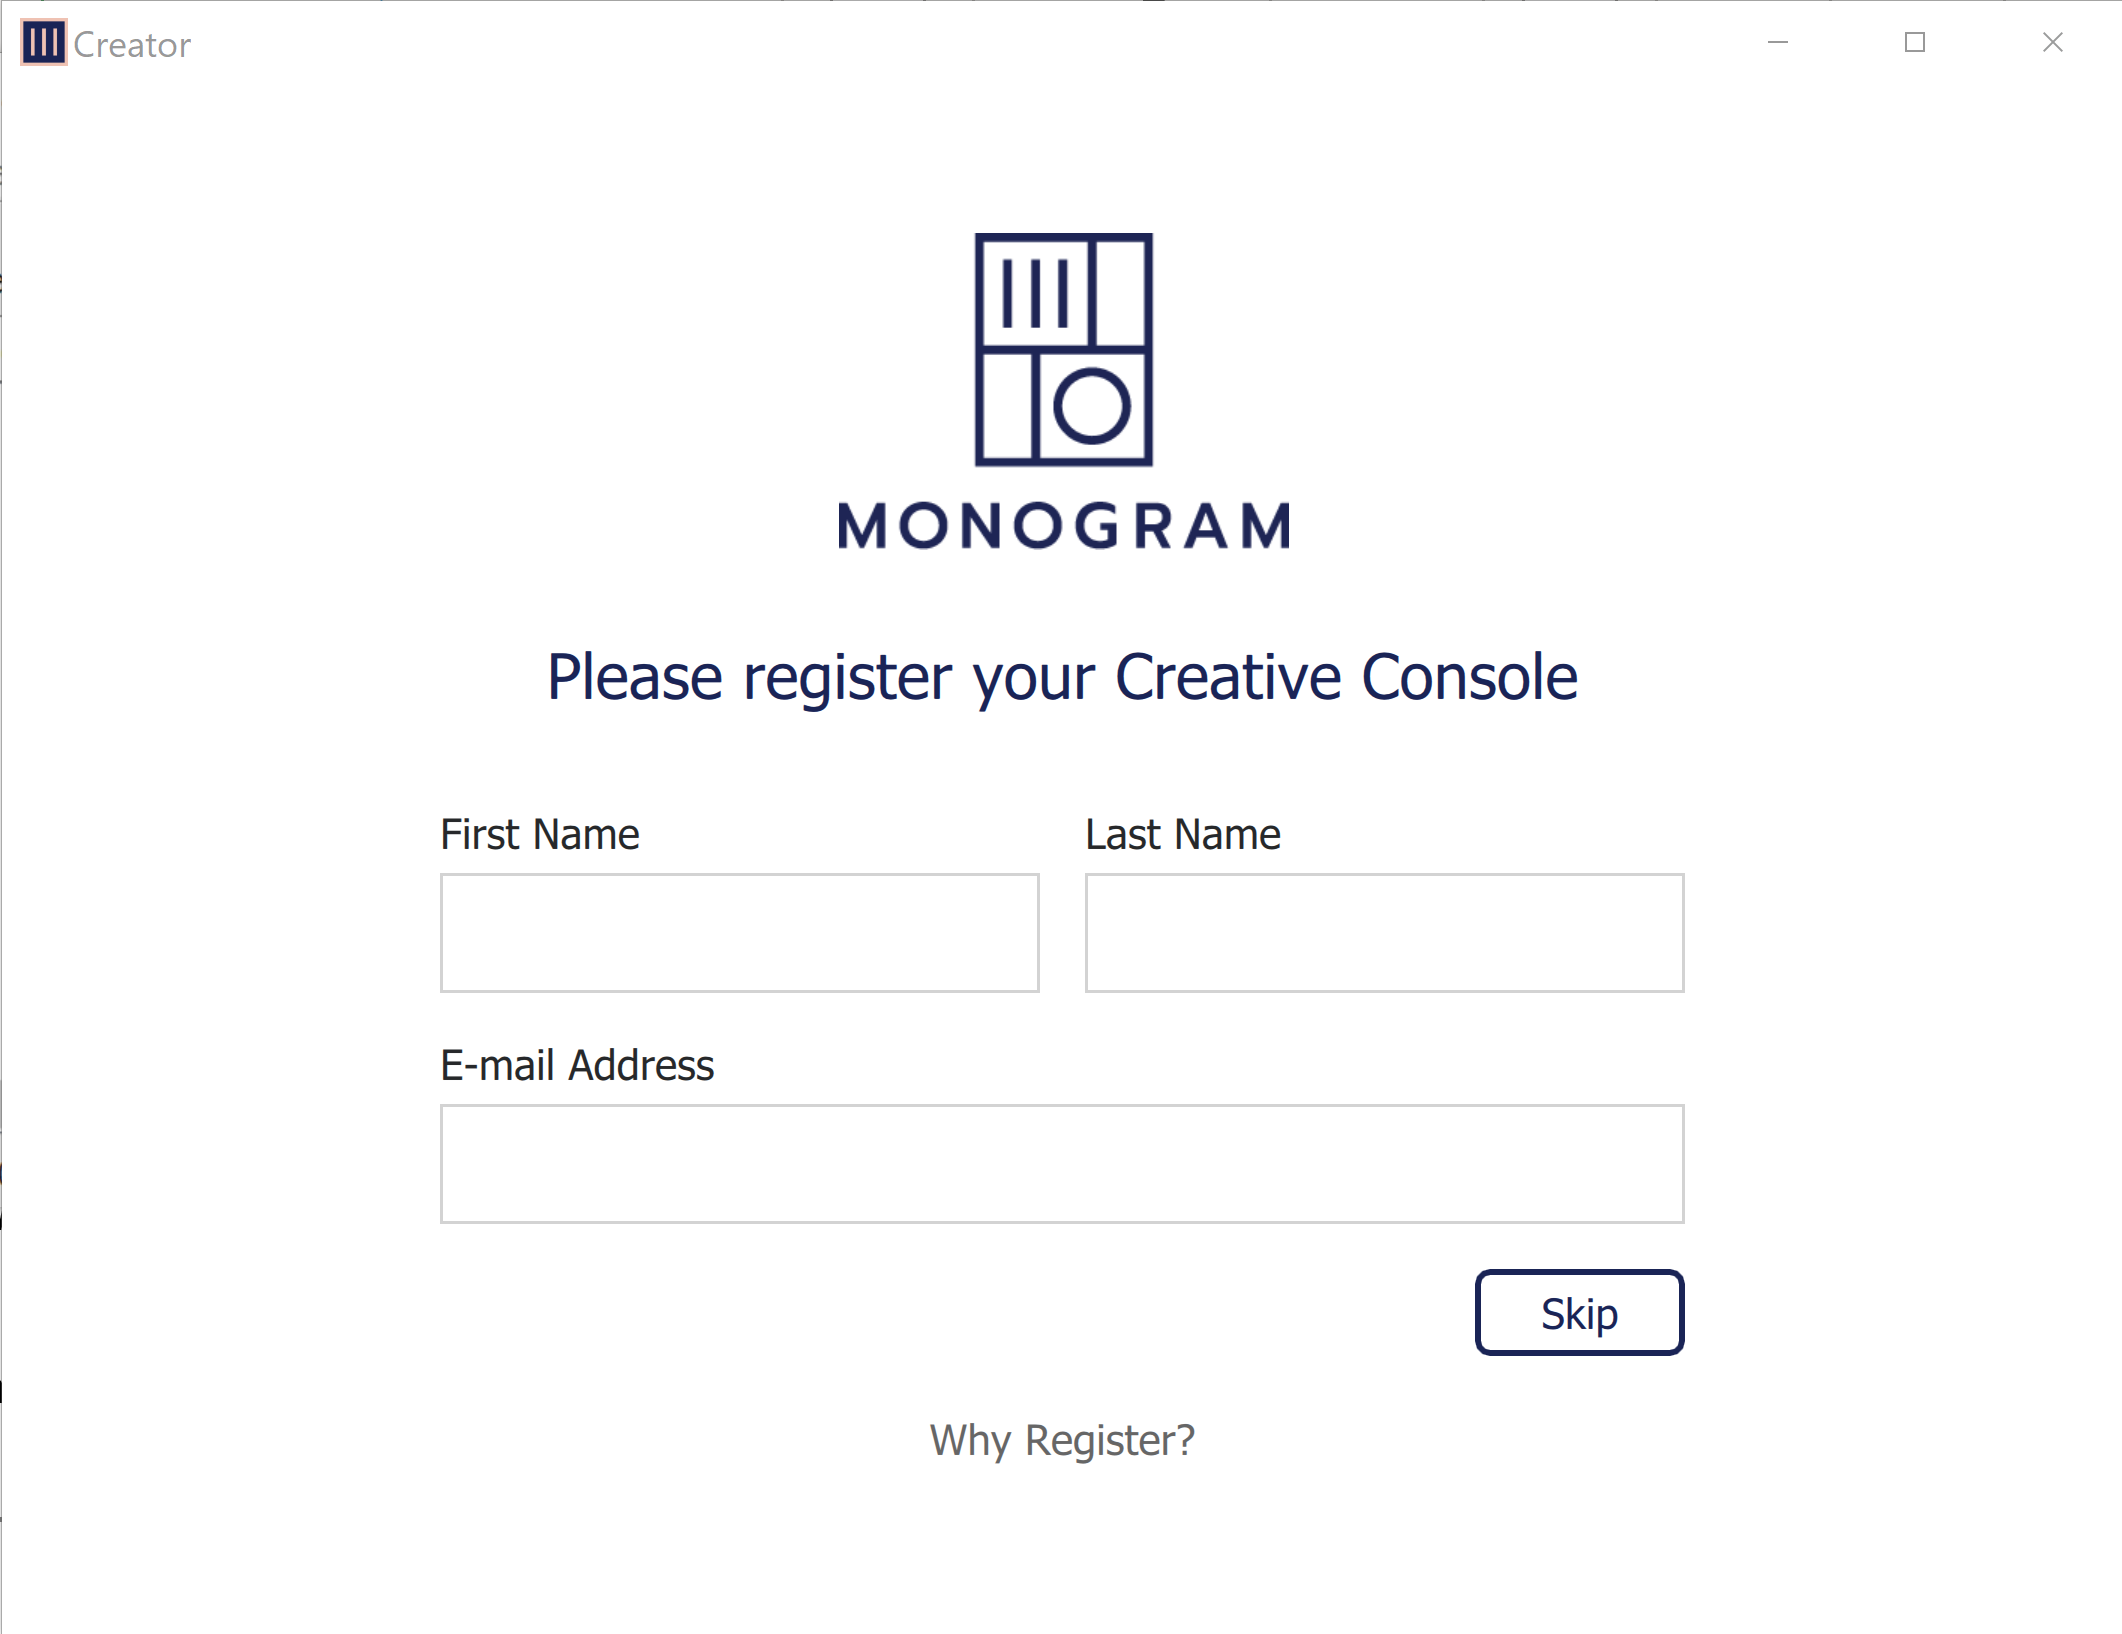
Figure 12 - Product Registration
-
If the product registration dialog box appears (Figure 12), do one of the following:
-
To skip product registration, select Later .
tipIf you do not register, the product registration dialog box will appear again the next time you start Monogram Creator.
-
To register the product, complete the registration form and then select Submit .
-
-
The connect console dialog box appears (Figure ??).
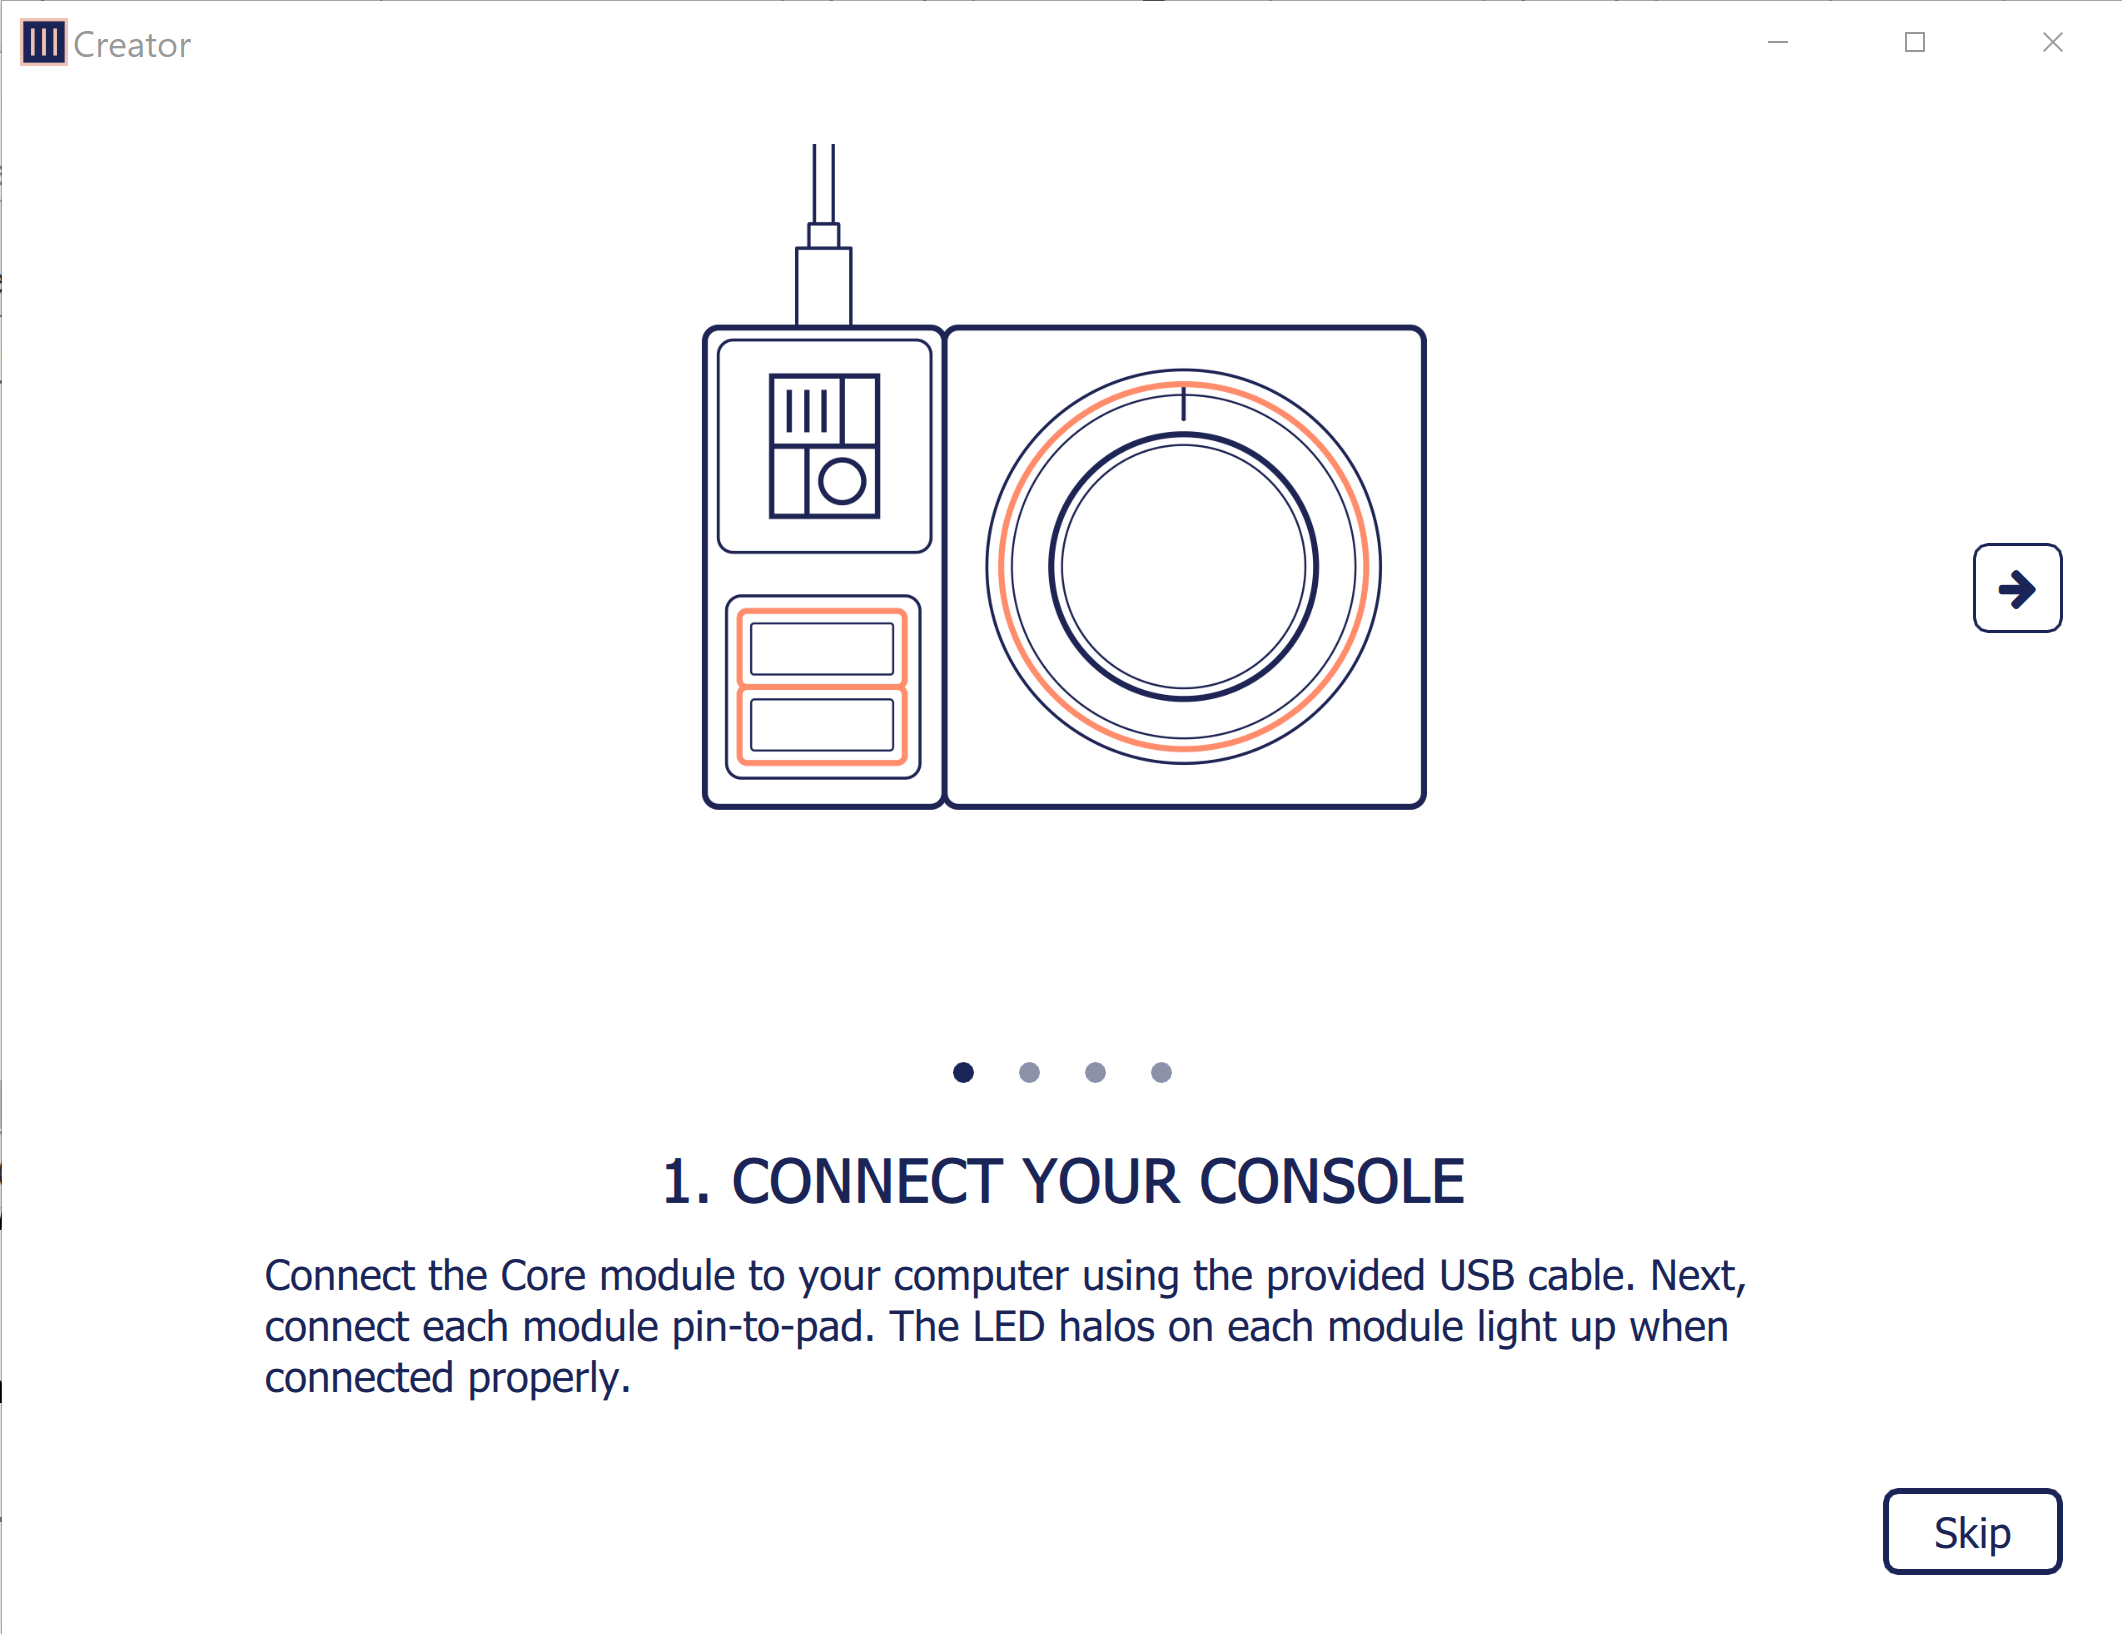
Figure 13 - Connect Console Dialog Box
-
Select Skip .
The Monogram Creator application opens (Figure ??).
noteThe icons shown in Monogram Creator vary depending on what other applications are installed on the computer. You can ignore these icons.
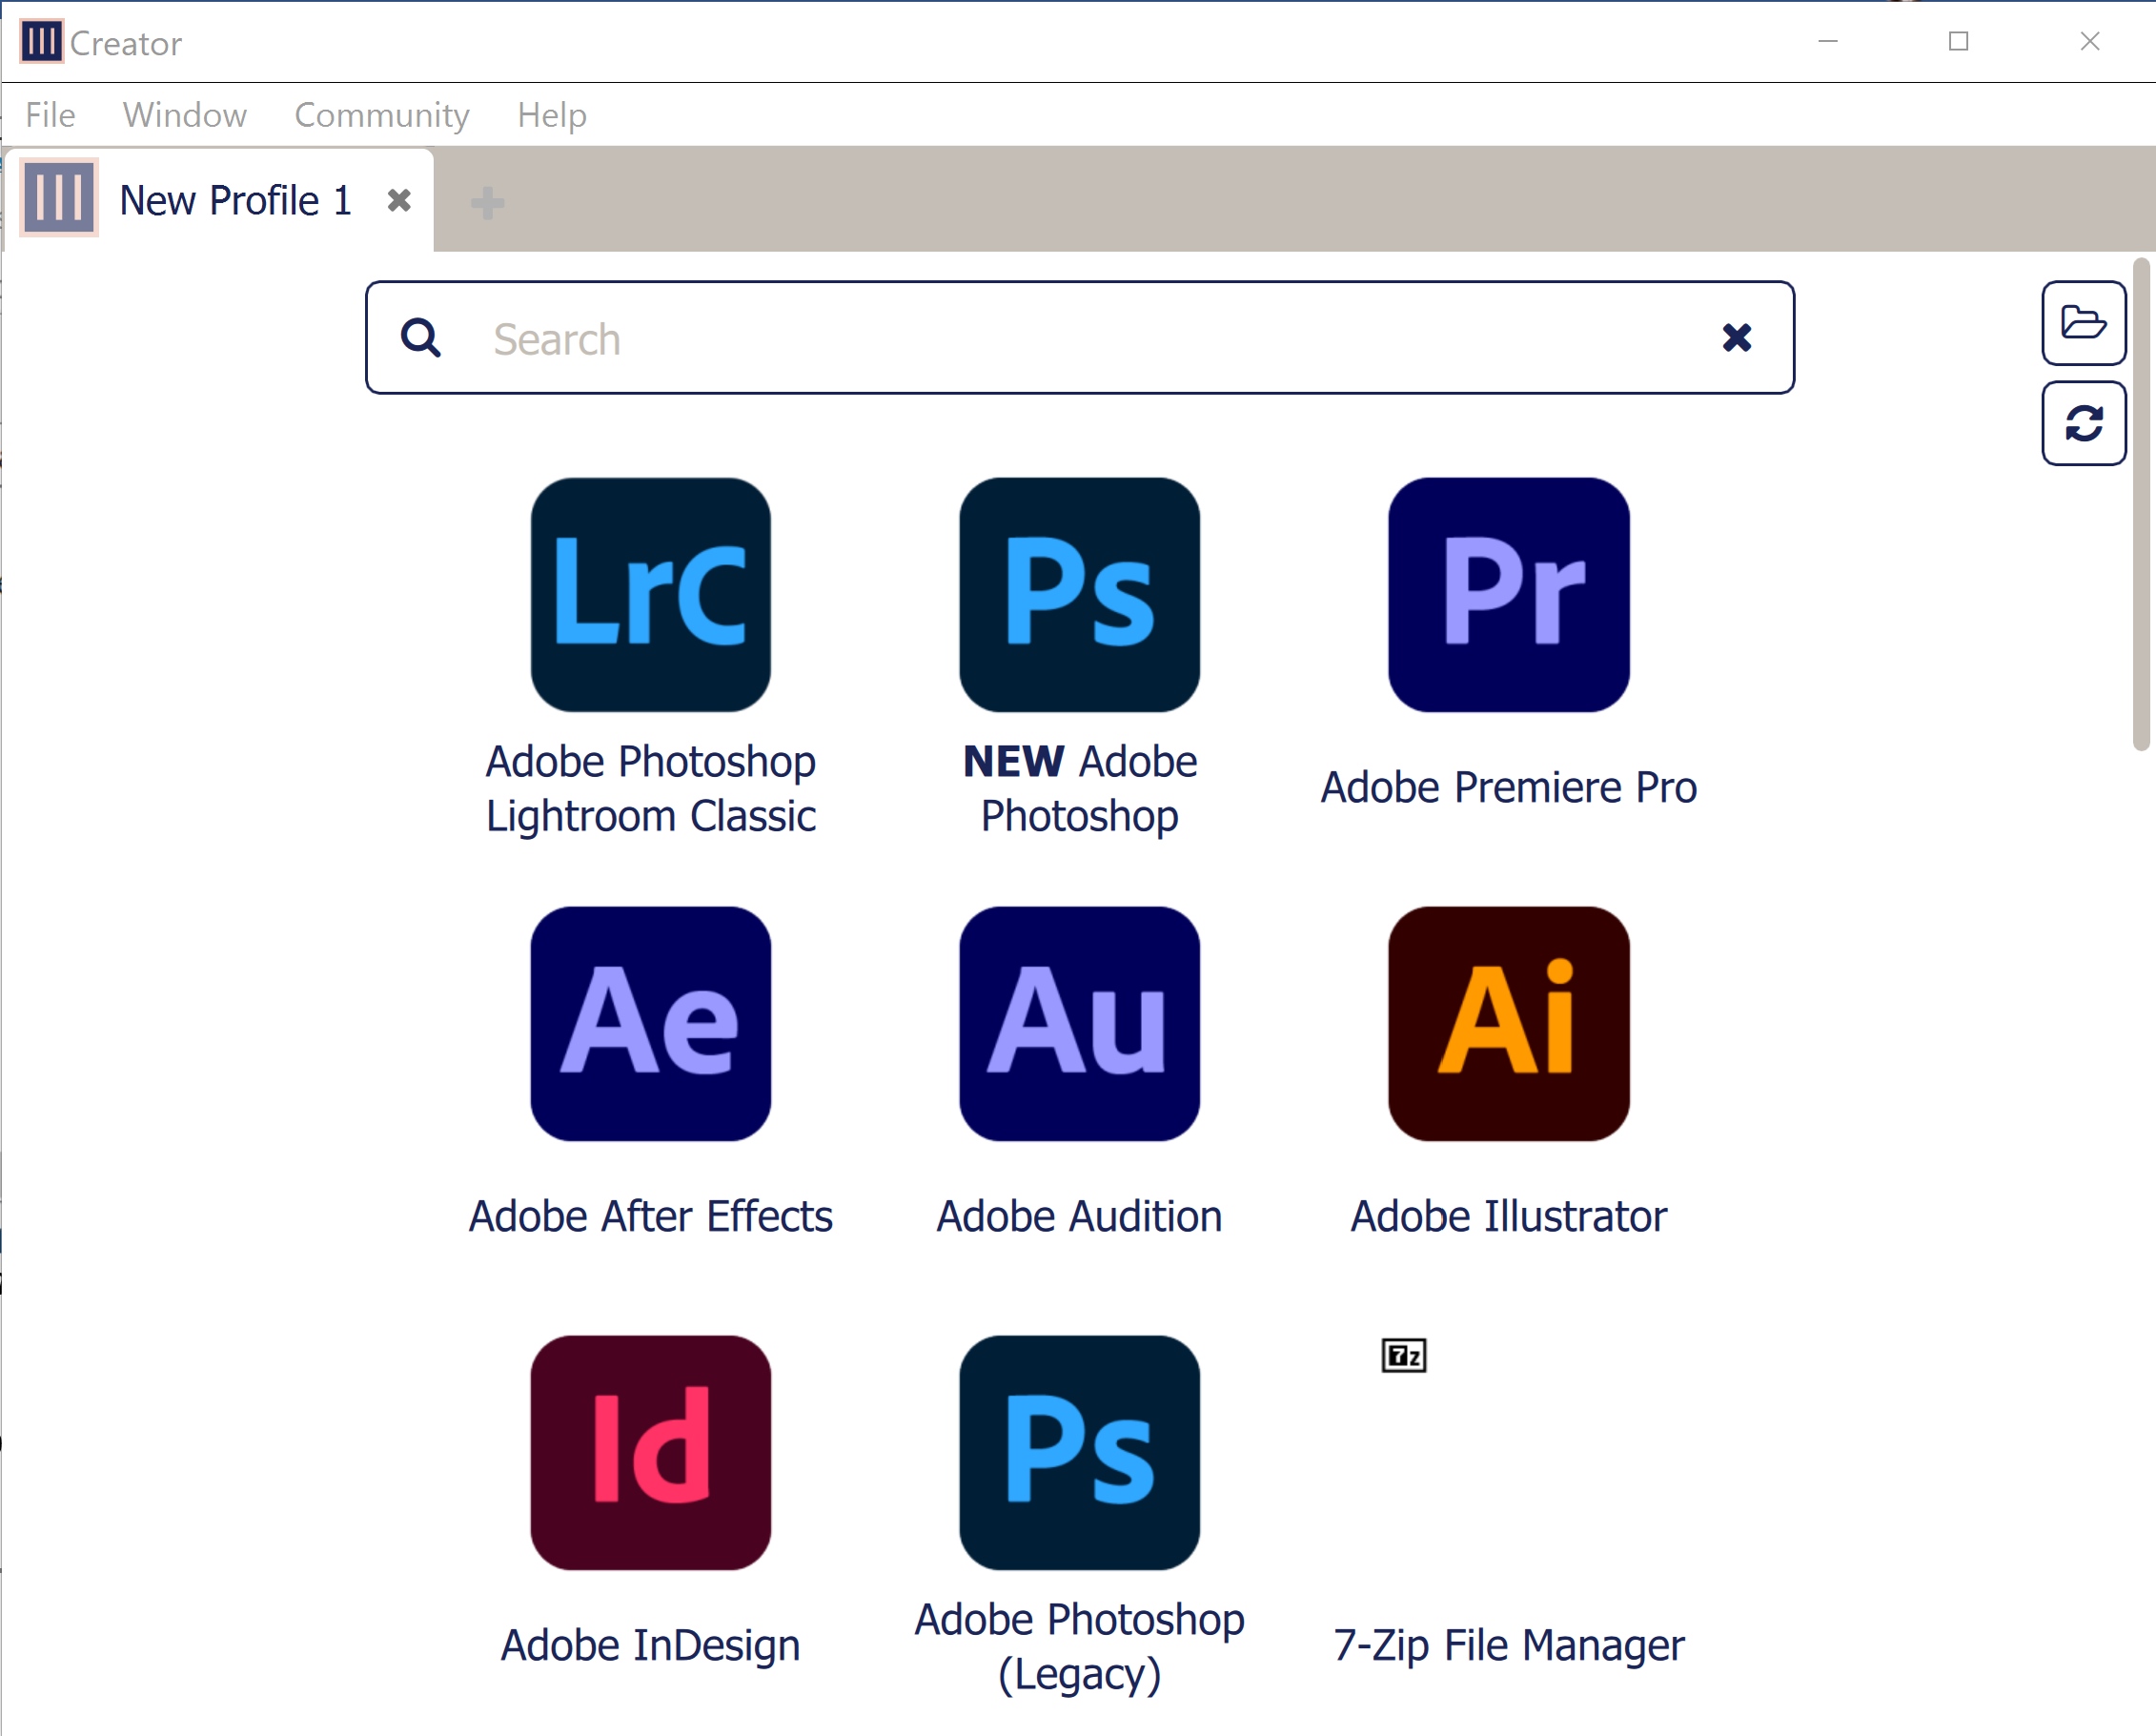
Figure 14 - Monogram Creator Application
When you run Monogram Creator , you may see a message about a new version being available. Do not install a new version. New or updated versions of Monogram Creator may not be fully compatible with DashBoard control of PTZ cameras and PT heads.
Apply Firmware
DashBoard control of PTZ cameras and PT heads is based on a special version of the Monogram Creator application, which in turn works with a particular version of firmware (software installed on the Monogram Core module).
When you purchase a Monogram Core, its pre-installed firmware may be a later version than the one required.
This section describes how to apply to the required firmware version.
To apply the correct firmware version:
-
In Monogram Creator, select Help > Monogram Updates .
The software update window appears (Figure ??).
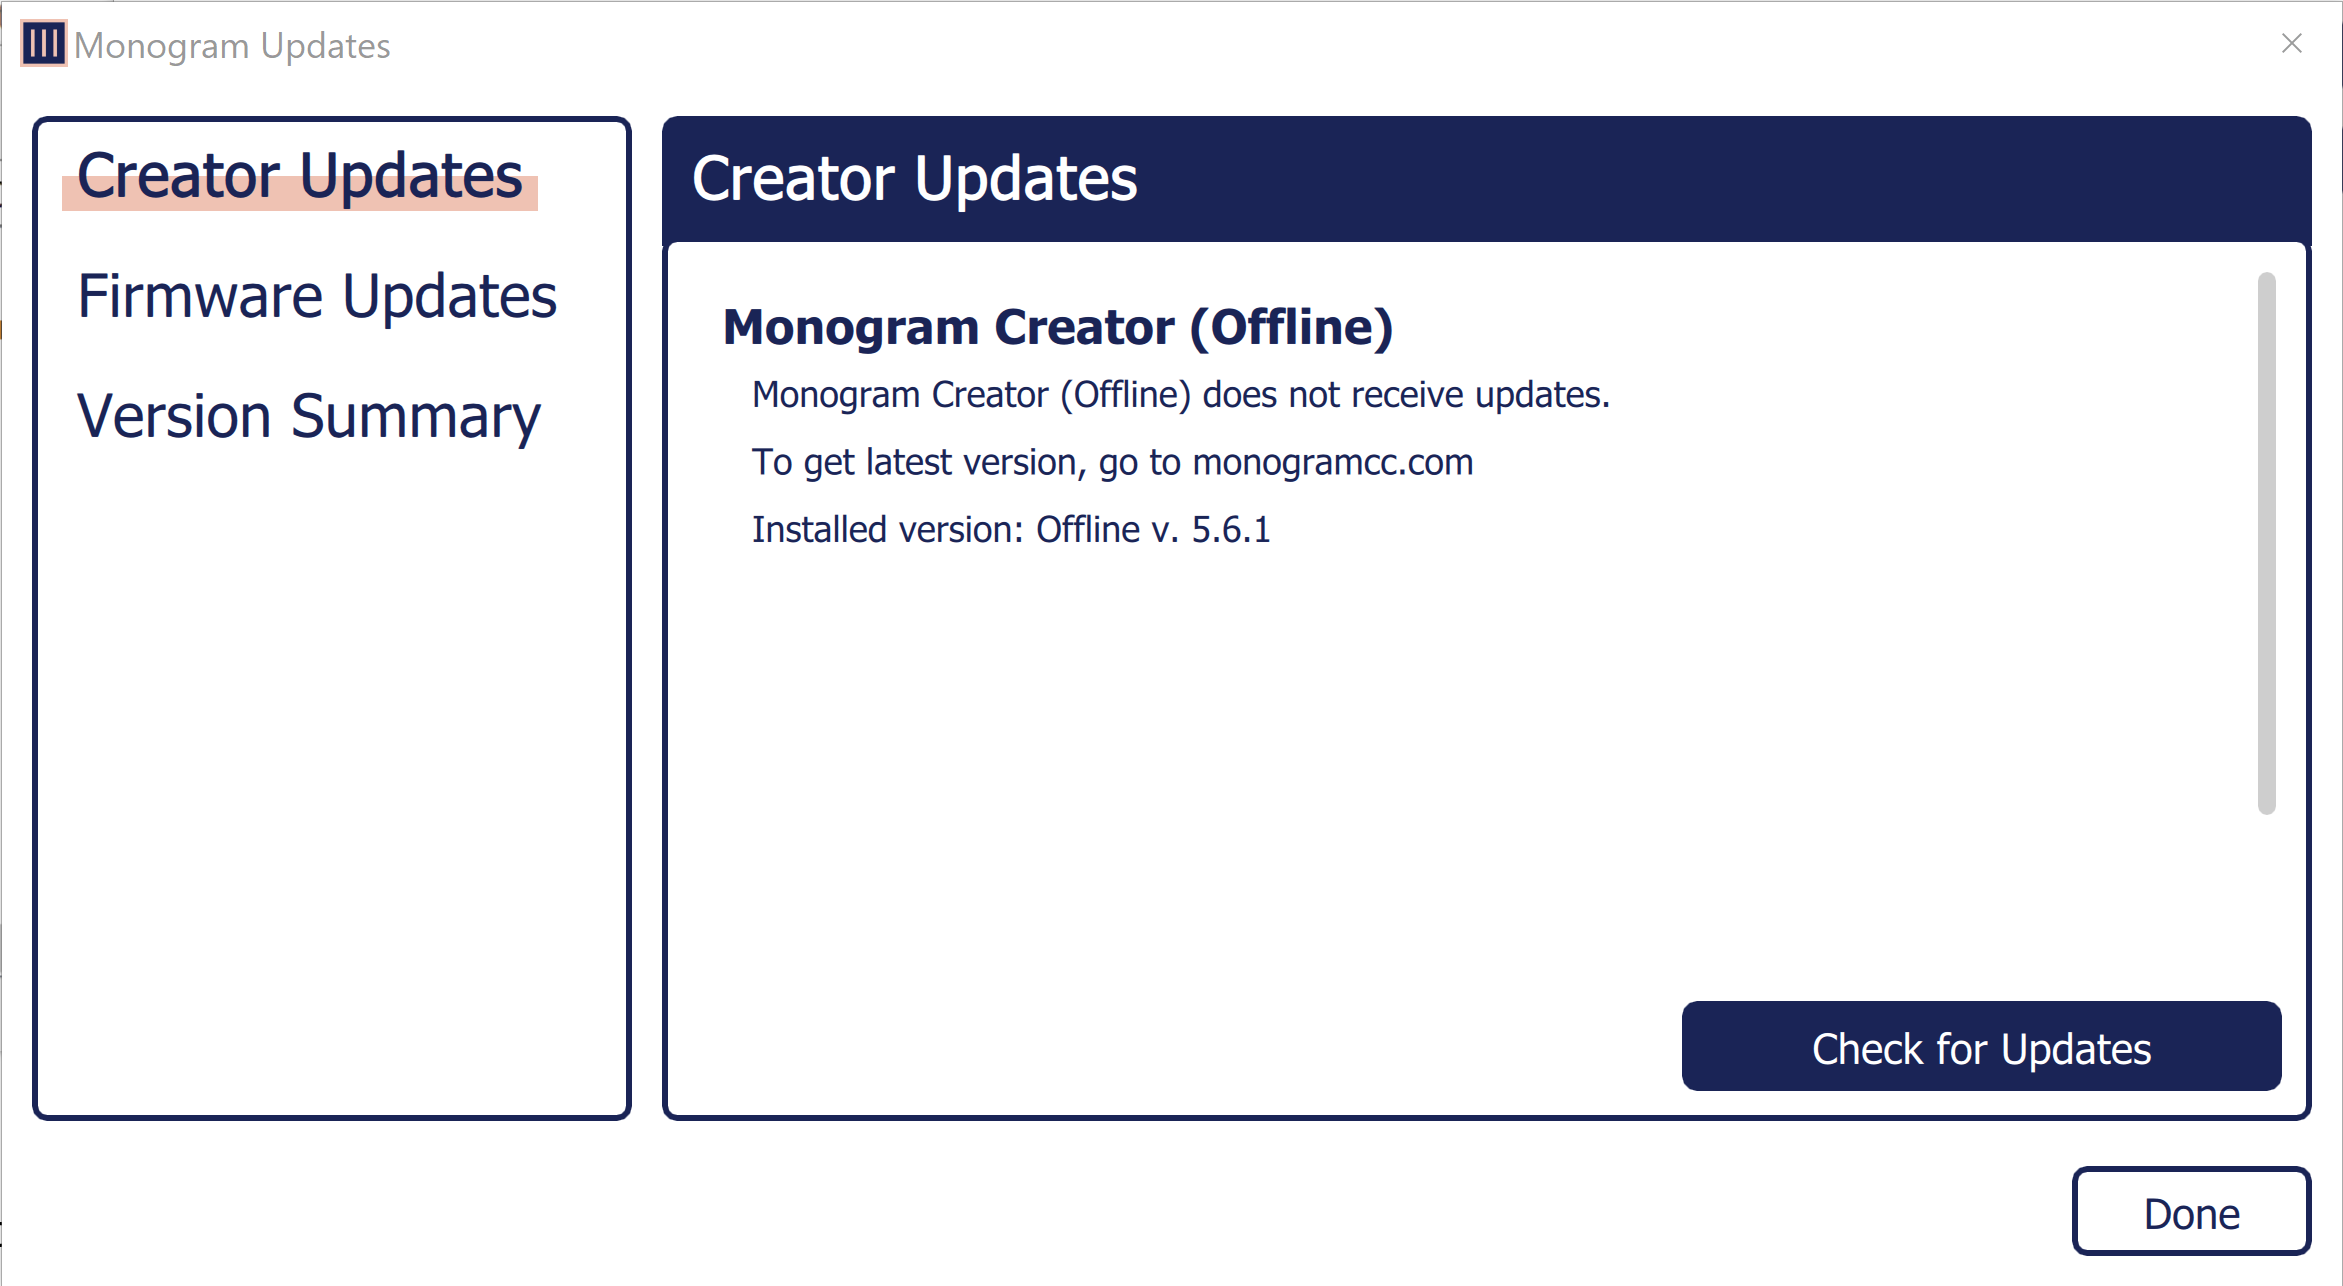
Figure 15 - Monogram Update Window, showing the Current Monogram Version
-
Select Firmware Updates from the menu
-
Select Update Firmware if the installed version is different than the available version (Figure ??).
importantDo not unplug the Core module while the firmware is being updated. Doing so may render the Core module inoperable. Once the firmware update is complete, then disconnect the USB from the core module and reconnect it.
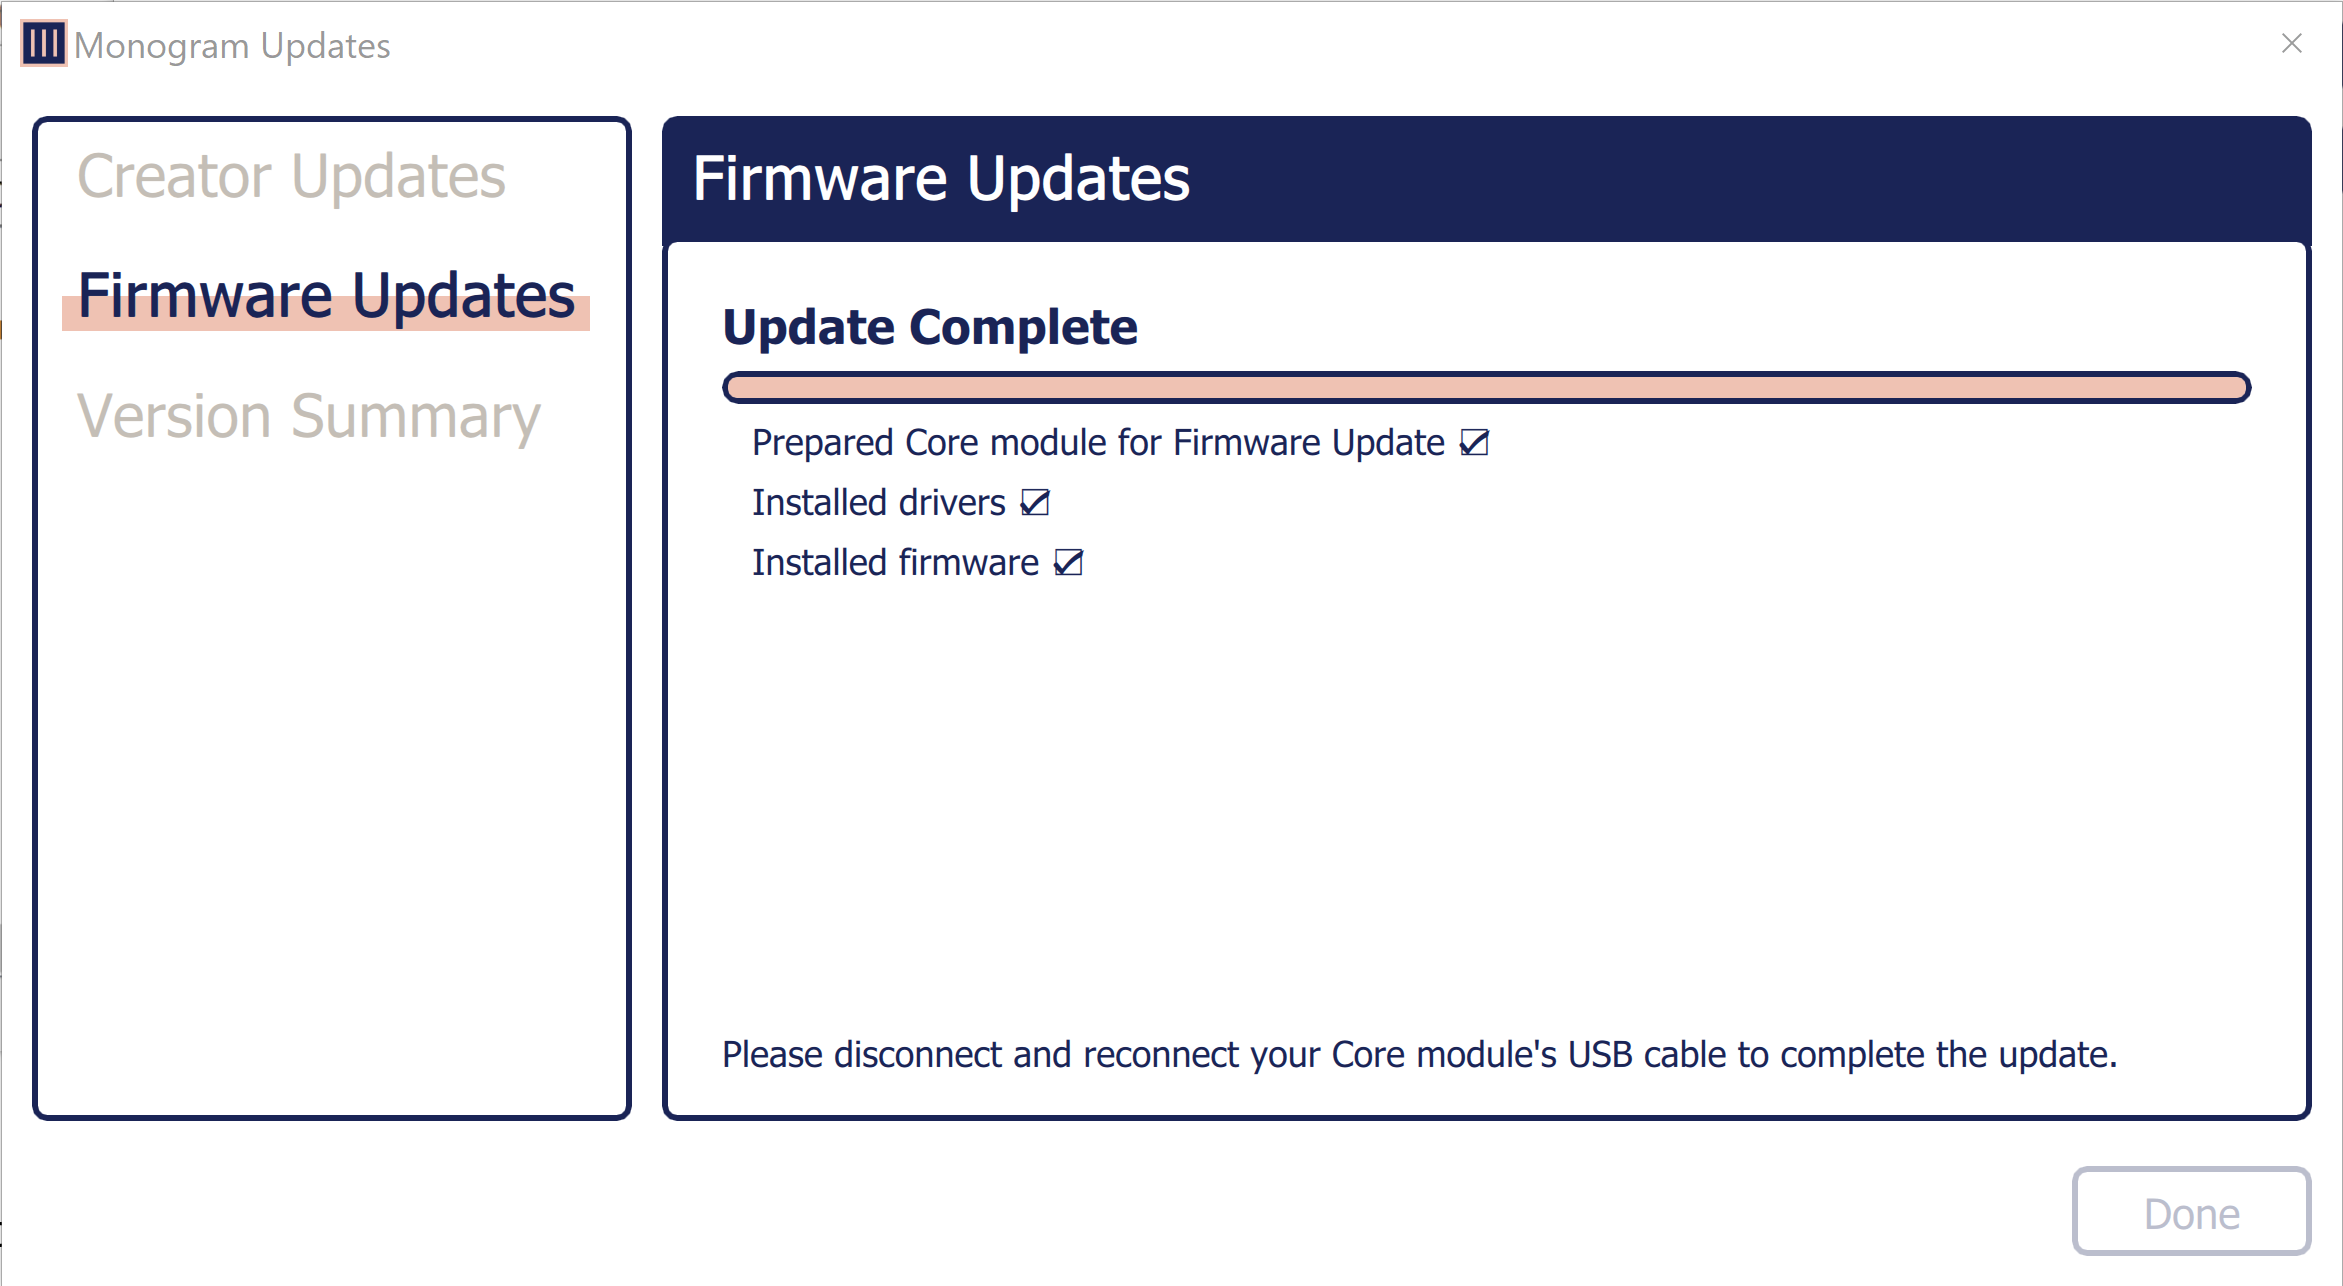
Figure 16 - Firmware Update Windows, showing the Firmware Update Process
-
When a message appears to indicate that the firmware has been installed successfully, unplug the Core module’s USB cable, wait a few seconds, and then reconnect it.
-
Close the software update window.
Set Preferences in Monogram Creator
This section describes how to set preferences to optimize your use of Monogram Creator. Perform the steps in this section once. The preferences persist.
To Set Preferences in Monogram Creator :
-
In Monogram Creator, select File > Preferences .
The Preferences window appears (Figure ??).
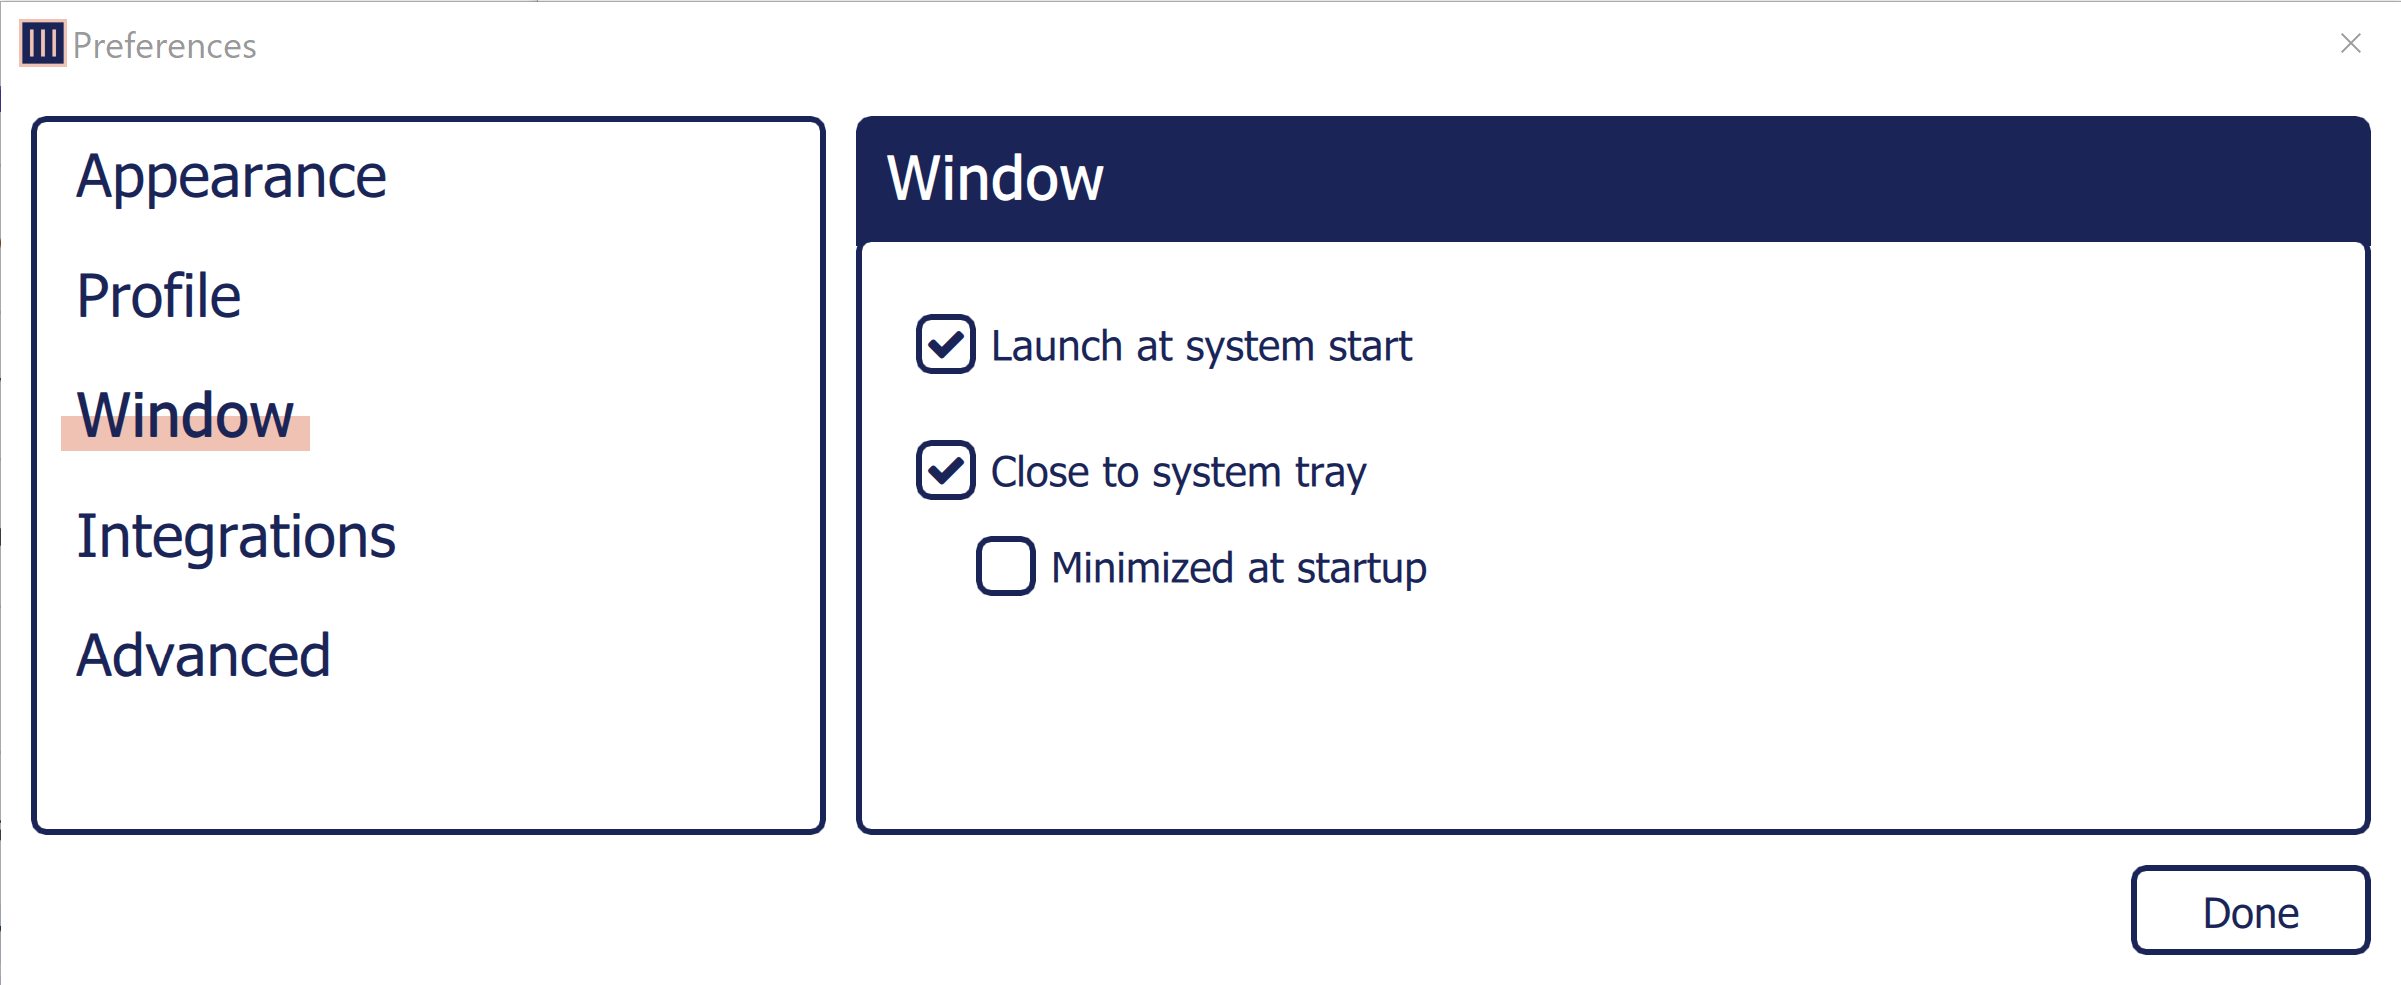
Figure 17 - The Preferences Window for Monogram Creator (showing Window preferences)
-
 In the menu on the left side, select Window , and then select the following check boxes to ensure that Monogram Creator is always running, and is available via the Monogram Creator icon in the Windows system tray (shown at left):
- Launch at system start
- Close to system tray
-
In the menu on the left side, select Advanced , and then clear the Check for updates on startup check box (Figure ??).
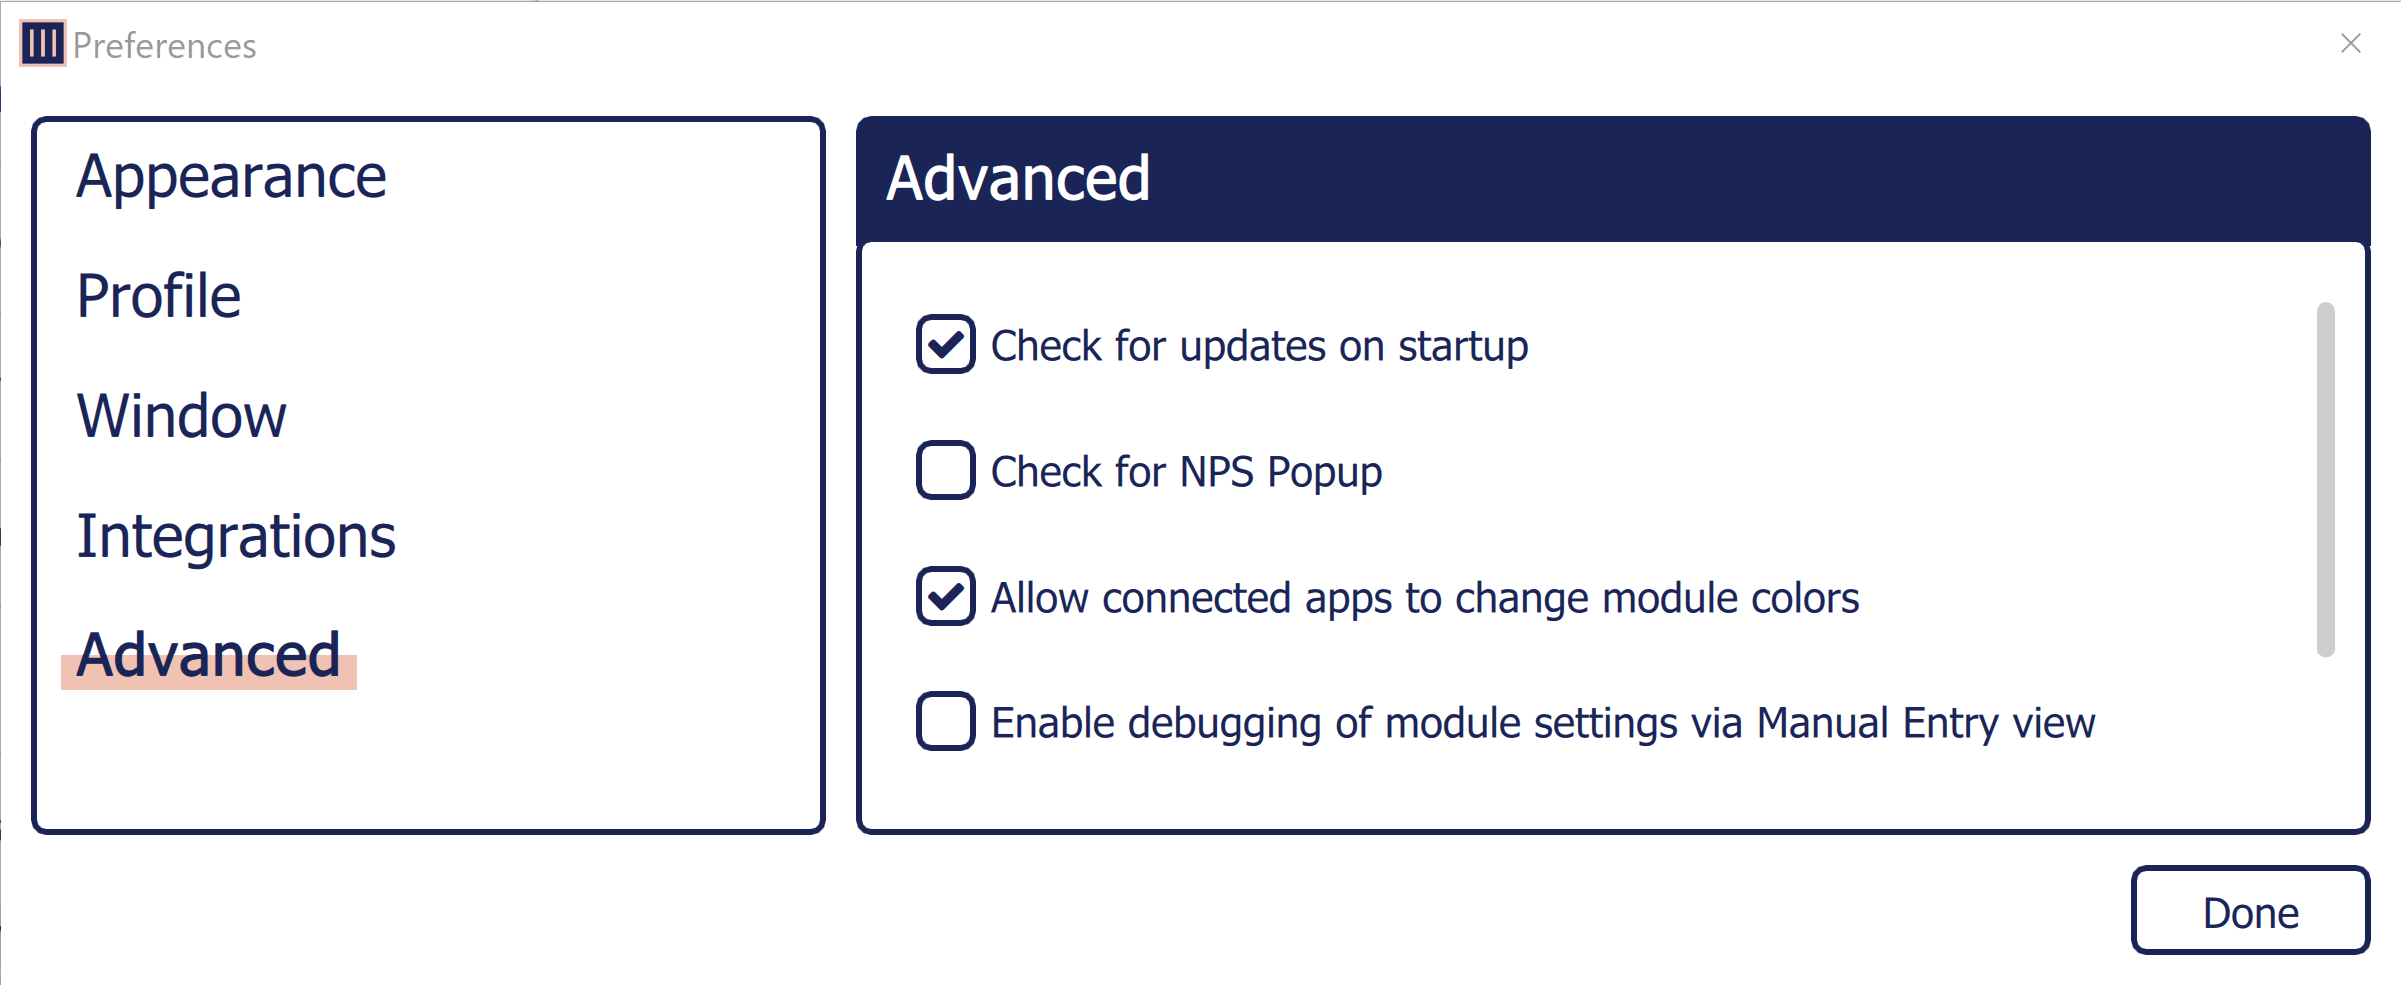
Figure 18 - The Preferences Window for Monogram Creator (showing Advanced preferences)
-
Select Done .
The Preferences window closes.
Download and Load a Co nfiguration Profile
Configuration profiles define the behavior of each control on the Monogram Creator.
Ross Video provides a zip file that contains configuration profiles and DashBoard joystick files for each of the Monogram Creative Console packages we sell (PTZ Starter and PTZ Pro).
The configuration profile for the PTZ Starter package controls up to three PTZ cameras. There are two configuration profiles for the PTZ Pro package; one for controlling up to six PTZ cameras, and one for controlling up to six PT heads.
This section describes how to download configuration profiles from the Ross Video website and then open them in Monogram Creator.
After you load a configuration profile in Monogram Creator, you must also load the corresponding joystick file (.joystick ) in DashBoard. If you are performing initial setup of Monogram Creative Console, there are additional DashBoard configuration tasks you must perform. For more information, see “Configure DashBoard”.
Because the special legacy version of Monogram Creator software does not receive updates and does not require network access to function, we strongly recommend that you minimize security risks by configuring Windows Firewall to deny Internet access to all Monogram applications.
To download configuration profiles from Ross Video:
-
If this is the first time you are downloading configuration profiles, create a new folder named Monogram File s with the following path:
C:\Ross\Monogram Files
-
In a web browser, navigate to the following URL:
https://www.rossvideo.com/support/software-downloads/robotic-camera-systems/
-
Download the Monogram Creative Console Configuration Files , and then move the downloaded Ross_Monogram_PTZ_Config_
<version >.zip file from the Downloads folder to the Monogram Files folder (C:\Ross\Monogram Files ). -
Extract the contents of the Ross_Monogram_PTZ_Config_
<version >.zip file into the Monogram Files folder (C:\Ross\Monogram Files ), as shown in Figure ??.
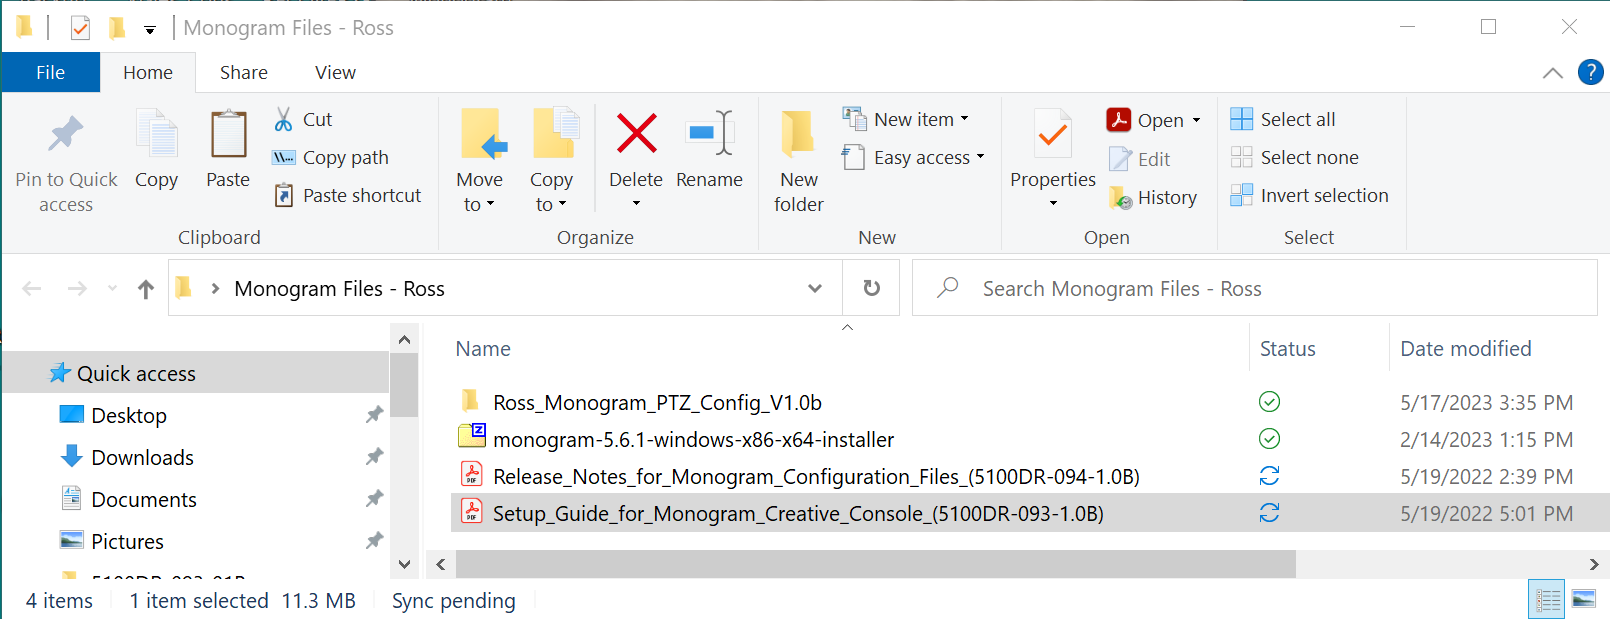
Figure 19 - Monogram Files Folder, showing Contents Extracted from a Monogram Files Zip Folder
To load a configuration profile:
-
In Monogram Creator, from the File menu, select Load Profile .
The Open Profile dialog box appears, and shows the folder from which a configuration profile was most recently loaded.
-
Navigate to the folder you extracted (C:\Ross\Monogram Files\Ross_Monogram_PTZ_Config_
<version>), and then open the folder that corresponds to your Monogram Creative Console package and the type of robotic camera systems you want to control (Figure ??):- To control PT Heads using the PTZ Pro package — double-click the PTZ Pro for PT Heads folder.
- To control PTZ Cameras using the PTZ Starter package — double-click the PTZ Starter for PTZ Cameras folder.
- To control PTZ Cameras using the PTZ Pro package — double-click the PTZ ProStarter for PTZ Cameras folder.
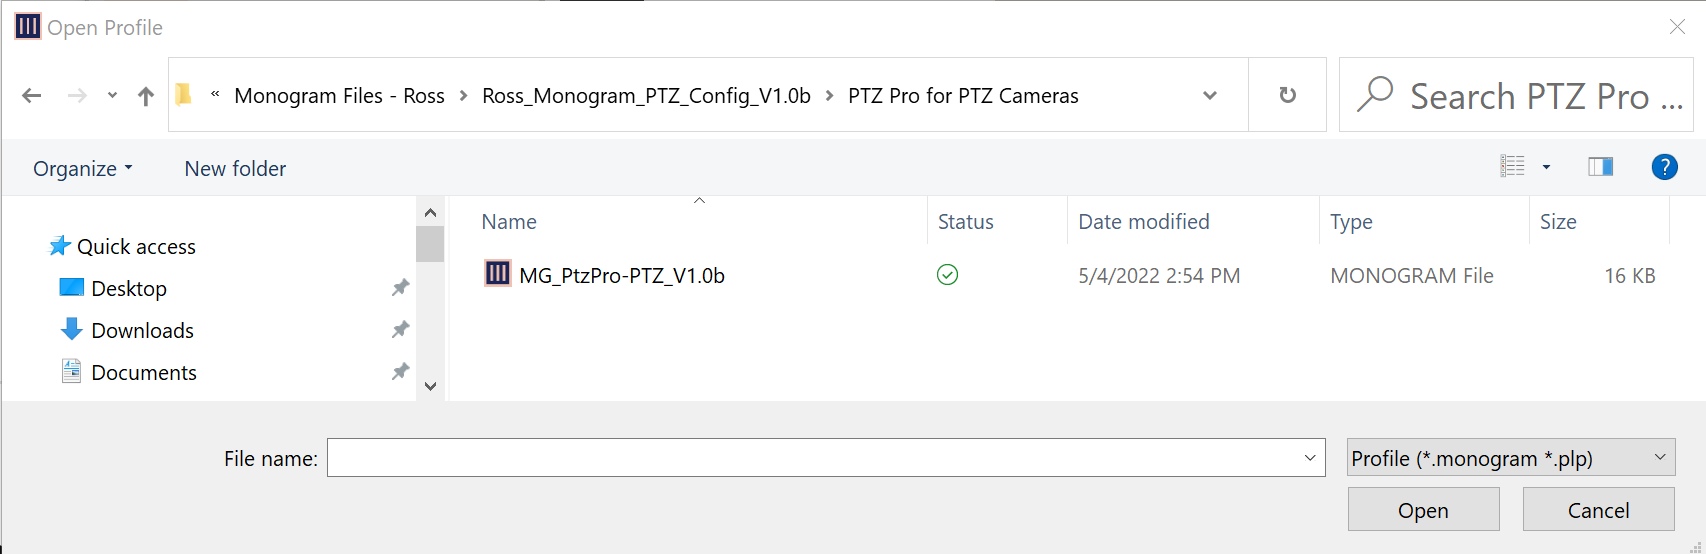
Figure 20 - Folder Containing a Configuration Profile (.monogram file)
-
Select the configuration profile (a .monogram file) and then select Open .
A new tab appears in Monogram Creator, and shows the loaded profile (Figure ??).
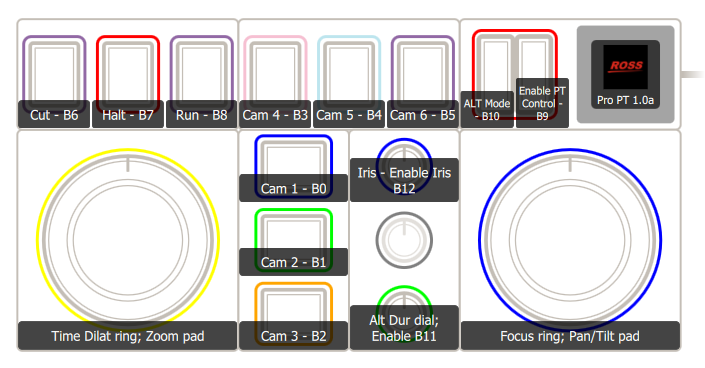
Figure 21 - Monogram Creator , showing the PTZ Pro for PT Heads Layout ( MG_PtzPro-PT_ .monogram profile)
-
If the orientation of the controls shown in Monogram Creator does not match the orientation of the Monogram Creator modules, select the Rotate Kit button to re-orient the view. (Figure ??).

Figure 22 - Rotate Kit Button
-
If controls on a Dial module or Essential Keys module are reversed, as in the example shown in Figure ??, close the profile tab and then re-load the profile.
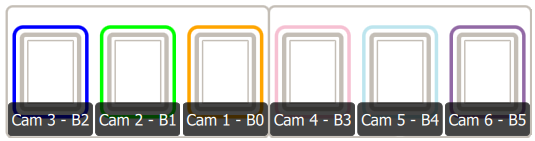
Figure 23 - Monogram Creator Layout, with Buttons 1, 2, and 3 in Reversed Order
-
If the controls still do not appear in the expected positions as shown in Figure ?? (for PTZ_Starter), Figure ?? (for PTZ Pro for PTZ Cameras), or Figure ?? (for PTZ Pro controlling PT Heads), do the following:
- Close the profile tab.
- Close Monogram Creator.
- Unplug the Core module, wait five seconds, and then plug it back in.
- Start Monogram Creator.
- Reload the profile.
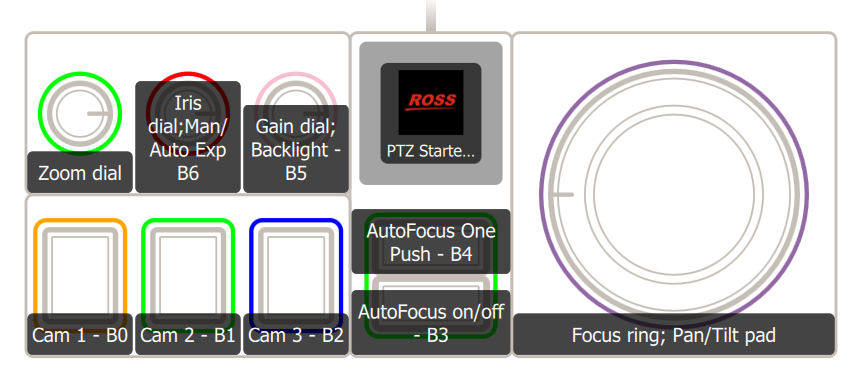
Figure 24 - Monogram Creator Layout — PTZ Starter Package Controlling PTZ Cameras
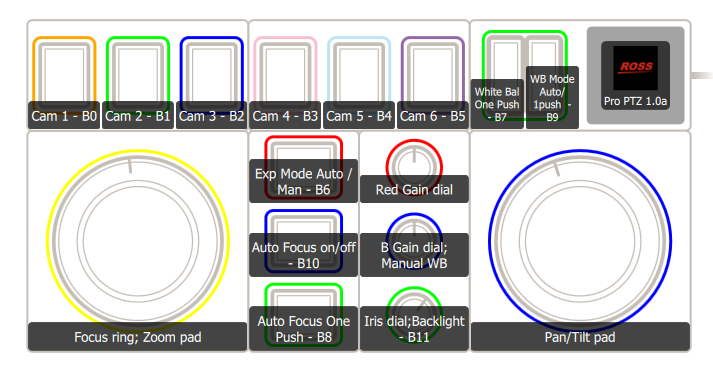
Figure 25 - Monogram Creator Layout — PTZ Pro Package Controlling PTZ Cameras
Figure 26
Figure 30 - Monogram Creator Layout — PTZ Pro Package Controlling PT Heads
Configure DashBoard
This section describes how to add the Monogram Creative Console in DashBoard, and how to link your Monogram Creator’s physical controls to functions available in DashBoard plugins (PT Head Control plugin or PTZ Camera Control plugin).
This section includes the following topics:
- “Add the Creative Console in DashBoard”
- “Load a Joystick File”
- “Map Device Classes to the Monogram Creative Console”
- “Configure Selector UI Mappings”
Add the Monogram Creator in DashBoard
This section describes how to add the Monogram Creator as a USB controller.
To add the Monogram Creator as a USB control device in DashBoard:
-
If DashBoard is open, close it.
-
Confirm that the Monogram Creative Console modules are connected to the computer via USB cable (halos on each module are illuminated).
-
Start DashBoard.
When DashBoard starts, it detects the Monogram Creative Console as a USB controller.
tipDashBoard can detect USB controllers only if they are already plugged in when DashBoard starts.
-
In DashBoard, on the File menu, select New, and then select Other .
The New dialog box appears (Figure ??).
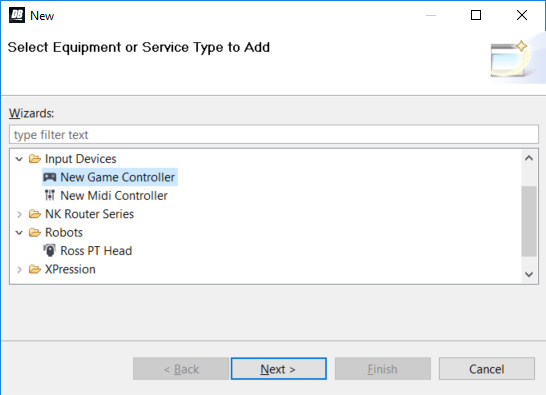
Figure 27 - Adding a USB controller
-
In the Wizards list, expand Input Devices , select New Game Controller , and then tap Next .
The New Game Controller Connection dialog box appears (Figure ??).
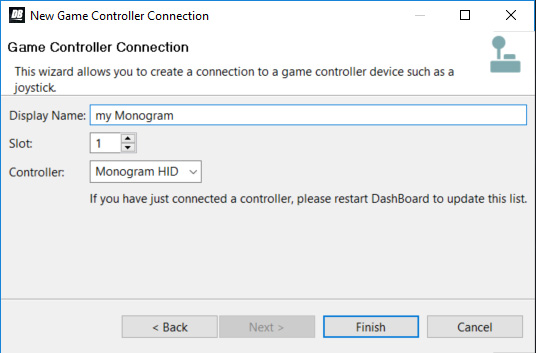
Figure 28 - Connecting to a USB controller
-
In the Display Name box, type a name for the controller.
-
In the Controller list, select Monogram HID .
noteIf Monogram HID is not on the list, either it was not detected or it is already registered in DashBoard.
-
Select Finish .
A node for the Monogram Creator appears within the Game Controllers node in the DashBoard Component Tree . The node has the name you provided for the controller (Figure ??).
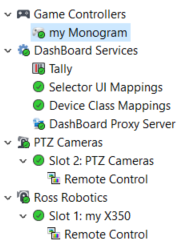
Figure 29 - DashBoard Basic Tree, with a Monogram Creator Node Highlighted in Blue
Load a Joystick File
A joystick file contains previously-saved settings for a USB controller, such as the Monogram Creative Console.
Joystick files work in conjunction with Monogram configuration profiles to link your Monogram Creator’s physical controls to functions available in DashBoard plugins (PT Head Control plugin or PTZ Camera Control plugin).
Ross Video provides a joystick file corresponding to each of the provided Monogram configuration profiles.
To load a joystick file:
-
In the DashBoard tree, expand the Game Controllers node and then double-click the Monogram Creator’s node.
tipThe name of the Monogram Creator ’s node is the name you specified when you added it, in step 6.
DashBoard configuration settings for the Monogram Creator appear, including lists of Device Classes , Axis Controls , and Buttons (Figure ??).
If the settings do not appear within 20 seconds, close the tab and then double-click the Creative Console’s node again.
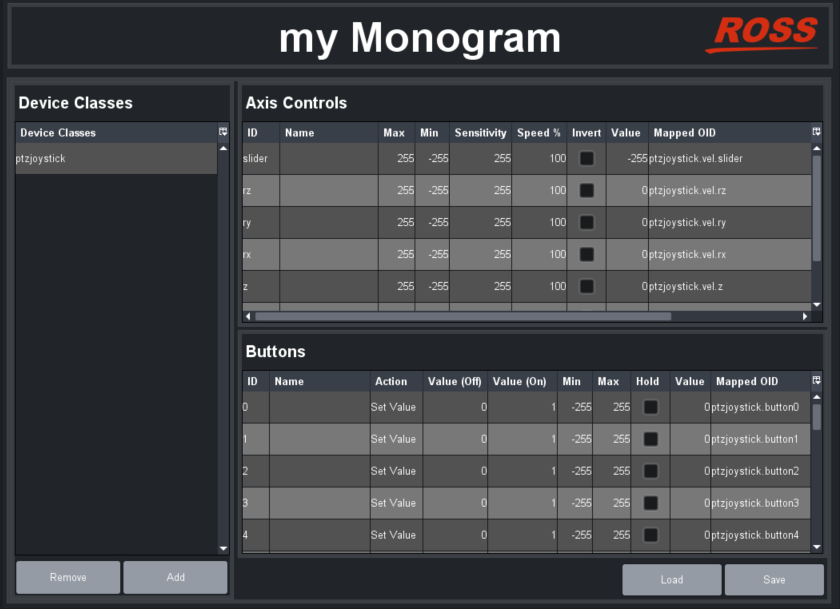
Figure 30 - List of Device Classes, Axis Controls, and Buttons
-
Tip : If you want to test the physical controls on the Monogram Creator , manipulate them and watch the numbers in the Value columns change.
-
Select Load .
The Restore Settings dialog box appears
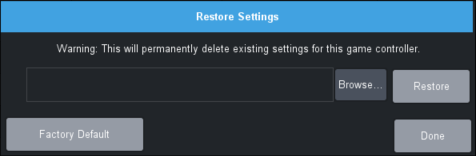
Figure 31 - Restore Settings Dialog Box
-
Select Browse .
tipIf the Browse button is not available, it is because the Core module was not connected to the computer when DashBoard started. DashBoard detects the Core module only if it is already connected when DashBoard starts. To fix this issue, close and re-open DashBoard, and then begin these steps again.
The Open File dialog box appears (Figure ??).
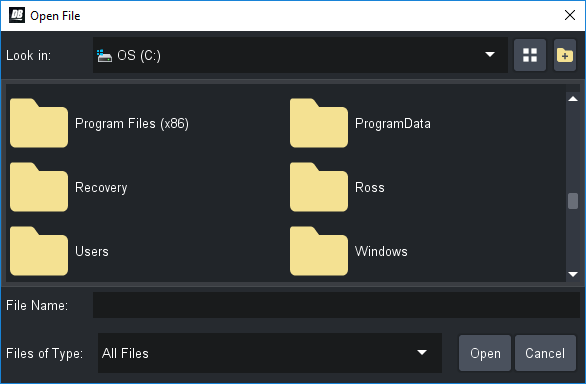
Figure 32 - The Open File Dialog Box
-
Tip : To view the full names of folders and files, select the Details icon (Figure ??) and then expand the Name column.

Figure 33 - The Details Icon (turns blue when Details view is invoked)
-
In the Open File dialog box, navigate to the folder you extracted earlier, which contains the configuration profiles and joystick files (C:\Ross\Monogram Files\Ross_Monogram_PTZ_Config_
<version>) (Figure ??).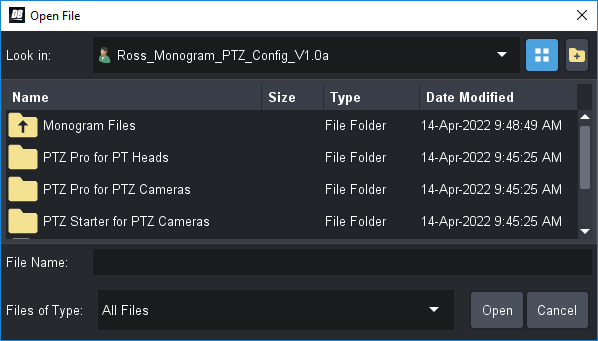
Figure 34 - Navigating to the Extracted Folder (with Details view invoked)
-
Open the folder that corresponds to your Monogram Creative Console package and the type of robotic camera systems you want to control (Figure 20):
- To control PT Heads using the PTZ Pro package — double-click the PTZ Pro for PT Heads folder.
- To control PTZ Cameras using the PTZ Starter package — double-click the PTZ Starter for PTZ Cameras folder.
- To control PTZ Cameras using the PTZ Pro package — double-click the PTZ ProStarter for PTZ Cameras folder.
-
Select the .joystick file and then select Open (Figure ??).
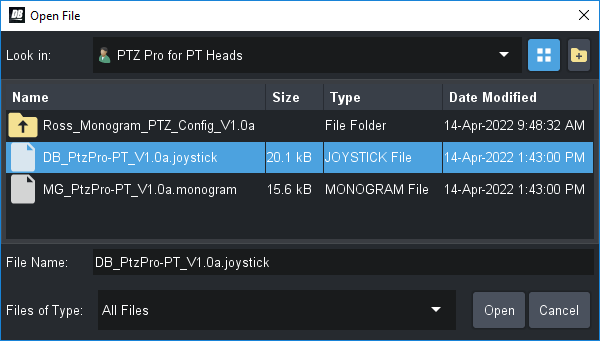
Figure 35 - Selecting and Opening a .joystick File for Controlling PT Heads using the PTZ PRO Package
-
The Restore Settings dialog box reappears, showing the path to the file you selected (Figure ??).
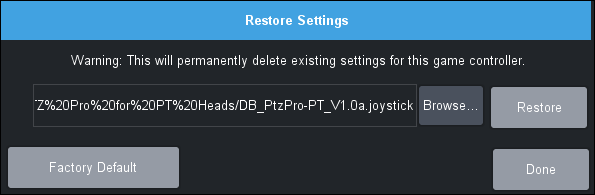
Figure 36 - Restore Settings Dialog Box, with a .joystick File Selected
-
Select Restore .
The settings are loaded, and the loaded settings are applied.
Map Device Classes to the Monogram Creative Console
In DashBoard, specific parameters (OIDs) represent individual controls you can operate, such as the Pan axis or one-time Auto Focus. These parameters are grouped into device classes. All parameters within a given device class can be manipulated by a single physical controller only. The Core module plus any modules connected to it are considered to be a single controller.
This section describes how to map device classes to the Monogram Creative Console.
Parameter names typically consist of multiple parts separated by periods (for example, ptzjoystick.vel.pan ). The first part of a parameter name is its device class (for example, ptzjoystick ).
Parameters that are used to control PTZ cameras and PT heads are as follows:
- selector — for camera selection buttons
- ptzjoystick — for controls related to pan, tilt, zoom, and focus
- paintbox — for controls related to exposure and white balance
- shotcontrol — for controls related to preset recall (for PT head control only)
To map device classes to the Monogram Creative Console :
-
In the DashBoard tree, open the DashBoard Services node and then double-click Device Class Mappings .
The Device Class Mappings table appears (Figure ??), and lists relevant device classes, based on the types of USB controller(s) and robotic devices that are connected.
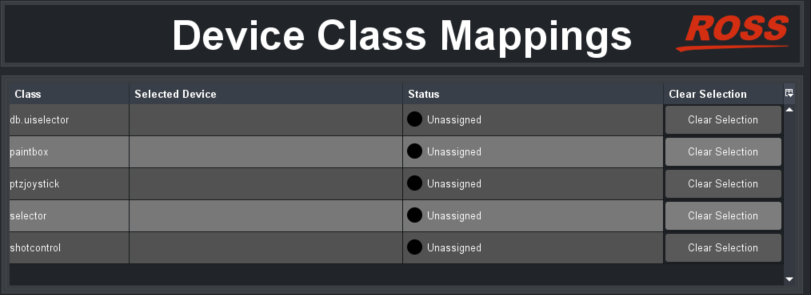
Figure 37 - Device Class Mappings Table
-
For the db.uiselector class, in the Selected Device drop-down list, select Selector UI Mappings on DashBoard Selector Service (Figure ??).

Figure 38 - Mapping the db.uiselector Device Class to Selector UI Mappings on DashBoard Selector Service
-
For each of the following classes (if listed), select the name of your Monogram Creator in the Selected Device drop-down list, as shown in Figure ??. For example, if you named the Monogram Creator my Monogram , select my Monogram on Game Controllers .
- paintbox
- ptzjoystick
- selector
- shotcontrol (not required for PTZ Starter package)
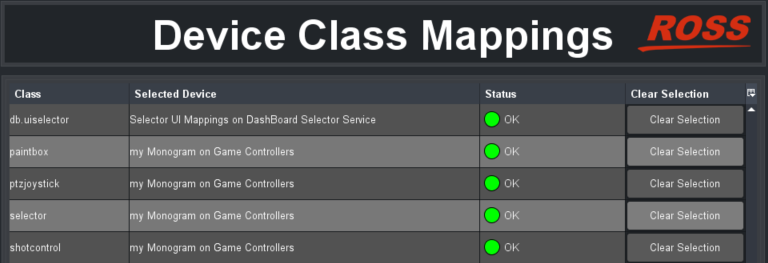
Figure 39 - Device Class Mappings Table (with mappings defined)
Configure Selector UI Mappings
Each of the Monogram Creative Console packages sold by Ross Video includes one or more Essential Keys modules for camera selection. Each of these modules has three buttons.
You can configure Selector UI Mappings to assign each camera to a button, so that when you press a button, you can control the associated camera.
By default, the PTZ Starter kit is configured to control up to three cameras, while the PTZ Pro kit is configured to control up to six.
Alternatively, if you do not want to use buttons on the Monogram Creator to select which camera to control, but instead want the console to control whichever camera is selected in DashBoard, you can configure Selector UI Mappings to ignore mappings.
To configure Selector UI Mappings:
-
In the DashBoard tree, open the DashBoard Services node and then double-click Selector UI Mappings .
The Selection Mapping table appears (Figure ??)
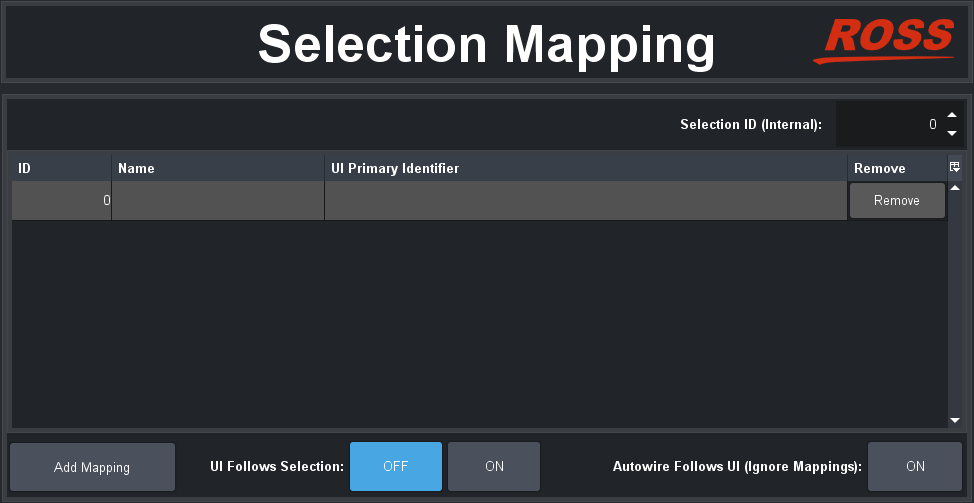
Figure 40 - Selection Mapping Table
-
If you do not want to use buttons on the Monogram Creator to select which camera to control, but instead want the console to control whichever camera is selected in DashBoard, set Autowire Follows UI (Ignore Mappings) to ON .
Go to Step Step 5.
-
If you do want to use buttons on the Monogram Creator to select which camera to control, create mappings between camera ID numbers (starting at 0 ) and the corresponding camera systems (PT head or PTZ camera).
To create the mappings, do the following for each camera system:
-
Select Add Mapping to create a new row in the table.
-
In the ID column, type the ID number corresponding to the button.
For the PTZ Starter package, there are three camera selection buttons, numbered 0 to 2 .
For the PTZ Pro package, there are six camera selection buttons, numbered 0 to 5 .
-
In the Name column, you can specify a name for the camera mapping (optional).
-
In the UI Primary Identifier column, navigate to the Remote Control node for the PTZ camera or PT head, as shown in Figure ??, and then double-click it.
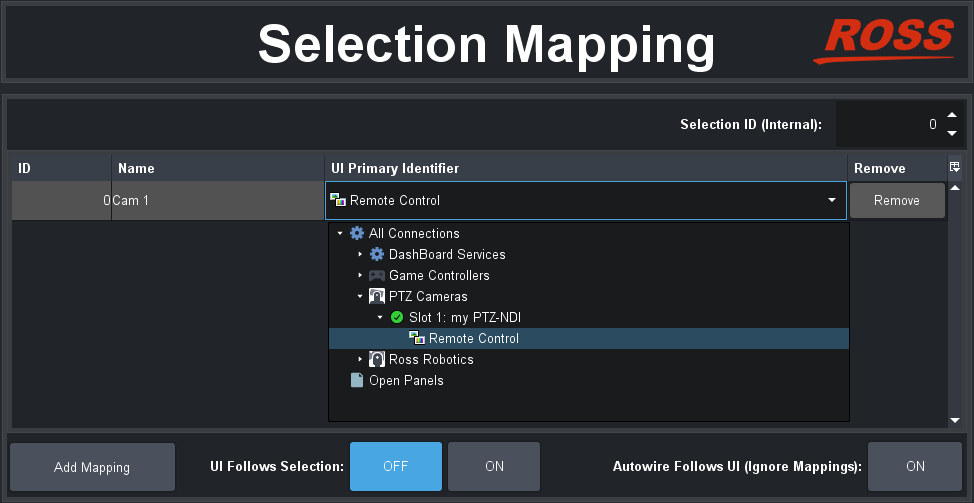
Figure 41 - Selecting a Camera System to be Mapped to a Button with ID 0
-
-
Do one of the following to specify whether you want the DashBoard interface to automatically switch to the selected camera each time you press a camera selection button on the Monogram Creator:
-
UI Follows Selection ON — Camera selection/control using the Monogram Creator is linked to camera selection/control using the DashBoard interface.
When you press a camera selection button on the Monogram Creator, DashBoard automatically switches to show the interface for the selected camera. You can select and control cameras through DashBoard and/or the Monogram Creator.
-
UI Follows Selection OFF — Camera selection/control using the Monogram Creator is independent of camera selection/control using the DashBoard interface.
When you press a camera selection button on the Monogram Creator, you can control the selected camera through the Monogram Creator. The DashBoard interface does not switch to that camera.
If a camera’s interface happens to be active in DashBoard, you can also control it through DashBoard.
tipYou can control one camera through Monogram Creator while controlling another through the DashBoard interface.
-
-
Test the configuration by selecting and controlling each camera system.
noteFor PT heads, joystick control must be enabled. You can enable or disable joystick control in the DashBoard PT Head Control interface (Figure ??), or by pressing the Enable PT Control button on your Monogram Creator .

Figure 42 - Enabling Joystick Control of a PT Head