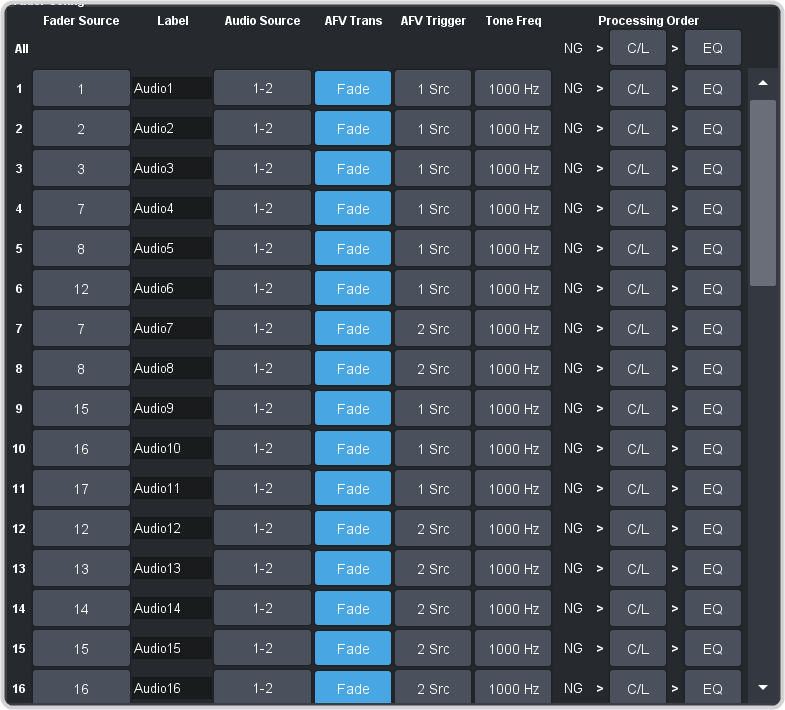
Assign audio sources to each fader in the mixer.
-
Click Navigation Menu > Audio Mixer > Config.
-
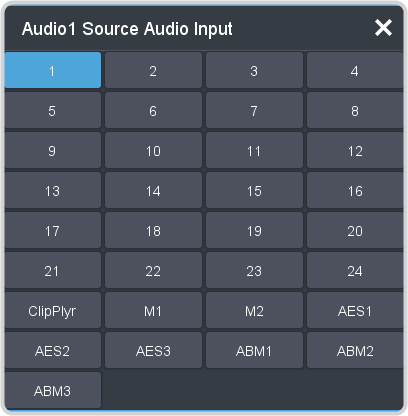
In the Fader Config area, click the Fader Source button for the fader you want to assign an audio source to and click the source you want
to assign.
- X – SDI audio sources
- ClipPlyr — audio from clip player
- MX — Media-Store audio sources
- AESX — AES source from each ABU
- ABMX — analog audio source from each ABU
Tip: You can rename a fader by entering a new name in the Label field.
-
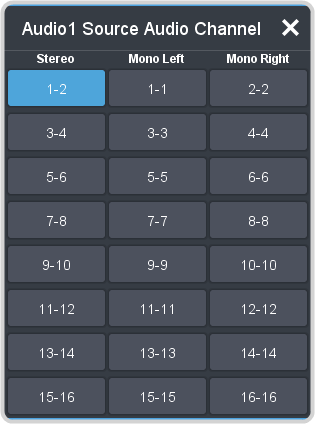
Click the Audio Source button and click the stream pair that you want to use.
- Stereo — select the stereo pair that you want to use.
- Mono Left — select the left mono pair you want to use. The left channel audio is put on both the left and right channels.
- Mono Right — select the right mono pair you want to use. The right channel audio is put on both the left and right channels.
-
Toggle the AFV Trans button to either have the audio sources fade in and out (AFV Fade) or have a cut between the audio sources
(AFV Cut) when the associated video source is taken on or off-air.
- AFV Fade — the audio source level is taken down (going off-air) or up (going on-air) as the transition progresses. The rate of the audio fade is tied to
the length of the video transition.
- AFV Cut — the audio source is cut on-air at the beginning of the transition (going on-air) or cut off-air at the end of the transition (going
off-air).
Note: Each audio source is transitioned according to how the AFV transition is set. For example, if Audio 1 is set to AFV Cut and Audio 2 is set to AFV Fade and you perform
a transition from Audio 1 to Audio 2, Audio 1 will remain on and cut off at the end of the transition and Audio 2 will fade in through the transition.
-
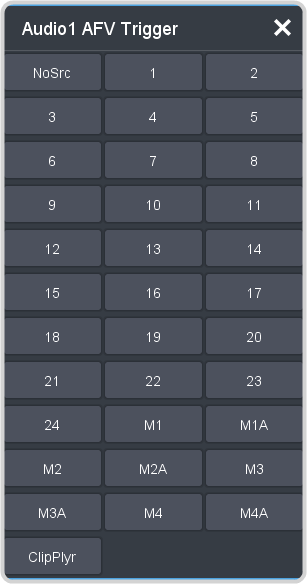
Click the AFV Trigger button and select the video source(s) that you want the audio transitions to follow. By default, the audio follows the video it is
embedded in. You can select multiple sources.
-
Click the Tone Freq button and select the frequency you want to use for the test tone on this channel. The test tone can be turned on from the main audio mixer
interface.
-
Click a Processing Order button for an audio fader to select whether the equalizer (EQ) is applied first, or if the compressor/limiter
(C/L) is applied first for that fader. The noise gate (NG) is always applied upstream.
Tip: You can use the Processing Order buttons for All (at the top) to change the processing order for all audio faders.