To Set Up Audio Faders
Assign audio sources to each fader in the mixer.
-
Click Navigation Menu > Audio Mixer > Config.

-
In the Fader Config area, click the Fader Source button for the fader you want to assign an audio source.
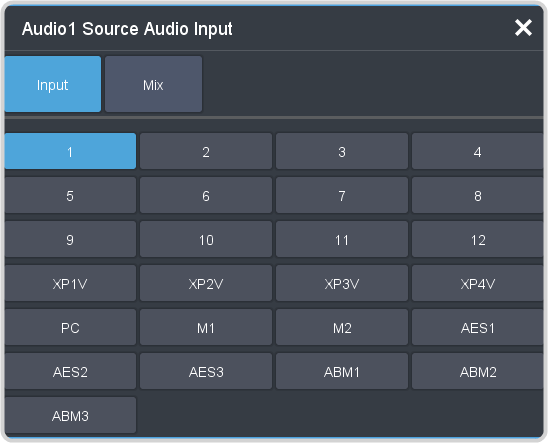
- Input — assign an audio source to the fader.
- XPX — XPression audio sources
- PC — PC audio sourcesTip:Each PC audio channel appears as an audio playback device in Windows® Sound Control. The audio rate is fixed to 48kHz at 16 bits per sample.
- SDIX — SDI audio sources
- ClipPlyr — audio from clip player
- MediaX — Media-Store audio sources
- AESX — AES source from each ABU
- ABMX — analog audio source from each ABU
- Mix — assign the output of a mixer to the fader (loop back).
- Main — output of main mix.
- AuxX — output of a aux mix.
Assign an audio source to the fader or select Off to turn the audio fader off.
Tip:You can rename a fader by entering a new name in the Label field. - Input — assign an audio source to the fader.
-
Click the Audio Source button and click the stream pair that you want to use.
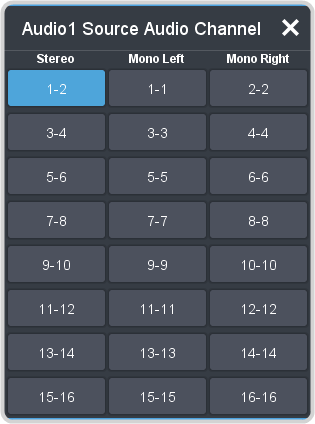
- Stereo — select the stereo pair that you want to use.
- Mono Left — select the left mono pair you want to use. The left channel audio is put on both the left and right channels.
- Mono Right — select the right mono pair you want to use. The right channel audio is put on both the left and right channels.
- Mono Sum — select the stereo pair you want to use and have them added together into a single mono output. Note:Mono Sum can only be applied to up to 8 faders at a time.
-
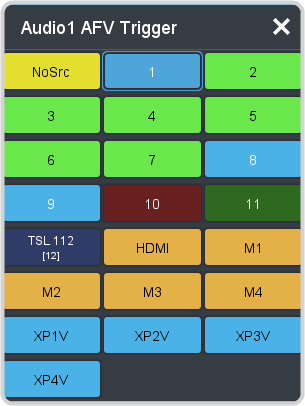
Click the AFV Trigger button and select the video source(s) that you want the audio transitions to follow. You can select multiple sources.
Tip:Click Fader Src to have the Fader Source added as an AFV trigger.