
To Load a Media Item
Media items are loaded from the USB drive into a Media-Store channel from MediaManager
Note: Media items must be created in the same color gamut and dynamic range that they are intended to be used in on the switcher. If a media item is created in one color space and
the switcher is operating in another, the media item may not appear correctly.
-
Insert your USB drive into the USB Port on the switcher. You must wait 5 seconds for the switcher to recognise the USB drive.
If the files on your USB are new, it takes about 2 seconds per file for the switcher to generate the thumbnail for the MediaManager. Once all the thumbnails are generated, they are displayed in the MediaManager window.
-
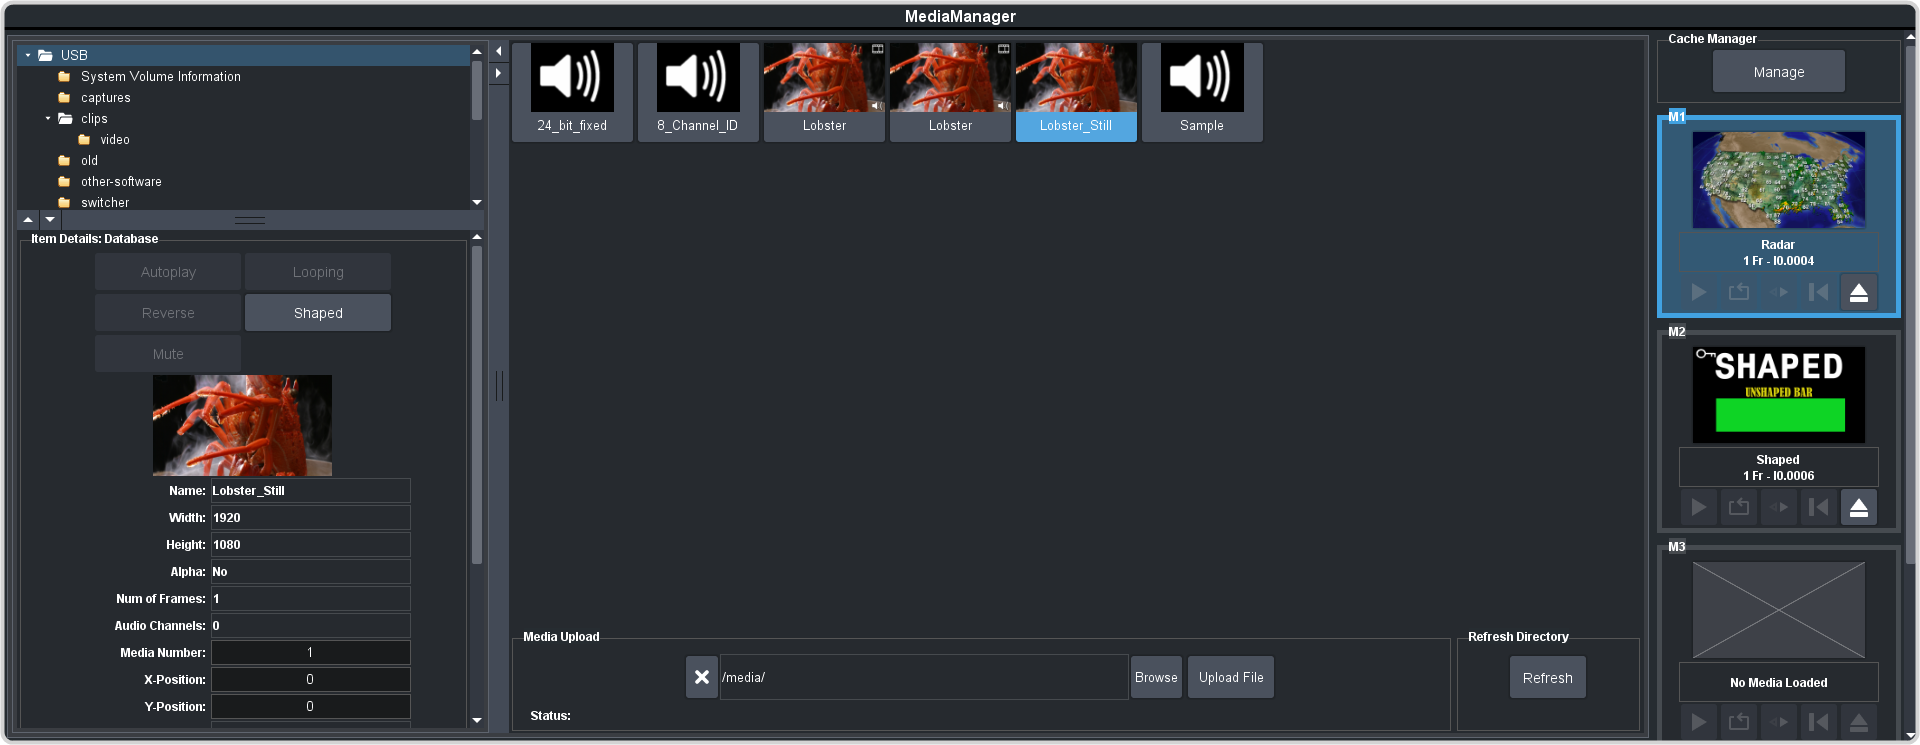
Click Navigation Menu > MediaManager
Tip: The MediaManager can also be accessed from Live Assist (Click Navigation Menu > Live Assist > Media > MediaManager). The Live Assist version follows Media-Store source selections on the panel.
-
Navigate to the folder containing the media item you want to load into a Media-Store channel.
Note: The first time you navigate to a folder it may take a few moments for the Media-Store to scan the files and build the database entries.Tip: If you have added media items to a folder on the USB but they do not appear on the menu, click Refresh to scan the folder for any new files.Tip: You can upload a media item from your computer to the selected folder on the USB. In the Still Upload area click Browse and navigate to the media item you want to upload to the USB. Click Open and then Upload File.
All the media items in that folder are shown in the center area of the page.
-
Drag the media item onto the Media-Store channel you want to load it in.
Tip: The film-strip symbol (
 ) indicates that the media item is an animation, the key symbol (
 ) indicates that the media item has an alpha, and the speaker symbol (
 ) indicates that the
media item has audio associated with it, or is audio only.
) indicates that the
media item has audio associated with it, or is audio only.