
The AVP Interface
An overview of the interface of the Acuity Virtual Panel.
Tip: You can use the virtual panel with a touchscreen monitor if required. Touch events are treated as mouse clicks and
multi-touch and drag events are also supported.
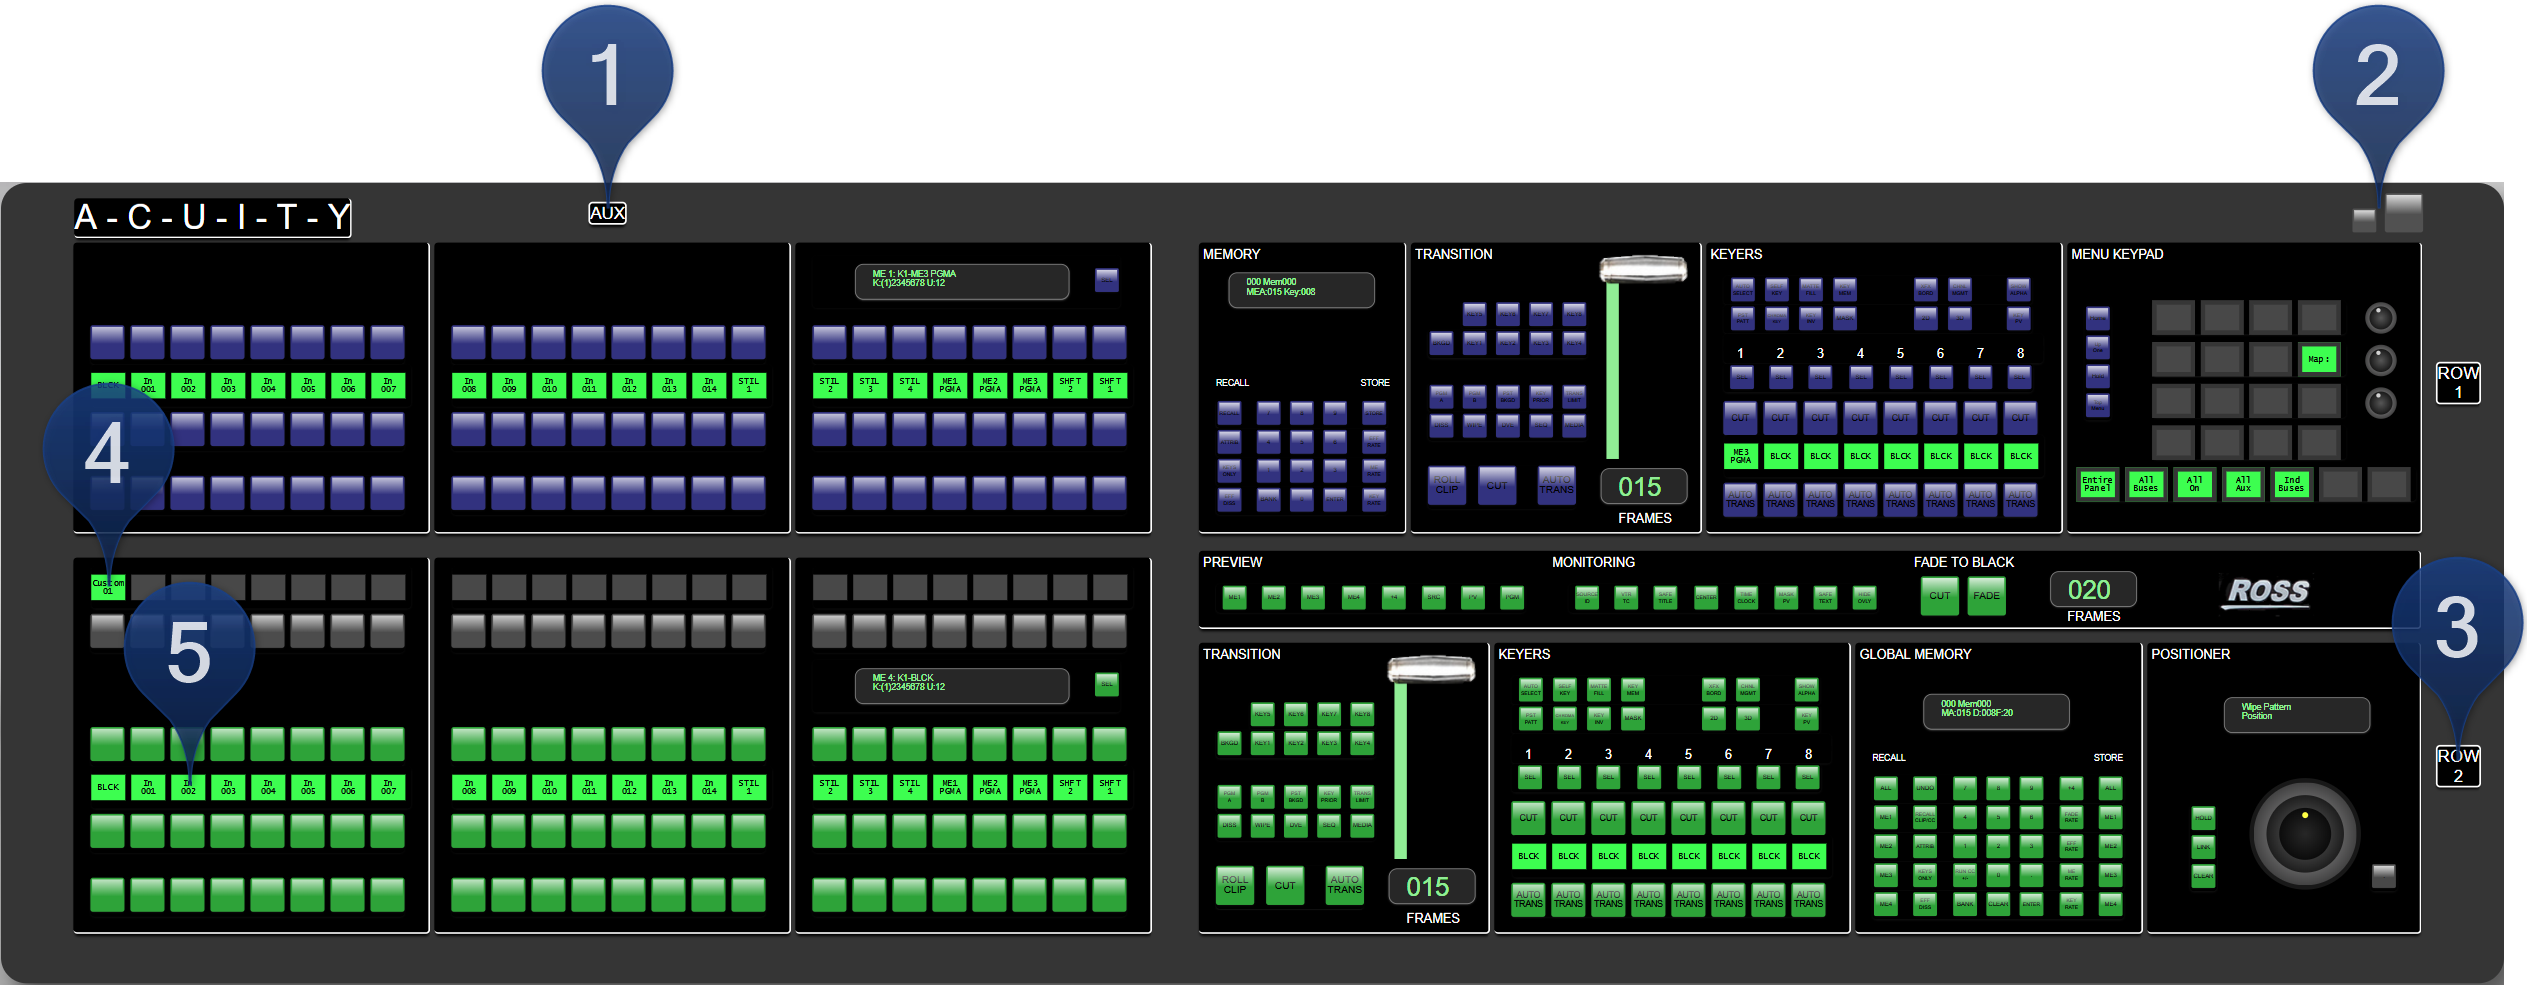
- AUX — Click AUX at the top of the panel to turn the Auxiliary Control Panel on or off.
- Minimize/Maximize — Click these buttons to minimize or maximize the size of the panel.
- ROW X — Right-click on the ROW X button to assign the panel
row to a different switcher row.
- Set to Internal Row --> — Point to this item and click the internal row that you want to assign the panel row to.
- Set to External Row --> — Point to this item and click the external row that you want to assign the panel row to.
- Custom Control Setup
- Double-click on a custom control mnemonic to record to that custom control.
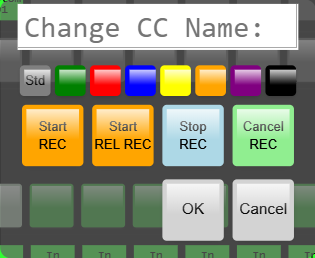
- Start REC – start recording a standard custom control.
- Start REL REC – start recording a relative custom control.
- Stop REC – stop recording the custom control.
- Cancel REC – cancel recording the custom control.
- Change the name and mnemonic color of that custom control.
- Right-click on the custom control mnemonic to assign a bank or special function to the button.

- Select Bank on Row — Point to this item and click the custom control bank that you want to assign the row to.
- Set Bank Link on Bttn — Point to this item and click the custom control bank that you want to add a selection button for.
- Set Function on Bttn — Point to this item and click the special command that you want to assign to the button.
- Default Mnem Color — Point to this item and click the mnemonic color that you want to assign to ALL the panel mnemonics.
- Double-click on a custom control mnemonic to record to that custom control.
- Source Setup
- Double-click on the mnemonic to change the source name
- Right-click to edit the bus map.
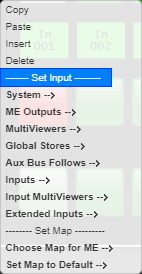
- Copy — Click to copy the button assignment.
- Paste — Click to replace the button assignment with the copied one.
- Insert — Click to insert a none source and shift all the other assignments to the right.
- Delete — Click to delete the button assignment and shift all the other assignments to the right.
- System — Point to this item and click the internally generated source you want to assign to the button.
- ME Outputs — Point to this item and click the ME output that you want to assign to the button.
- MultiViewers — Point to this item and click the MultiViewer output that you want to assign to the button.
- Global-Stores — Point to this item and click the Global-Store that you want to assign to the button.
- Aux Bus Follows — Point to this item and click the aux bus follow that you want to assign to the button.
- Inputs — Point to this item and click the video input that you want to assign to the button.
- Input MultiViewers — Point to this item and click the Input MultiViewer that you want to assign to the button.
- Extended Inputs — Point to this item and click the extended input that you want to assign to the button.
- Choose Map for ME — Point to this item and click the bus map you want to assign to the ME that the row is assigned to.
- Set Map to Default — Point to this item and click the bus map you want to default.
Keep the following in mind:
Keep the following in mind when working with the Acuity Virtual Panel:
- Use the mouse wheel to zoom in/out on the control panel.
- Press and hold Ctrl on your keyboard and right-click on a panel button to hold that button down. For example, to select background and key 2 in the next transition, press and hold Ctrl and right-click BKGD and KEY 2. A red glow appears below the button when it is held.
- Click on the border of the menu window to move it around, or on the left or bottom border to make the window smaller.
- The responsiveness of the positioner on the Acuity Virtual Panel can be unexpected. It is recommended that an external SideStick be used for better positioner control.
- You can only store and recall from the Hard Drive on the frame or the local drive in the ARP server.
- There are no serial Remote ports or Tally ports on the Acuity Rack Panel.
- If the connection to the Acuity Rack Panel is lost, a popup is shown asking you to refresh the webpage. This can happen if you shutdown the switcher or the panel is rebooting after an upgrade.
- Memory recalls are easier to perform if the Quick Bank Select personality option is on.
- You cannot store or recall files from the USB on the Acuity Rack Panel server. You must store or recall the files from the Local Disk and access it over the network. Point your file explorer to the localdisk folder on the server (\\##.##.##.##\localdisk). The user name is nobody and there is no password.
- The panel sleep functionality is disabled for the Acuity Rack Panel.