
Clip Control Area
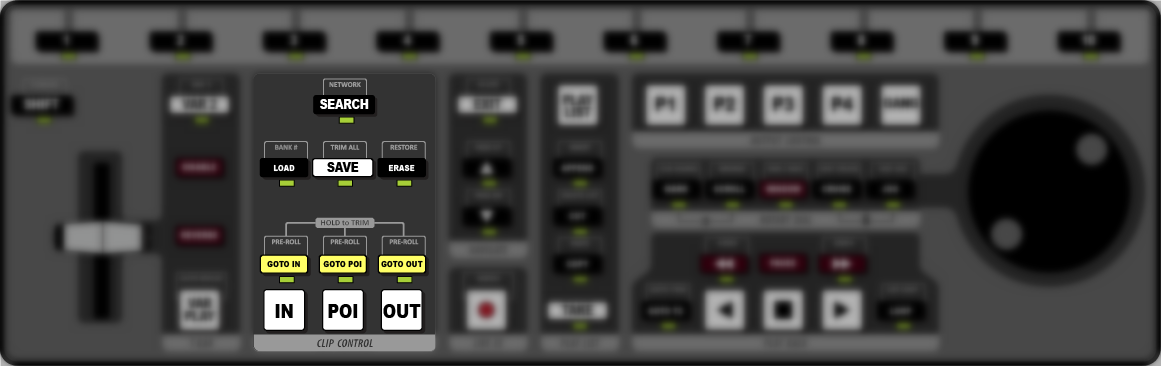
- SEARCH – use the keyboard to enter the name of a clip you want to find and press SEARCH. Press EXIT to return to normal operation.
- NETWORK – press SHIFT > SEARCH to open the Select Event menu. This list shows all the replay events on the server, as well as the replay events on any remote servers. The Enable Network Video option must be selected in Mira Config on both servers to load a replay event from another server.
- LOAD – press LOAD to load the selected clip in the Clip Register. The selected playout channel goes into Clip Play mode.
- BANK # – use the keyboard to enter the number of the Clip Register bank you want to use and press SHIFT > LOAD.
- SAVE – store the current live recording to a clip or save the new in-point, out-point, and point of interest (POI) to the clip for the current camera.
- TRIM ALL – press SHIFT > SAVE to save the new in-point, out-point, and point of interest (POI) to the clip for all the cameras.
- ERASE – press ERASE to erase the current clip.
- RESTORE – press SHIFT > ERASE to undo the last erase.
- GOTO IN – press GOTO IN to jump to the in-point of the clip.Tip: press GOTO IN during LIVE EE mode to mark a point of interest and rewind by the Auto-mark In-point offset
- GOTO POI – press GOTO POI to jump to the point of interest of the clip.
- GOTO OUT – press GOTO OUT to jump to the out-point of the clip.
- PRE-ROLL – press SHIFT > GOTO IN, GOTO POI, GOTO OUT to jump to the start of the pre-roll interval for the selected point.
- IN – press IN to set a new in-point for the clip. The button glows red when the clip is at the in-point.
- POI – press POI to set a new point of interest for the clip. The button glows red when the clip is at the point of interest.
- OUT – press OUT to set a new out-point for the clip. The button glows red when the clip is at the out-point.