
To Select an Export Destination
You can set up to nine export destinations, each with a different export format. Destination folders should only be located on network drives or high-speed USB drives (USB 2.0/3.0/3.1) mounted on the server.
Important: Do not select an export destination on the system (C:) or media drive (H:) of the server. These drives are reserved for the
operating system and media playout and recording. Exporting to either of these drives could cause video errors and system instability.
-
Click Configure > Export Configuration.
- Click the Destination X tab for the destination you want to set up or edit.
-
Select Enable this destination to make this destination available for export.
Destination 1 is always available for export.
- In the Destination Name field, enter a new name for the destination tab.
-
Click Export Type and select the codec you want to use for the export.
Note: Only Abekas native .clip and AVC-Intra .mxf are available when operating in a 1080p video format.
- Click Change and select the network drive or USB folder that you want to export to.
-
Click Select Folder.
The selected folder is shown in the Export directory field.
-
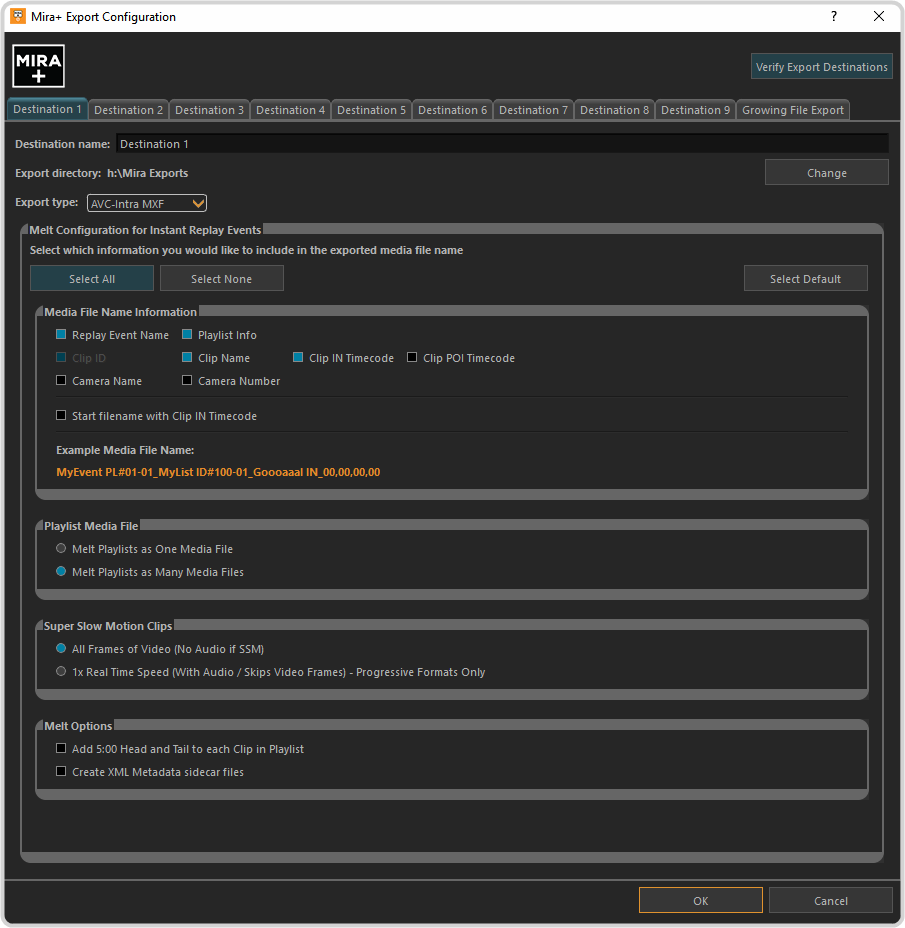
Select the naming and melt option you want to use for the export.
Media File Name Information Select the information you want to include in the name for the exported clip. An example of what the name will look like is shown at the bottom of the box. Playlist Media File Select whether the Play List is exported as a single or multiple files. Super Slow Motion Clips Select how super slow motion (SSM) clips are exported: - All Frames of Video (No Audio is SSM) — clips are exported with all frames but audio is stripped.
- 1x Real Time Speed (With Audio / Skips Video Frames) - Progressive Formats Only — clips are exported at normal speed with audio, but the extra frames for slow motion are stripped.
Melt Options - Add 5:00 Head and Tail to each Clip in Playlist — add time to the head and tail of each clip in the Play List.
- Create XML Metadata sidecar files — create XML files with metadata for the clips.
- Select additional export destination as required.
-
Click Verify Export Destinations to verify that all destination can be found.
A message is shown next to the button stating that all destination are valid, or that destinations are missing. The destinations that are missing are highlighted in yellow.
- Click OK.