
To Perform a Transition on TouchDrive (No Memory Area)
All transitions, with the exception of cuts on the background or key bus, have the same basic setup. The control panel offers physical buttons and mnemonics to setup and perform the transition.
-
The display in the Transition area shows the current setting for the transition type. Tap one of theses settings to show additional options.
Tip:Live Assist follows the transition type selection and shows the settings for that transition type.
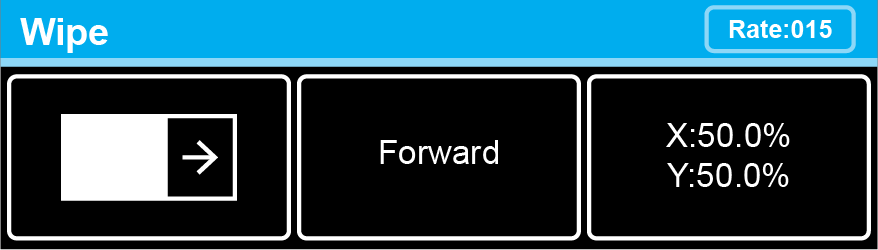
- Left — the left button shows the current pattern for the wipe or DVE transition. Tap the button and swipe left or right on the display to select a different pattern. For a MediaWipe the button shows the name of the media item being used for the transition.
- Center — the center button shows the current direction for the wipe, DVE, or MediaWipe transition. Tap the button and select a different direction for the transition to be performed in.
- Right — the right button shows the current position of the pattern for the wipe transition or the settings for the MediaWipe transition. Tap the button to have the 3-knob display show the position setting of the pattern and use the positioner to move the pattern around.
-
Set the rate for the transition you want to perform.
- Background
- On the Transition area tap Rate and use the 3-knob menu to enter the new rate.
- On the Transition area tap Rate and use the 3-knob menu to enter the new rate.
- Key OnlyNote:The KEY RATE is only used for key only transitions. Keys included in with the background are transitioned a the ME Rate.
- On the Keyer area tap the key you want to set the rate for.
- Tap Rate and use the 3-knob menu to enter the new rate.
- On the Keyer area tap the key you want to set the rate for.
- Background