
To Perform a Transition
All transitions, with the exception of cuts on the background or key bus, have the same basic setup. The touchscreen menu system offers the touchscreen interface to setup and perform the transition.
-
Click Navigation Menu > Live Assist > MEs.
-
In the Next Transition area, select the elements (Background and Keys) you want to include in the next transition. You can include any combination of background and keys, but at least
one element must be selected.

-
In the Rate field, enter the rate that you want the transition performed at. This is the speed, in frames, that it takes for the transition to complete. A Cut
or manual fader transitions do not use the transition rate.
- Background — enter a new ME transition rate, in frames, in the Trans Rate field.
- Key Only — enter a new key transition rate, in frames, in the Key X Rate for the key you want to transition.Note:The key rate is only used for key only transitions. Keys included in with the background are transitioned a the ME Rate.

-
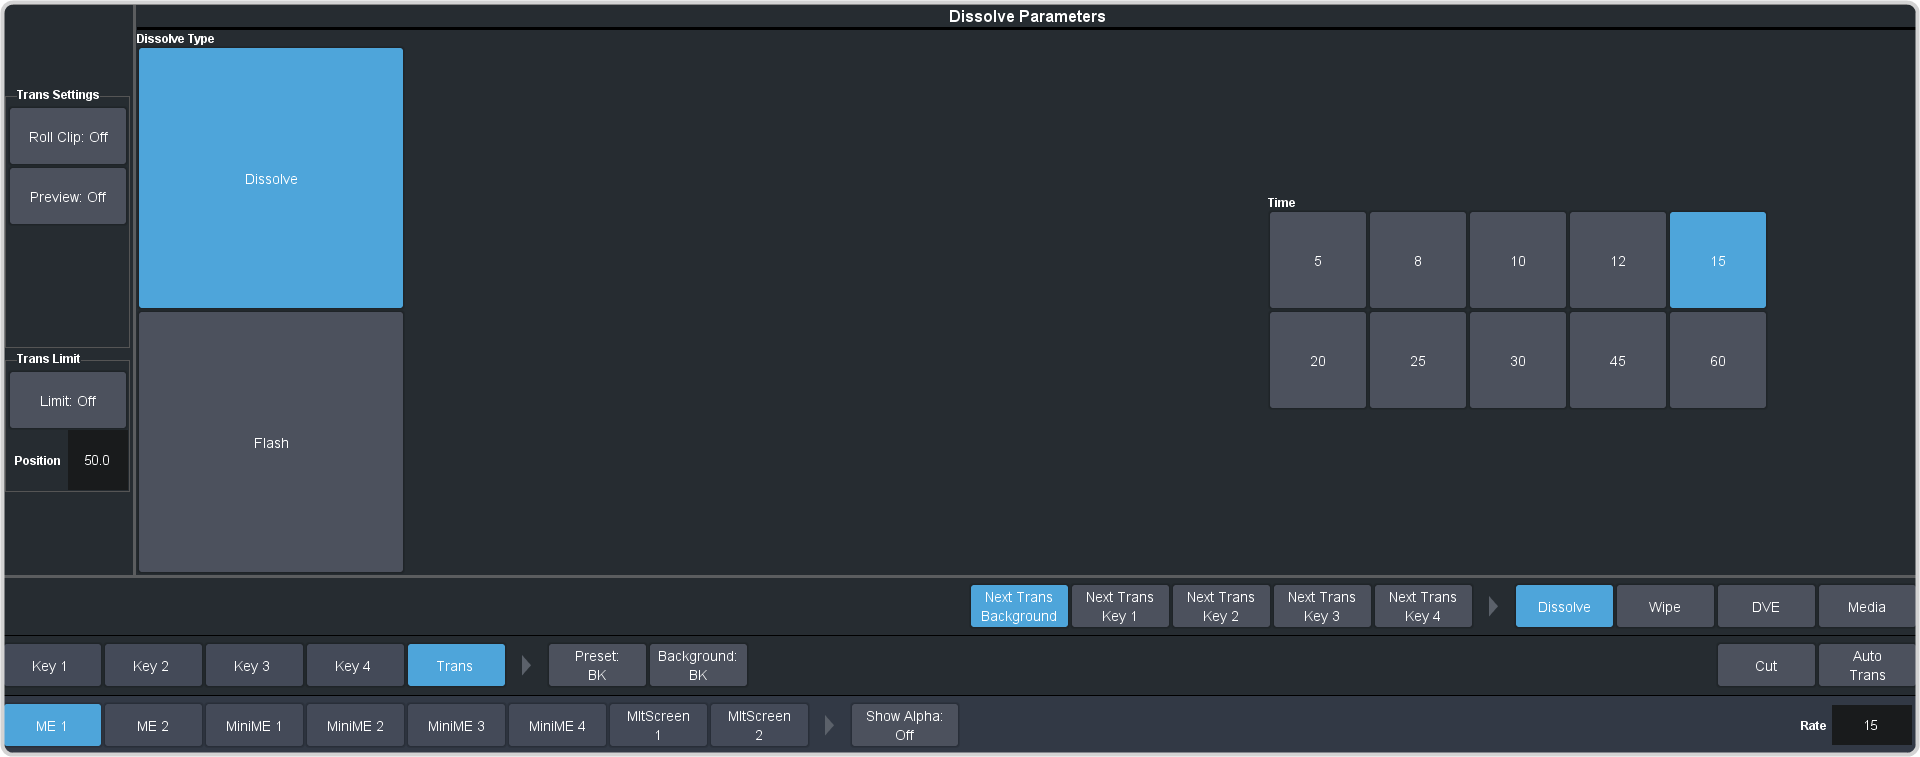
In the Transition area, select the type of auto transition you want to perform. If you want to perform a cut you do not need to select a transition type and can move to the next
step.

- DISS — perform a dissolve or WhiteFlash auto transition. Refer to To Set Up a Dissolve or To Set Up a WhiteFlash for more information.
- WIPE — perform a wipe auto transition. Refer to To Set Up a Wipe for more information.
- DVE — perform a DVE auto transition. Refer to To Set Up a DVE Transition for more information.
- MEDIA WIPE — perform a MediaWipe auto transition. Refer to To Set Up a MediaWipe for more information.
-
Click a Trans Settings button to turn the setting on or off. The options available depend on the type of transition selected.
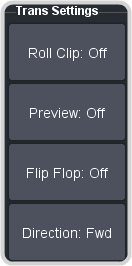
- Roll Clip — select whether you want any video server clips assigned to a source being taken on-air to play with the transition (On), or not (Off).
- Preview — preview the transition on the preview output On. You cannot preview the independent key-only transitions or a MiniME™ transition.
- Flip Flop — select whether the wipe runs forward during the first transition and then reverse during the second (On), or if it always runs in the same direction (Off).
- Direction — select the direction that the wipe travels.
-
Click Limit to turn trans limit On or Off. Enter a value for the trans limit in the
Position field to set the point in a transition where an auto transition stops. When active, the point in the transition where the auto transition will stop is
indicated by a flashing segment on the transition progress bar next to the fader handle on the control panel. The auto transition proceeds to this point and stops. The second auto
transition starts from the transition limit point and goes back to where the first transition started.
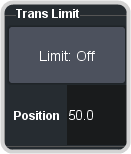
Tip:The Limit Position is a percentage with 0 being the starting point of the transition and 100 being the ending point of the transition. -
Perform the transition.
Important:The Cut and Auto buttons trigger a transition on what has been selected. If Trans is selected a normal background transition is performed. If one of the keyers is selected (Key X) a key-only transition is performed on the selected key.

- Auto Trans — click Auto Trans
- Cut — click Cut
Tip:During an auto trans, press Auto Trans again to hold the transition at the current position or press Cut to abort the transition and return to the original source.