
Chroma Key Tips and Tricks
Some useful tips for how to get your production ready for a flawless chroma key, and some tricks for how to deal with difficult shadows.
The Set
In every set design, care must be taken to ensure there are no visible seams, joints or hard corners that will appear on camera. Paint should be chosen that is a close as possible to the exact color vector that will be used, typically Green or Blue. If the paint pigment is not precise and several batches of paint or repaint are required, the uneven color result will make the perfect key impossible. There are several vendors of chroma key specific paints and set materials you can work with. Ross Video works closely with ProCyc (www.procyc.com) in the USA, we whole-heartedly recommend their products.
The set should be sized to allow ample separation between foreground talent and the chroma background wall; ideally at least 6-to-8 feet of separation. The further the distance, the easier it is to reduce unwanted color spill and achieve good lighting separation.
Lighting
Lighting configuration will naturally vary with set design and choice of lighting equipment, but there are some simple rules that will help achieve the best results:
- Light the chroma set independent of the talent: light the walls and floor to achieve flat, even illumination.
- Light the talent independently: use back and side lighting to minimize color spill from the walls and floor. Use floor or stand mounted front fill lights to eliminate areas of spill reflected from the floor.
- Don’t light the background too brightly: it should ideally be half a stop or more below the level of the foreground subject (about 50 - 75% of the foreground on a waveform monitor).
- Don’t rely on eyesight: when assessing the set lighting and background quality and finish - eyesight will mislead you. Look at the camera output on a waveform/vectorscope and ensure that the chroma background reads as an even signal without variation.
Camera and Lenses
Resolution: Cameras naturally vary in performance; the ideal camera has a high-resolution imager with very low noise. This is critical for an excellent final result. Medium resolution imagers can produce great results in normal video productions, but rely on relatively high-detail settings to enhance image edges. Detail-enhanced edges are undesirable in chroma keying. These edges will appear as bright or dark key halos, which cannot be removed without compromising overall key quality.
Imager/Sensor Noise: Noise is always present in the video image but can be minimized by choice of sensor type and gain settings. Image noise has a significant effect on chroma keying as the chroma levels in a normal video image are much lower than the luma levels - as a result, the chroma information contains proportionately more noise. High noise-levels will be most obvious in dark areas of a developed chroma key and can be very difficult to remove without compromising key quality. The better the noise performance of the camera - the better the end result.
Lens: Select a camera lens based on the set size and production needs. Some lower-cost lenses can exhibit chromatic aberration - colored halos - around edge transitions in certain lens regions. This has a highly undesirable effect on edge quality.
Detail: Avoid high levels of detail regardless of camera type; if detail is necessary to achieve the image quality desired, then the best choice is to use the chroma key Edge Softness control to soften the edge and conceal the aberrations caused by detail setting.
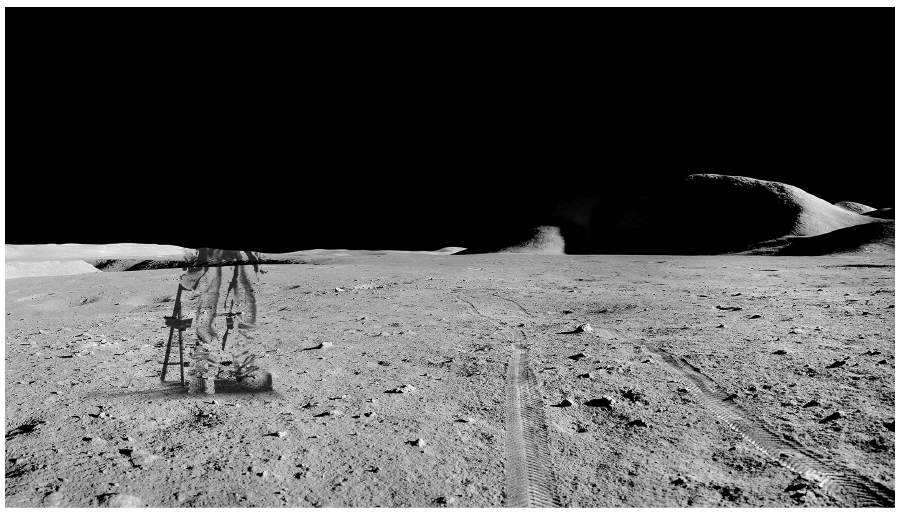
Shadow Tricks
Developing a shadow from the chroma key set can give you a more realistic final output, but this is very difficult to do. As previously mentioned, noise lurks in the shadows and can look quite nasty. But all is not lost, very acceptable shadows are achievable with a nifty keying trick.
- Setup the chroma key as usual; don’t worry about resolving the shadow, just make the best key you can. Assign the key to an ME or MiniME™ keyer, with an empty keyer below it (Example: chroma key on Key 2, with Key 1 unassigned).

Tip:No attempt is made to resolve any shadows as they are weak and indistinct. Raising the shadow sensitivity would bring up other set errors. - Set Key 1 type as Auto Select then select Black as the Key Fill and the chroma key source camera (in this example: Media Store 1) as the Key Alpha source. Turn on Key Invert and leave the keyer in Normal Mode.
- Now adjust the key Clip and Gain until the shadow area has the look you desire (you can ignore the rest of the image as it will be concealed by the chroma key above it).
- Now adjust Key Transparency for the most realistic shadow look.
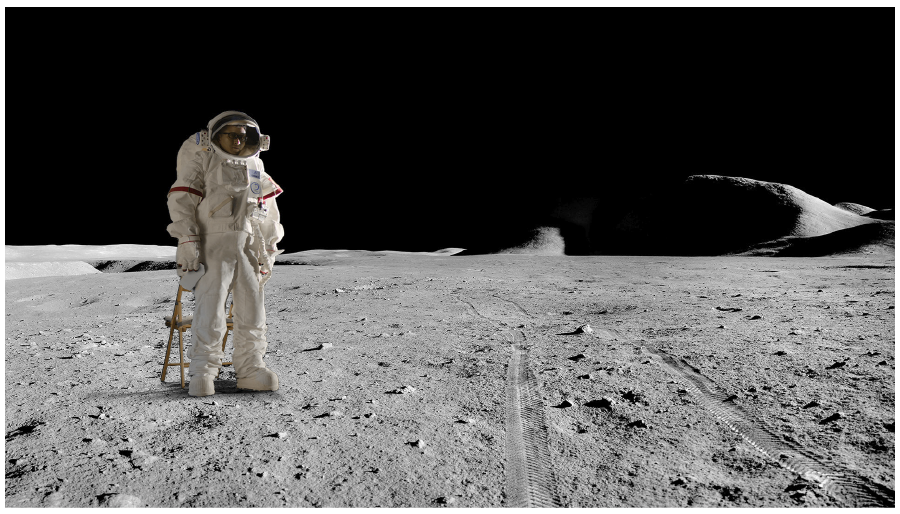
- Turn on the chroma key in Key 2 - Voila! Great looking shadow from a poor image. Good trick!