
To Edit a Switcher Configuration
Assign a new role to the SDPE blades in a switcher.
-
Select the HyperMax switcher you want to edit.
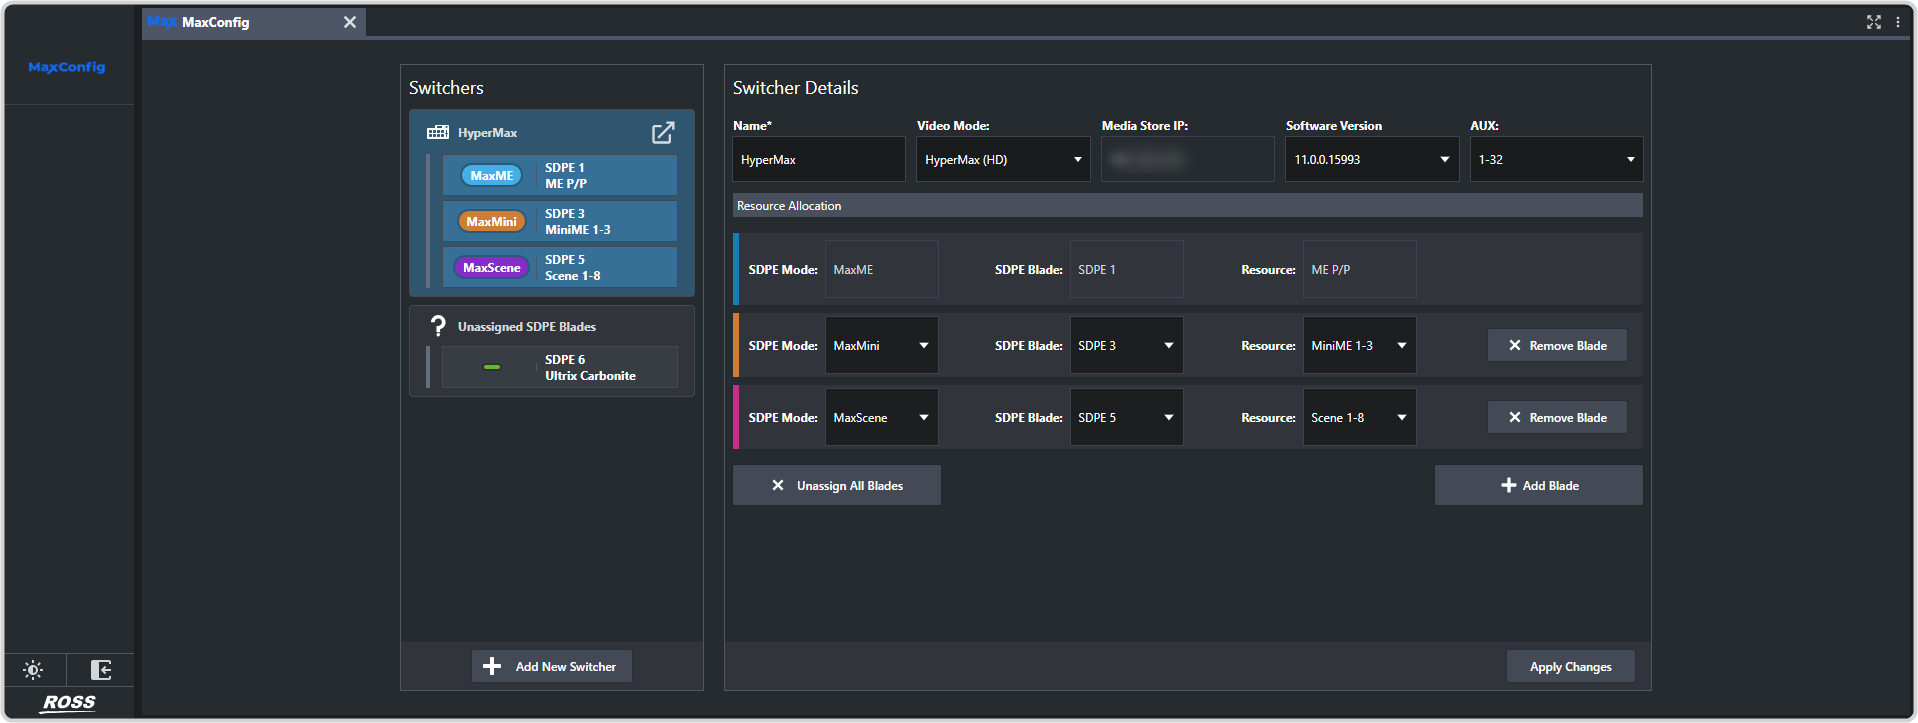
Tip:Any existing HyperMax switchers are listed in the Switchers section. If you select a switcher, the details for that switcher are shown in the Switcher Details section. Unassigned SDPE blades are also listed in this section. -
Configure the system parameters of the new switcher.
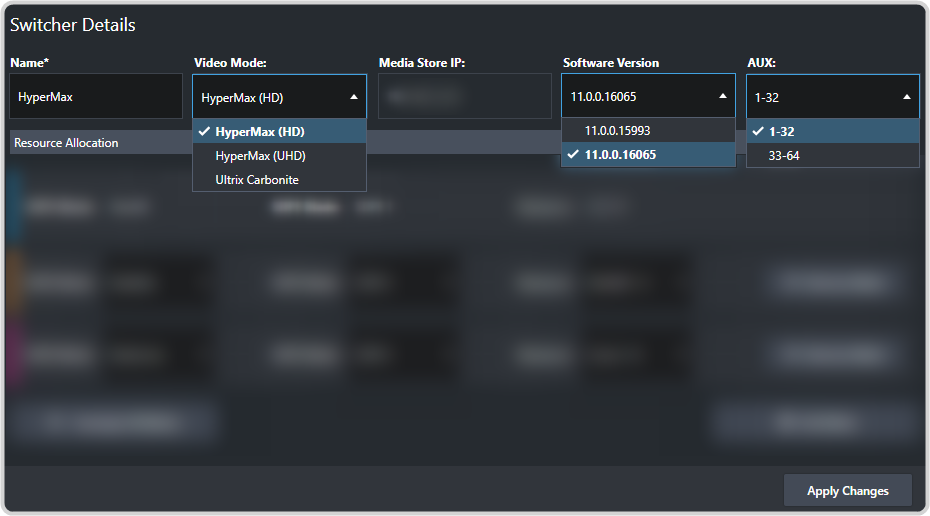
- Switcher Mode — select the mode, HD or UHDTV1 for the switcher.Important:Do not select Ultrix Carbonite at this time. This option will convert the new HyperMax ME P/P to an Ultrix Carbonite.
- Switcher Version — select the version of software you want to load on to the switcher. Only software versions that has already been loaded onto the switcher can appear on this list.
- Ultrix Virtual Aux — select the set of router aux buses you want to use for the switcher. If you are configuring multiple HyperMax switchers in the same router you must assign different ranges of aux buses to each switcher.
- Switcher Mode — select the mode, HD or UHDTV1 for the switcher.
-
Change the role of an existing, or newly added, blade used in a switcher. You can change the role of any SDPE blade in the switcher except ME P/P. The role is not changed until you click Apply Changes.
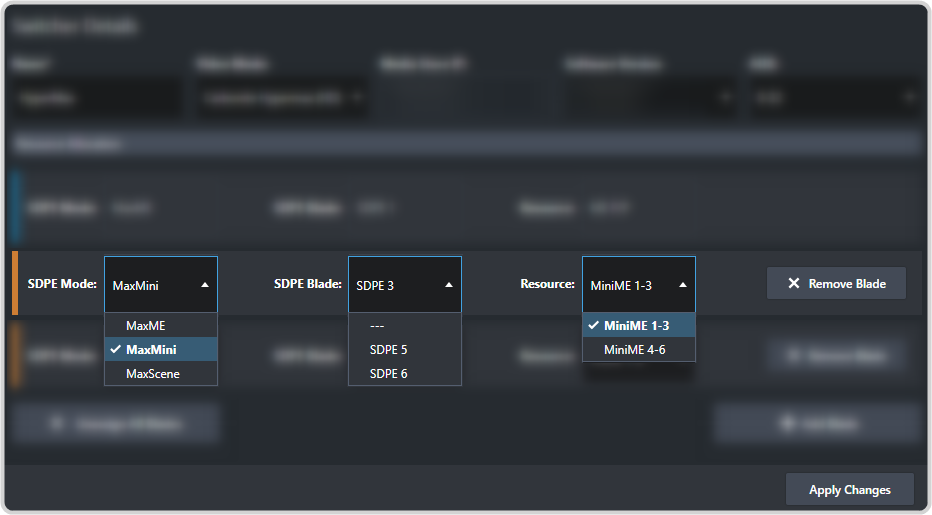
- SDPE Mode — select the role you want the blade to fill in the switcher. This can be a ME, MiniME™, or
MaxScene.Note:A switcher can only support a maximum of 5 blades assigned as MaxScene at a time.
- SDPE Blade — select which SDPE blade you want to fill the selected role. SDPE blades are selected by
the slot they are installed into in the frame. Note:If you select a blade that is already assigned to a role, the blades will be swapped and both will update when you apply the changes.
- Buses — if there is more than one SDPE blade assigned to the same role, you can select which set of resources are provided by the selected blade. For example, if you have two blades assigned to the MiniME™ role, then one provides MiniME™ outputs 1-3 and the other 4-6.
- SDPE Mode — select the role you want the blade to fill in the switcher. This can be a ME, MiniME™, or
MaxScene.
-
Remove a blade from the switcher by clicking × Remove Blade for the SDPE blade you want to remove. The blade will be removed from the
Switcher Details but will not appear as unassigned until you click Apply Changes.
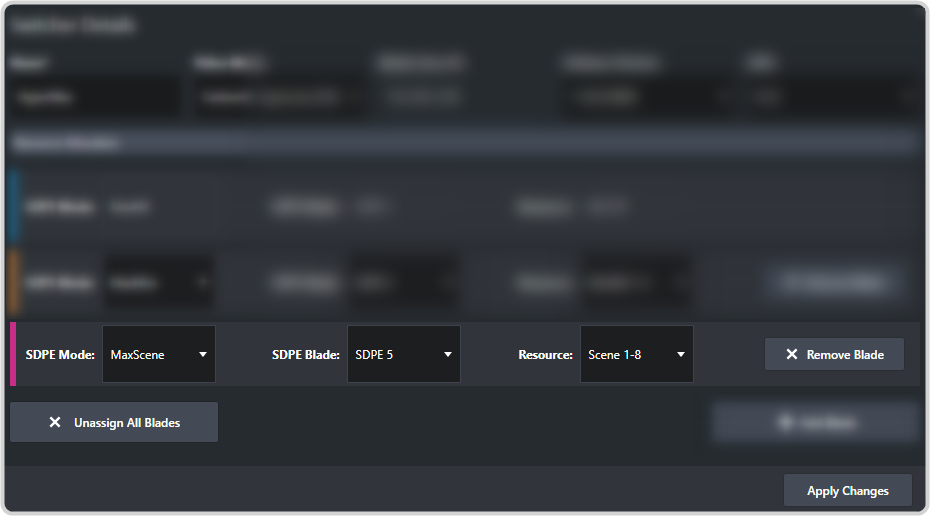
Tip:Click × Unassign All Blades to remove all blades except ME P/P from the switcher. -
Add a blade to the switcher by clicking + Add Blade. You must assign a role and which blade you want to use.
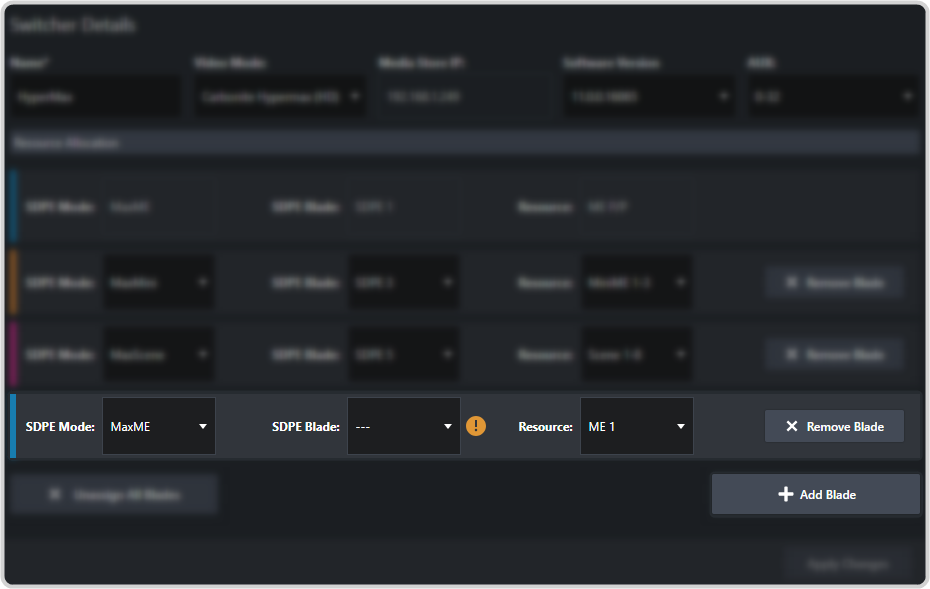
- SDPE Mode — select the role you want the blade to fill in the switcher. This can be a ME, MiniME™, or
MaxScene.Note:A switcher can only support a maximum of 5 blades assigned as MaxScene at a time.
- SDPE Blade — select which SDPE blade you want to fill the selected role. SDPE blades are selected by
the slot they are installed into in the frame. Note:If you select a blade that is already assigned to a role, the blades will be swapped and both will update when you apply the changes.
- Buses — if there is more than one SDPE blade assigned to the same role, you can select which set of resources are provided by the selected blade. For example, if you have two blades assigned to the MiniME™ role, then one provides MiniME™ outputs 1-3 and the other 4-6.
- SDPE Mode — select the role you want the blade to fill in the switcher. This can be a ME, MiniME™, or
MaxScene.