
SoftPanel
SoftPanel provides you with a graphical interface to the menu system and control surfaces of the switcher. This allows you to setup and control the switcher without a control panel.
The screen can be broken up into several different functional areas. Each of these areas allows you to interact with different aspects of the switcher interface.
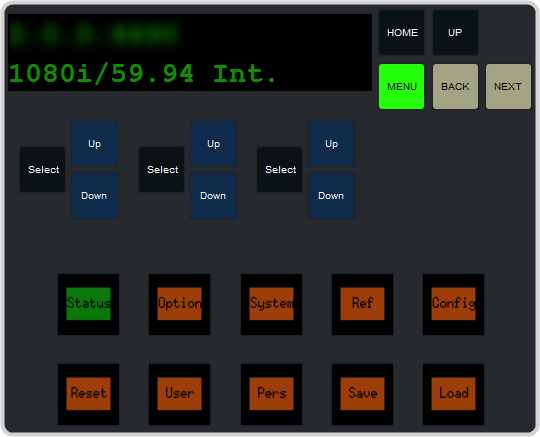
Menu Area
The menu area provides a graphic representation of the menu system on a Carbonite Black control panel. The Select, Up, and Down buttons represent the actions of turning and pressing the knobs on the panel. The buttons in the top right corner allow you to navigate around in the menu tree, and the stylized mnemonic buttons at the bottom allow you to access different menus.
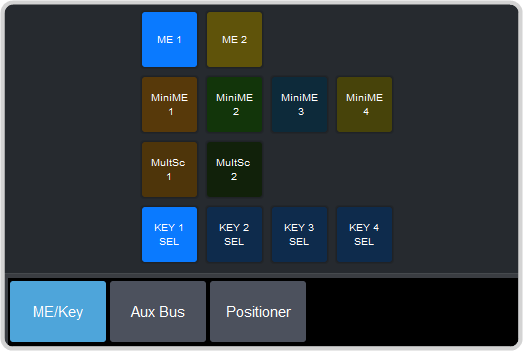
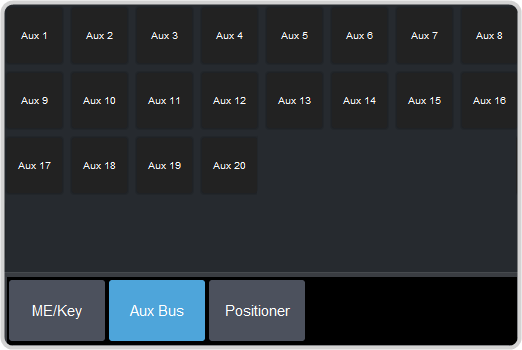
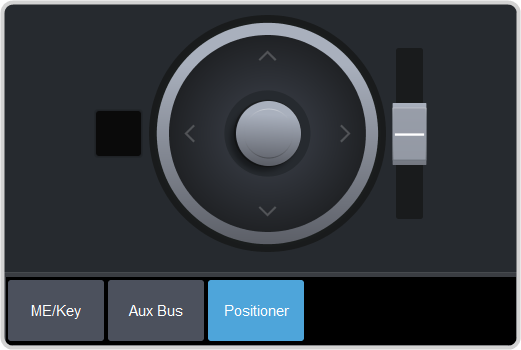
User Area
The user area can be assigned to ME/Key, Aux, or the Positioner. Press the ME/Key, Aux Bus, or Positioner button to a select how the user area appears.
ME/Key
The ME/Key button allows you to select what the bus area is assigned to. Click ME X, MiniME X, or MultSc X to assign the panel bus area to that output. Click one of the Key X Sel buttons to assign the key bus in the panel bus area to that key.
Aux Bus
The Aux Bus button allows you to select one of the aux buses that the key bus row in the bus area is assigned to.
Positioner
The Positioner button provides a virtual interface to the positioner. The positioner is used in device control, or to move keys or masks around. Click and hold the positioner and move it around to emulate moving the positioner around. The slider to the right of the positioner emulated twisting the positioner knob on the panel. The button to the left of the positioner emulates the button on the top of the positioner knob on the panel.
Control Area
The control area (the upper right of the screen) contains the main DashBoard interface to the switcher. Click Navigation Menu and select the menu you want to navigate to. When the Live Assist menu is selected, the sub-menus will follow actions in the bus area when PaneLINK is on.
Bus Area
The bus area provides a graphic representation of the panel row on the switcher. Use the user area buttons to assign the bus area to an ME, key, and aux bus. Sources are then selected on the key, program, and preset buses, and transitions are set up and performed with the transition buttons to the right of the source selection buttons.
