To Set Up a MultiScreen
-
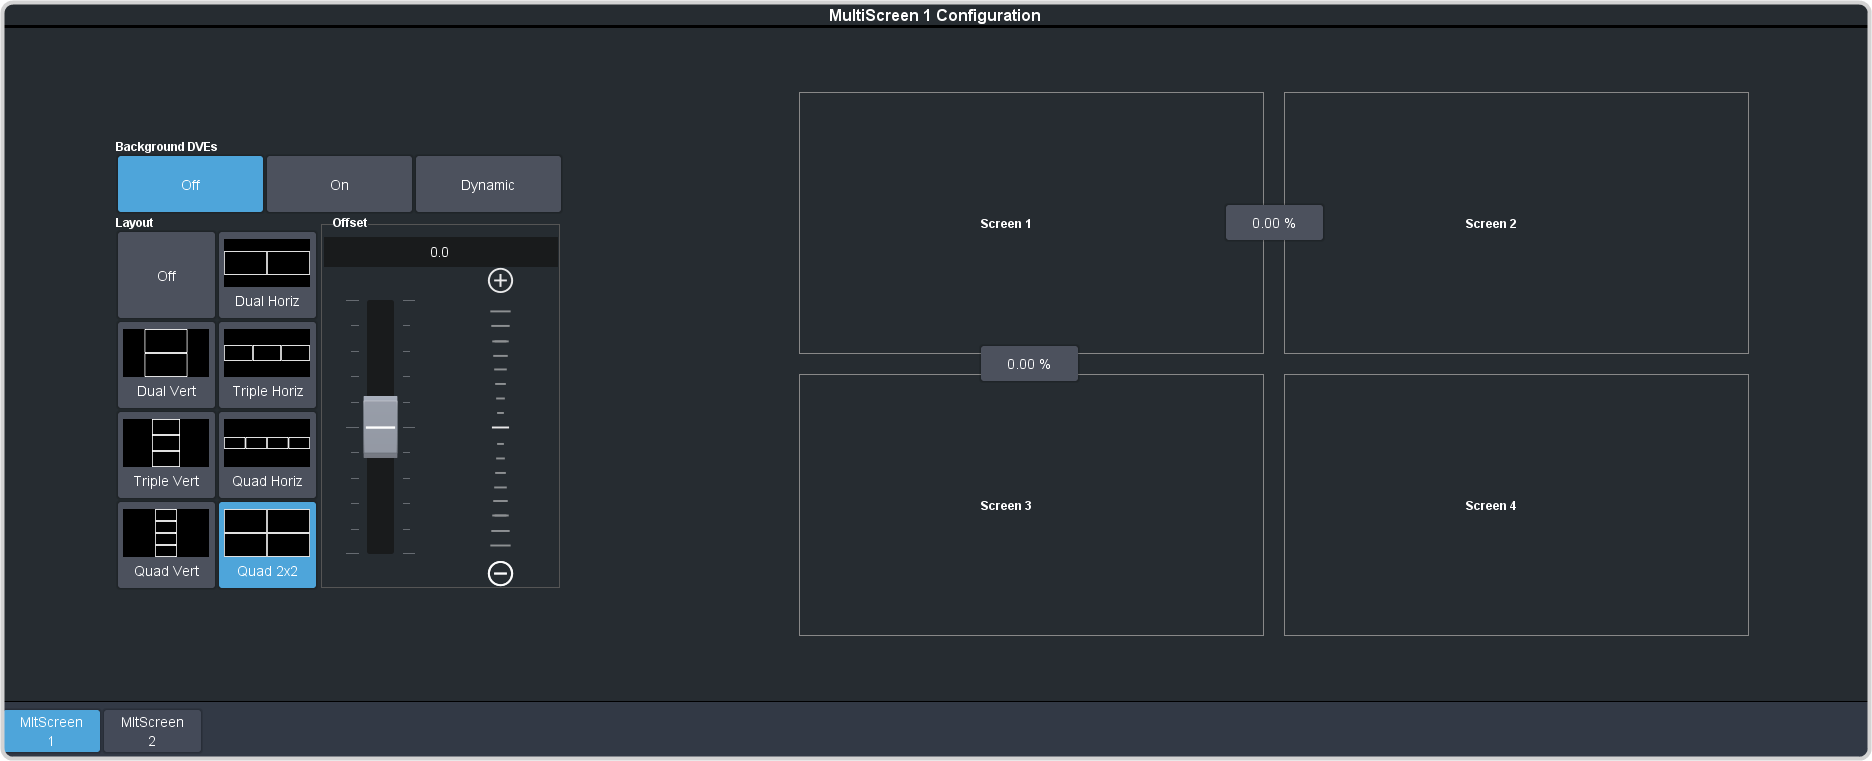
Click Navigation Menu > Configuration > Canvases.

- Click MultiScreen X to select the MultiScreen you want to set up.
-
Click a Layout button to select the layout you want to use.
Note: The available layouts depend on the number of screens being used by the other MultiScreen.
- Click Yes to confirm.
-
Click a Background DVEs button to select how DVE resources are used to scale sources for the MultiScreen screens.
- Off — DVE resources are not allocated to the MultiScreen for scaling of background sources.
- On — DVE resources are always allocated to the MultiScreen for scaling of background sources. This reduces the number of available DVE resources to the switcher when a MultiScreen is turned on.
- Dynamic — DVE resources are dynamically allocated to the MultiScreen for scaling of background sources if there is no substitution table.
Note: If there are no DVE resources to scale the background source across the entire MultiScreen, the switcher needs a substitution table to map separate inputs to the MultiScreen screens or the selected source is repeated in each screen of the MultiScreen. - Click OK.
-
Use the Offset slider to adjust the placement of the background scaling in the MultiScreen output.
This can be used to adjust for the aspect ratio difference between the input video and the MultiScreen output.
-
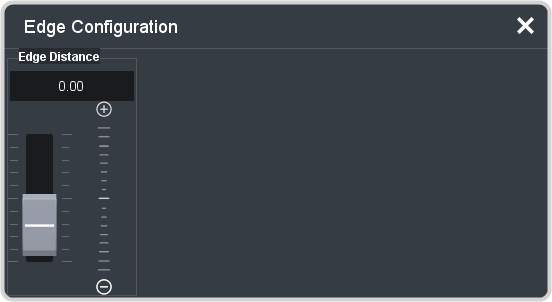
Click on the button between the two boxes to adjust the size of the edge between those two screens.

-
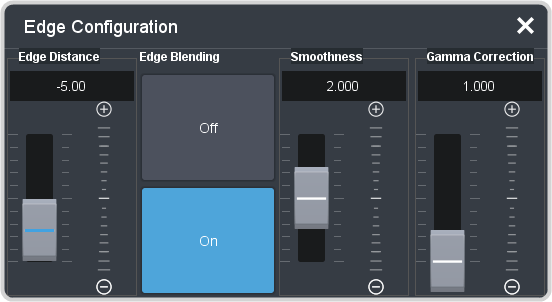
Use the Edge Distance slider to adjust the size of the gap between the MultiScreen screens.
- If you are using monitors for your MultiScreen display, you can use a positive value to compensate for the bezel on the outside of a display.
- If you are using projectors for your MultiScreen display, you can use the negative value to compensate for the amount of overlap of the projected images.
-
If you selected a negative distance, click an Edge Blending button to turn edge blending on (On) or off
(Off).

-
If the edge blending is on, use the Smoothness and Gamma Correction sliders to correct for the overlap in projected images.
- Smoothness — adjust the appearance of the transition area between the overlapping images.
- Gamma Correction — adjust the gamma correction applied to the overlapping images to match the output of your projectors.
- Repeat the edge adjustment for all other edges in your layout.
