
To Automatically Map Modules to a Row
Modules are mapped to rows so that the system can identify where the hardware is located on the panel.
Important: Do not manually map SideShotNet, SideSlideNet, or SideStick modules to the panel. Panel mapping for these
modules is done from the communications menu when you set them up.
- Press HOME > Setup > More > Panel Modules.
- Press Yes.
- Press Quick Configuration.
-
Select whether you want to assign modules to an internal panel row (Internal Rows), or an external
panel row (External Rows).
- Internal Rows — rows inside the control panel, or connected to the touchscreen display.
- External Rows — rows outside the control panel, such as on an auxiliary control panel, SideBox, not including the touchscreen display.
-
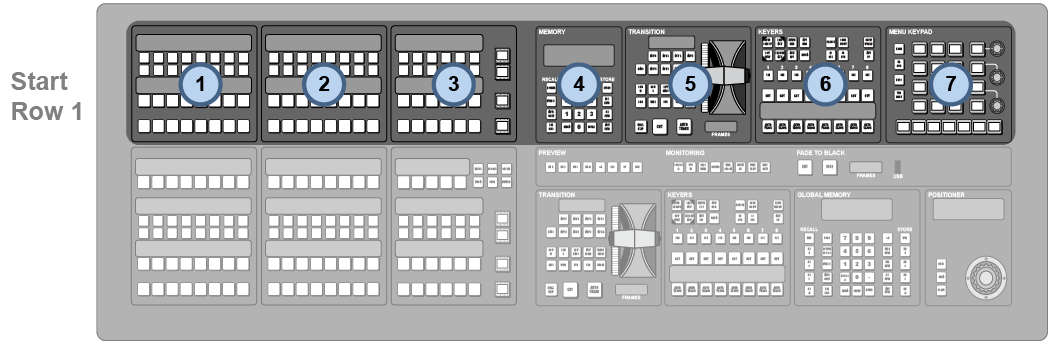
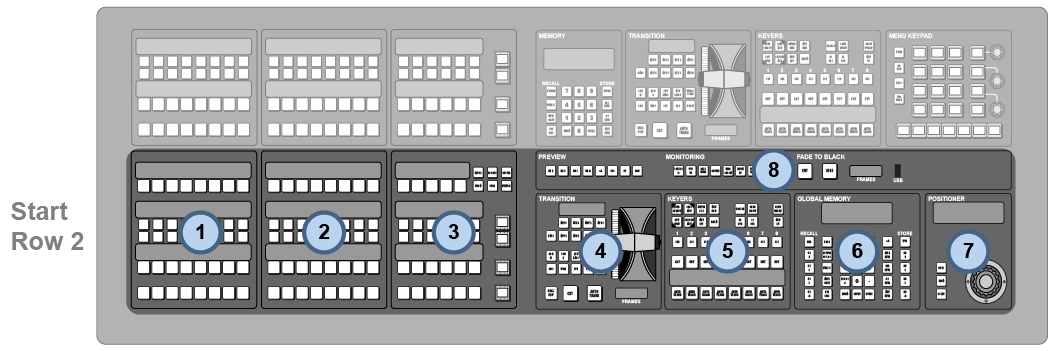
Press the Start Row X button for the row that you want to start
assigning modules to.
Note: Any module assignments to the selected row are lost.
-
Press a button on all the modules that you want to assign to the selected row starting with the first source
button/crosspoint module on the left. Remember to include memory and transition modules as well.
The order that source button modules are assigned to a row sets the order that the switcher maps to the buttons.
-
Repeat for each additional row you want to assign modules to.
- Press Exit.