To Configure a Compressor/Limiter

Apply compression to the audio level to prevent digital clipping.

  1. Click Navigation Menu > Audio Mixer > Effects > Compressor Limiter.
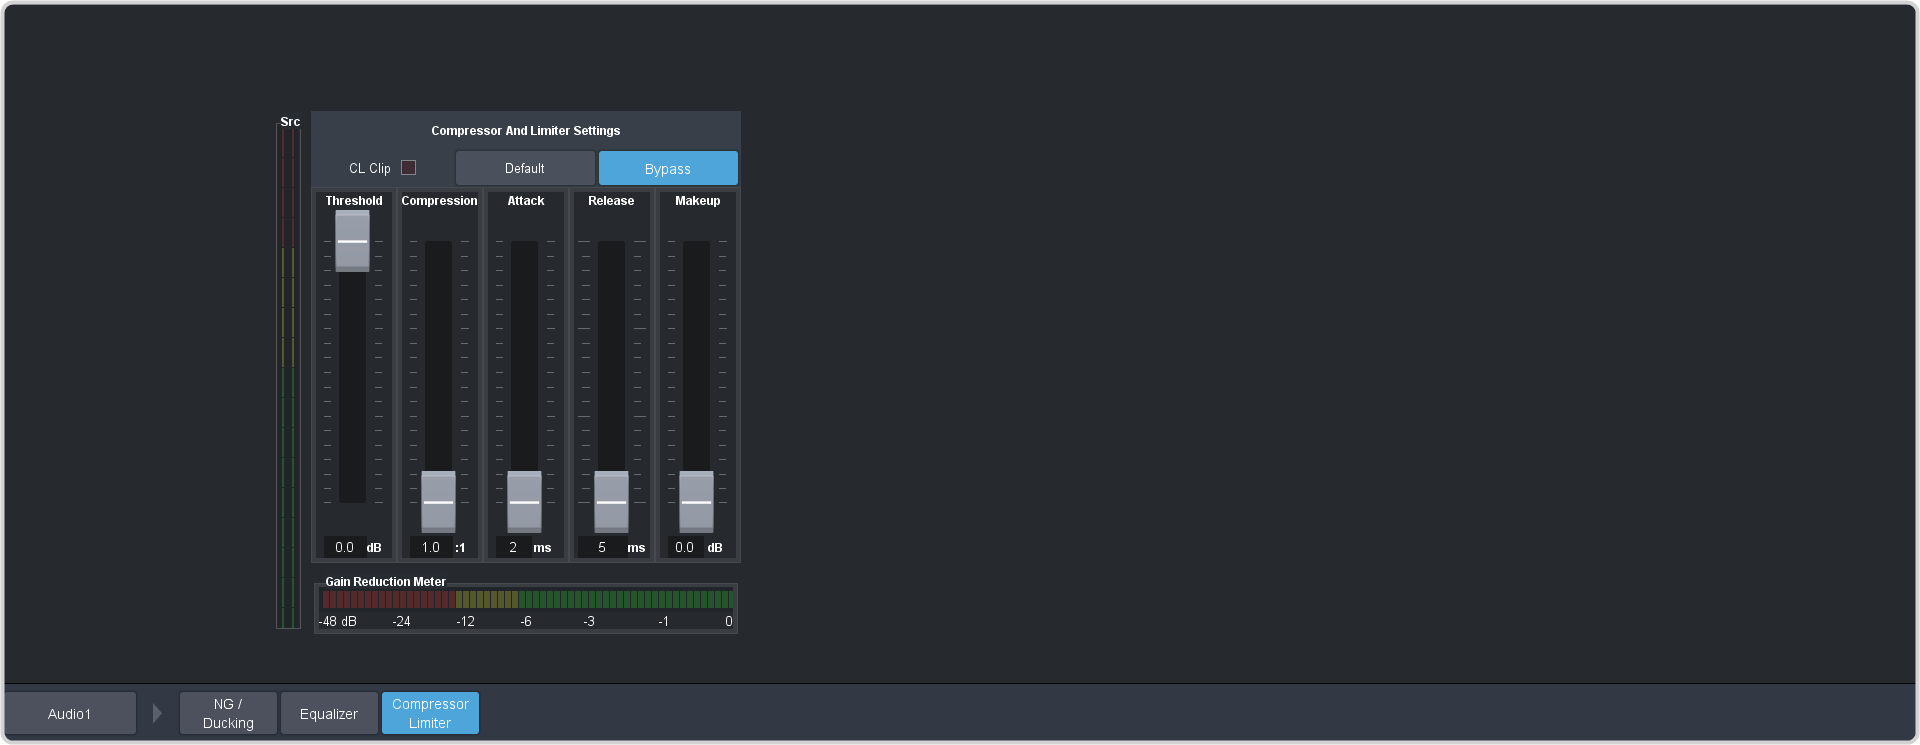

    Tip: The CL Clip indicator warns you if clipping is occurring in the Compressor stage for the selected audio source.
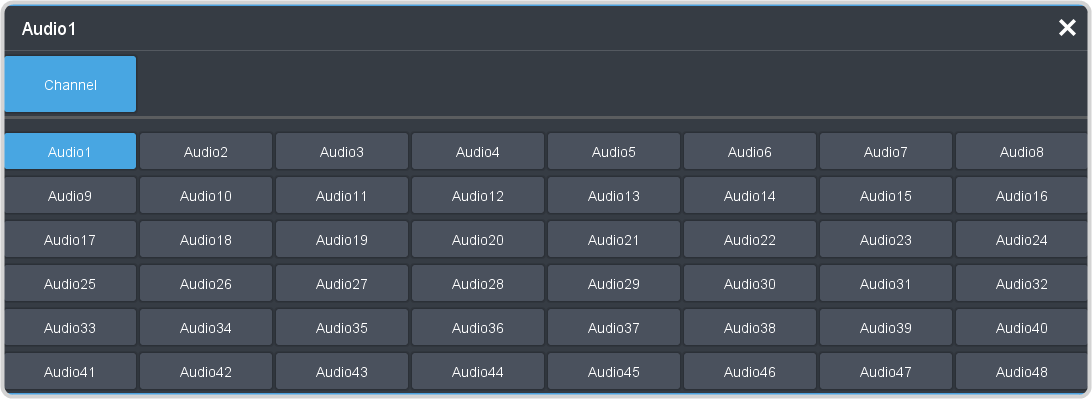
  2. Click the audio source button at the bottom left of the page and select the audio channel that you want to apply a compressor to.


    Tip: Click Default and click All Channels to default the compressor for all channels or Current Channel to default it for only the currently selected channel.
    Tip: Click Back to Mix to return to the mixer page.
  3. Click Bypass to turn bypass off and have the compressor applied to the selected audio channel.
  4. Set up the compressor as required.
    Parameter Description
    Threshold Select the level (dB) at which the compressor is applied.
    Compression Select the ratio for the amount of compression you want to apply. The higher the ratio the more compression is applied to lower the level. At infinity the audio level is limited to the threshold.
    Attack Select the amount of time (ms) you want to pass between the level surpassing the threshold and the full compression ratio being applied.
    Release Select the amount of time (ms) you want to pass between the level falling below the threshold and the compression ratio returning to 1:1 (no compression applied).
    Makeup Increase the gain (dB) of the audio after compression.
Tip: The Gain Reduction Meter at the bottom shows how much gain is being reduced by the compressor. The Src (Source) meter to the left shows the gain before the compressor is applied.