
To Create a Scene
-
Click Navigation Menu > Live Assist > UltraScene > Scene
X for the scene you want to use.

-
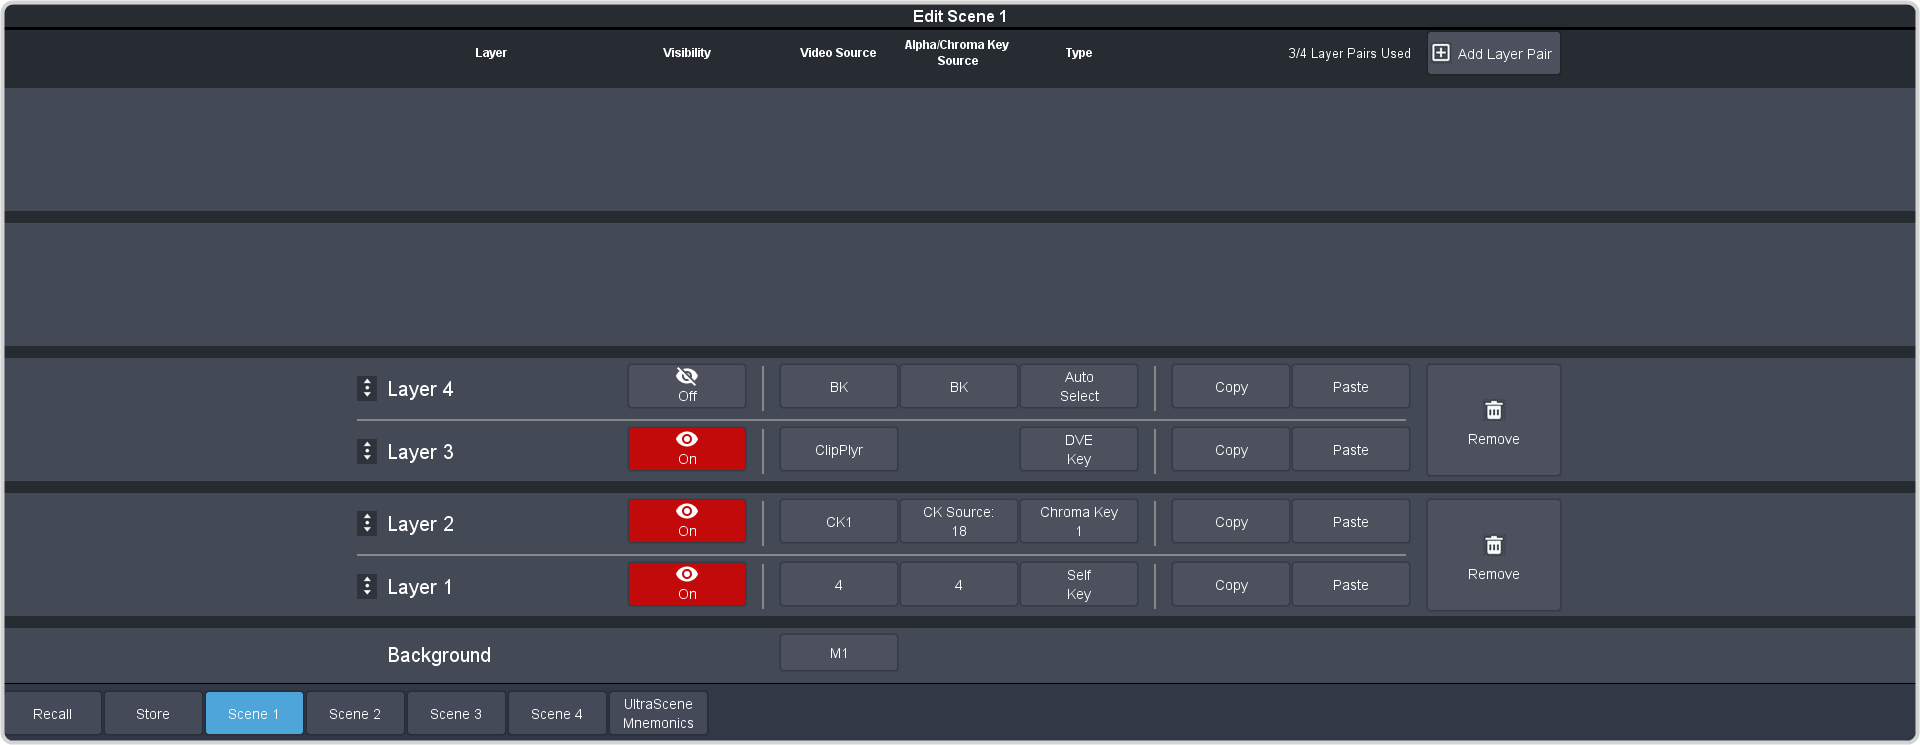
Click the Add Layer Pair button to add as many layer pairs as you need for your show.
Tip:If you only need an odd number of layers you will still need to add an even number of layers. For example, if you only need 3 layers, you will still need to add 2 layer pairs resulting in 4 layers.
-
Click the Video Source button for the layer you want to set up and select the source you want to use for the layer. If you want to use a chroma keyer, select
the CK you want to use and click Alpha/Chroma Key Source to select the video source you want to chroma key.

-
Click the Type button and select the type of keying you want to use for the layer. Layer types are set up in same way at key types. Refer to Keying for information on setting up different key types.

Tip:If PaneLINK is active, the 3-knob menu will jump to the menus for the layer you are setting up.