A DVE border or edge softness is applied to the edges of the DVE key and is manipulated as part of the key.
Note:
You can only apply a border to a DVE key. Fly Keys, such as chroma keys or auto select keys with DVE applied to them cannot have a border applied to them. Instead, the
selection is Edge Softness and is used to soften the edges of the key without any color.
Click Navigation Menu > Live Assist > MEs and select the ME and key that you want to set up.
Tip:
You can use the same procedure for a MiniME™ or Canvas.You can use the same procedure for a MiniME™.
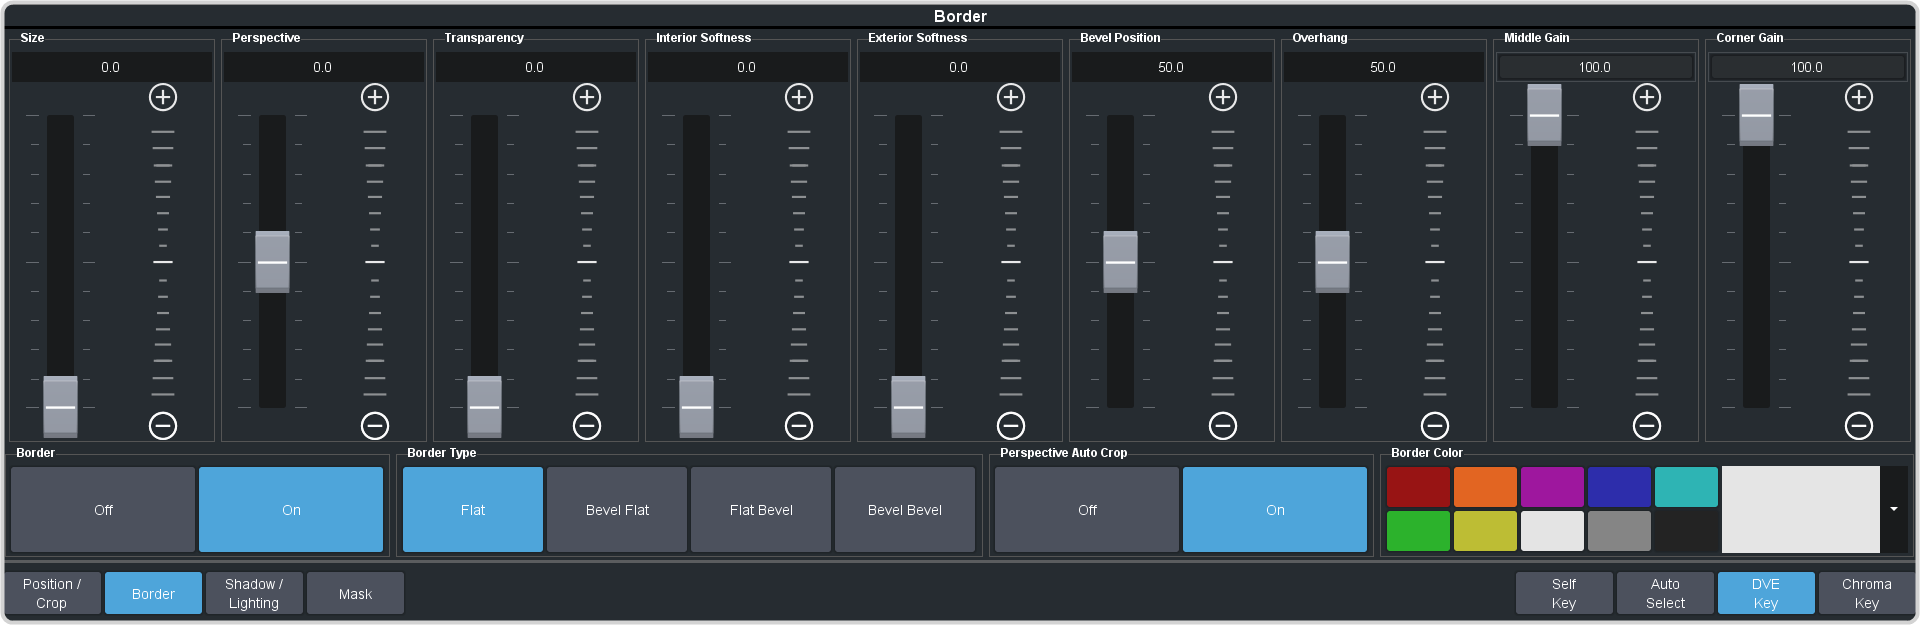
Click DVE > Border.
Note:
The 3D borders are not available when the switcher is operating in the SD 4 Key mode.
In the Border area, click On to apply the border to the key or Off to have it not visible. The border setting are
not changed when the border is turned off.
Tip:
To seamlessly apply a border with a custom control or memory, recall the border settings with the border turned off and then turn the border on with another CC event or
memory. Remember to insert a pause between the border settings and turning the border on to allow for the border settings to be applied.
In the Border Type area, select the type of border you want to apply.
Flat — border with no bevel appearance on the outside or inside of the border.
Bevel Flat — border that appears bevelled on the outside and flat on the inside.
Flat Bevel — border that appears flat on the outside and bevelled on the inside.
Bevel Bevel — border that appears bevelled on both the outside and inside.
Use the Size slider to adjust the size of the border.
Use the Perspective slider to adjust the viewing angle of the border. This gives the key the appearance of being rotated in 3D space. Use Border
Lighting to further enhance this look.
Tip:
Perspective is applied to the border of the key and not to the video inside the key. This can result in a black bar on the side of the key video. Apply a larger border
or manually crop the key to remove the bar. Use Perspective Auto Crop to automatically crop the key when perspective is applied.
Select a default or custom color for the border (borders only). The inner and outer border use the same color.
Default — click one of the preset colors.
Custom — click the arrow to the right of the Border Color area and use the Hue, Saturation, and
Lightness sliders to select your own color. Click OK to apply the color or Live to apply it in real-time.
Use the Transparency slider to adjust the transparency of the inner and outer border.
Use the Interior Softness and Exterior Softness sliders to adjust the softness of the inner and outer border.
Interior Softness — adjust the softness of the interior edge of the inner border.
Exterior Softness — adjust the softness of the exterior edge of the outer border.
Use the Bevel Position slider to adjust the transition point of the inner and outer border. This is the point where the inner and outer border meet.
Use the Overhang slider to adjust the position of the border relative to the edges of the key.
Tip:
At 50 the middle of the border is at the edge of the key. As you increase the overhang the border moves further to the outside of the key,
revealing more of the video in the key.
Use the Middle Gain and Corner Gain to adjust the brightness of the corners or center of the bevelled border (does not apply to flat
border).
Middle Gain — adjust the brightness of the center portions of the border. These are the sections of the border that are not in the corners.
Corner Gain — adjust the brightness of the corners of the border.