 Configuration icon.
Custom entities enable you to design Inception grids to store information that is particular to your organization. After you create a custom entity, you can specify the metadata to store in the entity by adding custom attributes to the entity.
1.Log in to your Inception Server as an Inception administrator.
For information about Inception Server log in, refer to the procedure To access the Inception Server Configuration window.
2.On the main toolbar, click the Configuration icon.
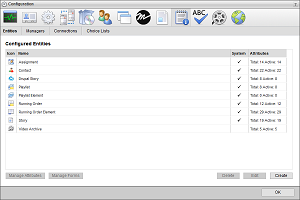
The Configuration window opens.
3.On the Configuration window toolbar, click the  Metadata icon.
The Metadata panel opens.
4.Click the Entities tab.
The Entities tab opens.
5.Click Create.
The Create Entity page opens.
6.In the Name box, enter the name to display for the custom entity in the  Create list of the Manager toolbar.
7.Select the Globally Searchable check box to include the information contained in the custom entity in global searches of Inception content.
The more entities that you include in global searches, the longer it takes Inception to report the results of a global search.
8.Use the Title Attribute list to select the attribute that contains the information to display as the entity title.
This list only displays the Single-Line text attributes defined for the entity. You can edit the Title Attribute after you define the attributes for your entity.
9.Click Next.
The next page opens and displays the Icon list for you to select an icon to identify your custom entity.
10.Use the Icon list to select an icon to identify your custom entity and display in the  Create list of the Manager toolbar.
If the icons in the list are not appropriate for your custom entity, do the following:
a.Use the Icon list to select Upload an Icon.
Inception displays a Browse button.
b.Click Browse.
The File Upload dialog box opens.
c.Use the File Upload dialog box to select the image file to use as the icon for your custom entity.
d.Click Open.
Inception adds the image contained in the selected image file to the Icon list as the Uploaded Icon option, and automatically selects the uploaded image as the icon for your custom entity. You can only upload one image to the Icon list at a time. Uploading another image to the Icon list replaces the current uploaded image with the new image.
11.Click Save.
Inception adds the new custom entity to the Configured Entities page. Inception automatically adds the ID, Modified, Modified By, Created, and Created By attributes to all custom entities. You can also add your own custom attributes to your new custom entity.
12.Complete your entity by defining attributes to associated with it, creating forms to manage it, and adding it to a Manager so that you can access it.
For More Information on...
•defining custom attributes for entities, refer to the sections Custom Attributes Planning and Create Custom Attributes.
•creating forms for entities, refer to the section Customize Input Forms.
•creating managers, refer to the section Create Managers.