
To Set A User Button
-
Click Navigation Menu > Personality > User Select and select the area you want to set up the user select buttons on. Not all control panels have the same types of modules.
- User Select — the assignable row of buttons at the top of each panel row.
- Flex Control 1/2 — the mnemonic buttons on the Flex Control of the TD 3/x3 and TD 4/x4.
- Positioner Flex Control — the mnemonic buttons on the Positioner module of the TD 3/x3 and TD 4/x4.
- Remote Flex Control 1/2/3 — the mnemonic button on the external SideShot-NG enclosure.
Note:The SideShot-NG modules are connected to the switcher through the TouchDrive control panels.Note:The menu only shows the user buttons that are available on your control panel.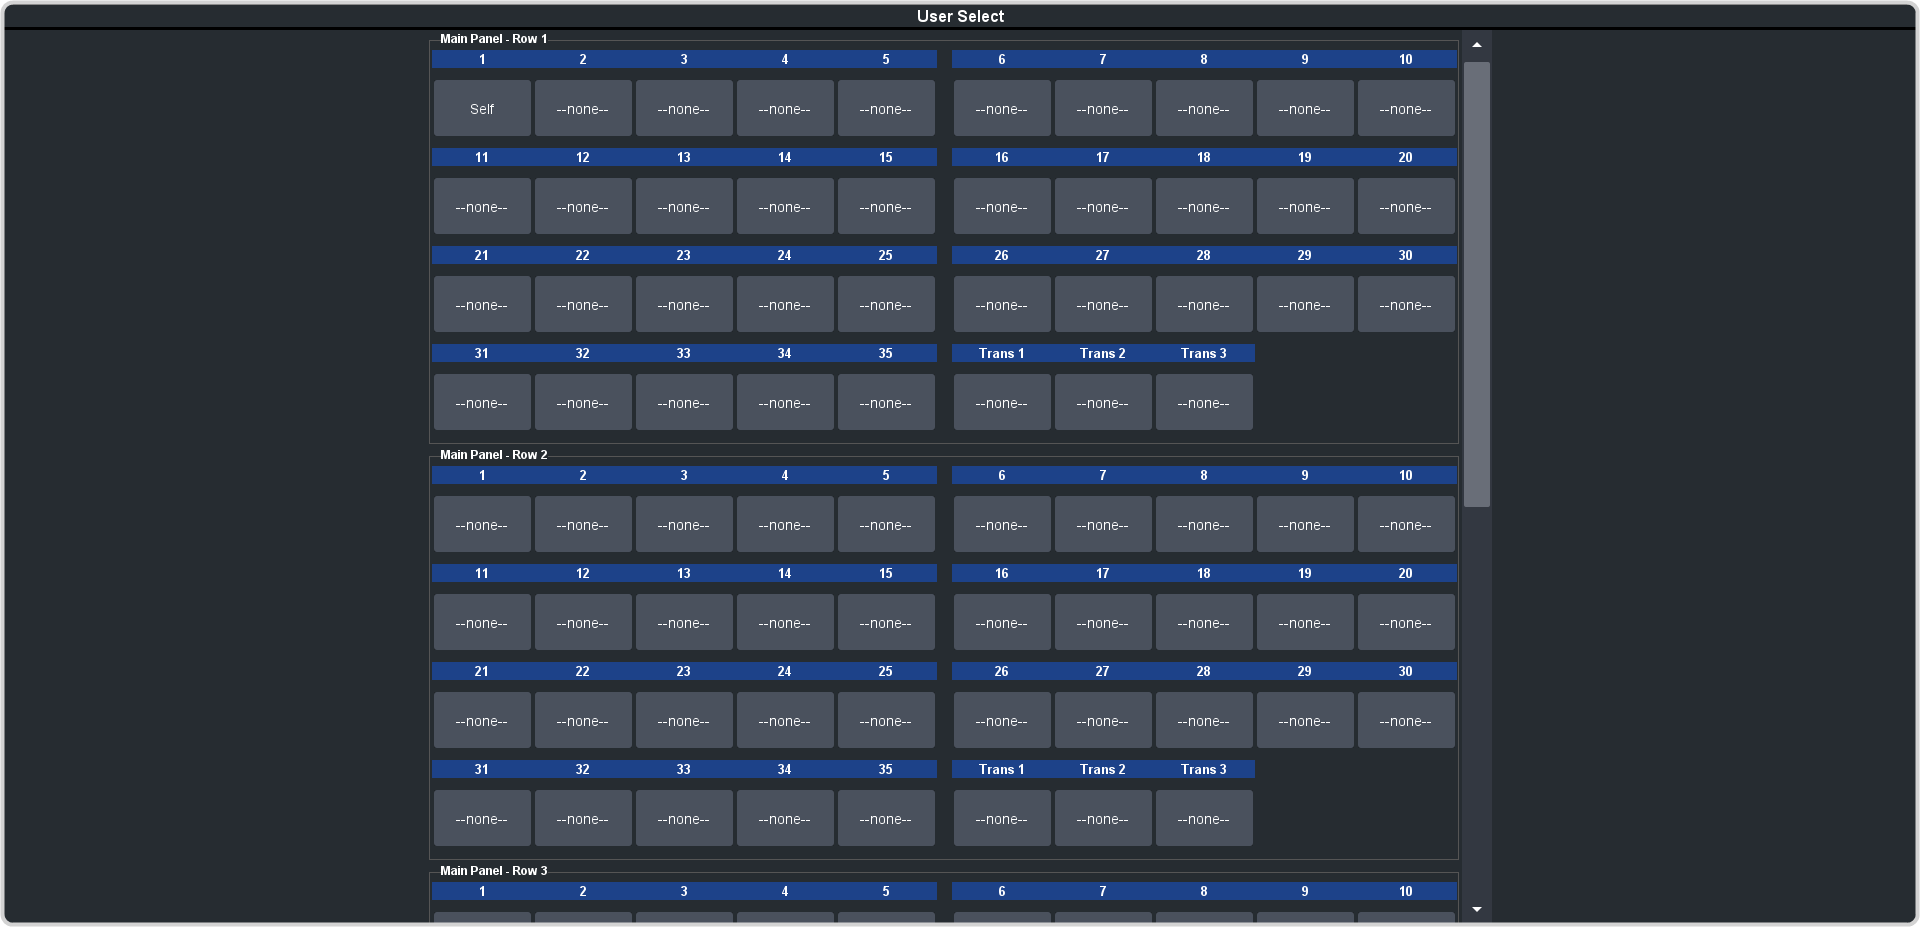
-
Click the user button that you want to assign a function to and select the function you want to assign to that button.
Tip:Each row on your control panel can have a separate set of user button assignment. These settings are tied to the row, and not the ME that is assigned to that row.Tip:The Trans buttons are located on the Transition area of the TouchDrive control panel.
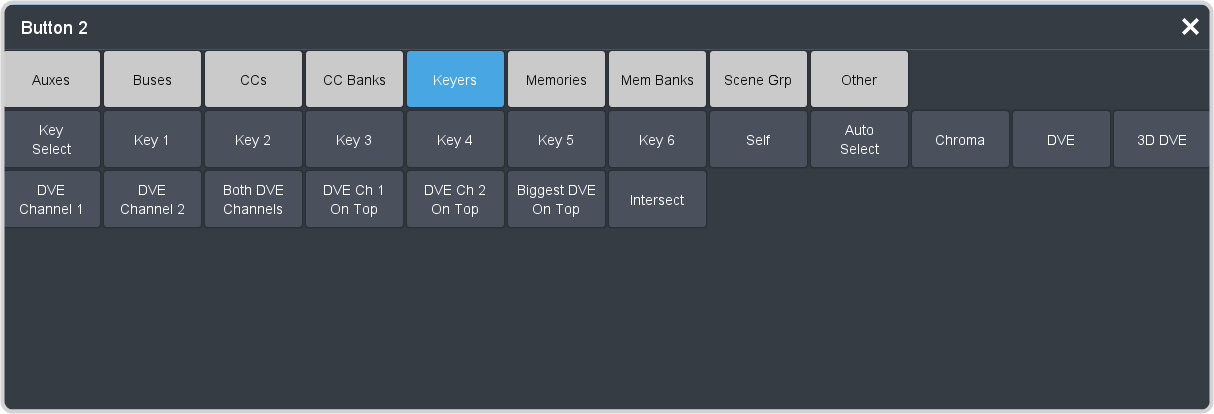
Note:The functions that are available on your switcher may differ depending on the options you have installed and how your switcher is configured.- Auxes — assign an aux bus to the selected button.
- Buses — assign an ME or MiniME™ layer to the selected button.
- CCs — assign a custom control to the selected button.
- CC Banks — assign a custom control bank selection to the selected button.
- Keyers — assign a keyer, key type, or DVE channel management to the selected button.
- Memories — assign a memory to the selected button.
- Mem Banks — assign a memory bank selection to the selected button.
- Scene Grp — assign a scene group selection to the selected button.
- Frame — assign a frame selection to the selected button.Note:Assignment of other frames to a control panel must be set up on the control panel.
- Frame Buses — assign a layer from a frame to the selected button.Note:The system does not know what resource are available on the other frames assigned to the control panel. Ensure that layer exists on the frame.
- Other — assign a special function to the selected button.Tip:The Attachments function allows you to view all the button on the control panel that have an additional function assigned to them. Press and hold the button to view the assignments.