
To Configure the Audio Router
The Audio Input Router tab allows you to set the audio channel that get recorded on the server and the Audio Output Router tab allows you to set which audio channels are played from the server.
-
Launch the Mira Config application.
You may be prompted to allow the program to make changes on the computer, click Yes.
-
Click the Audio Router tab.
Tip: If the audio routing on an input or output has been changed, a dot is shown next to the name on the tab.
-
Click the Audio Input Router tab.
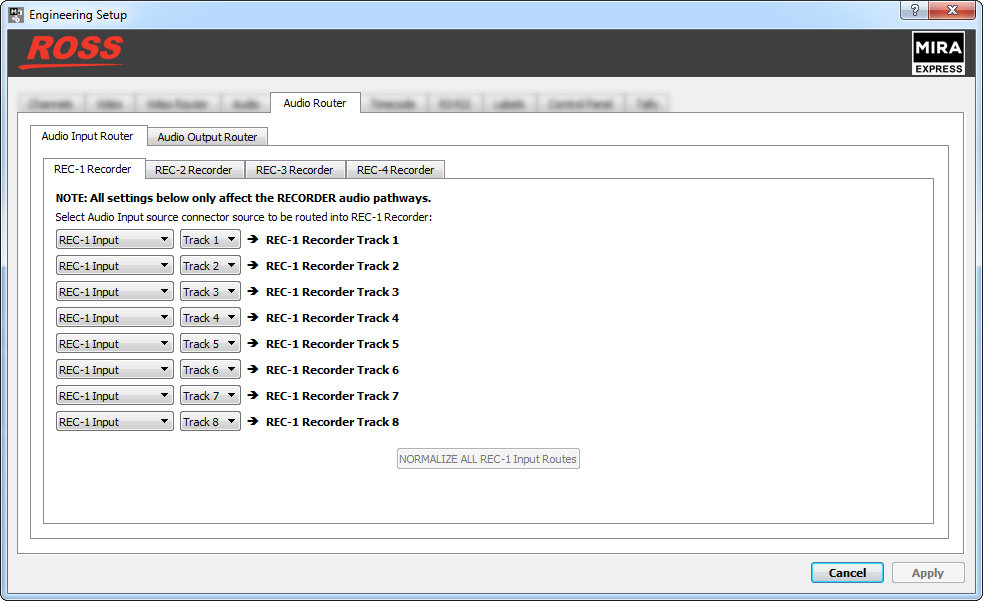
- Click on the tab for the record channel that you want to route audio channel to.
- In the REC-X Recorder Track 1 row, select the source channel input (REC-X Input) and the audio track (Track #) from the input that you want to record on track 1 of the clip.
-
Repeat this step for all of the remaining recorder channels.
Tip: Click NORMANIZE ALL REC-X Input Routes to reset all the input audio tracks to their default recorder track assignment.
-
Click the Audio Output Router tab.
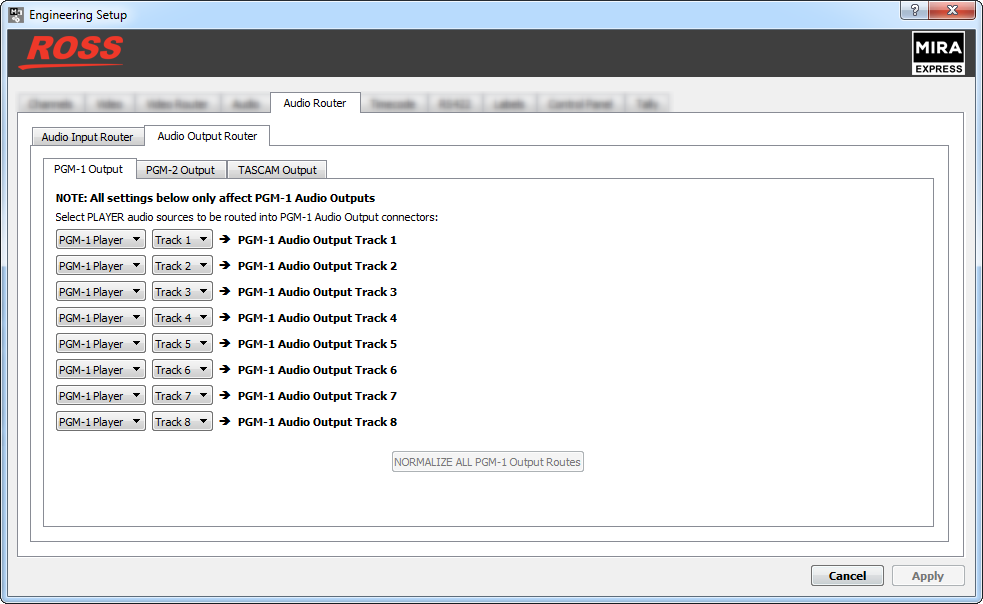
- Click on the tab for the channel output into which you want to route audio channels.
- In the PGM-X Audio Output Track 1 row, select the source channel player (PGM-X Player) and the audio track (Track #) from the player that you want to route to track 1 of the output video stream.
-
Repeat this step for all of the remaining output audio channels you want to assign a source to.
Tip: Click NORMANIZE ALL PGM-X Output Routes to reset all the player audio track to their default output track assignment.
- Click Apply.