 Configuration icon. If the Configuration icon is not visible, you are not an administrator and cannot configure the server.
Custom entities enable you to design Streamline grids to store information that is particular to your organization. After you create a custom entity, you can specify the metadata to store in the entity by adding custom attributes to the entity.
1.Log in to your Streamline Server as an administrator.
2.On the main toolbar, click the Configuration icon. If the Configuration icon is not visible, you are not an administrator and cannot configure the server.
The Configuration window opens.
3.On the Configuration window toolbar, click the  Metadata icon.
The Metadata panel opens.
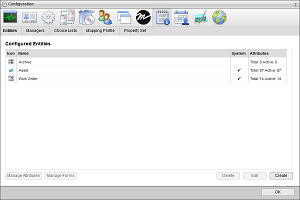
4.Click the Entities tab.
The Entities tab opens.
5.Click Create.
The Create Entity page opens.
6.In the Name box, enter the name to display for the custom entity in the  Custom Entities list on the main toolbar.
7.In the Grid Name box, enter the grid name to display in the title bar of the Streamline grid associated with the entity.
8.Select the Paged Grid check box if you want to use pages to display the information contained in the custom entity. When you select this option, Streamline adds paging controls to the bottom of the Streamline grid associated with the entity.
9.Select the Manual Sort check box if you want users to manually sort the information contained in the custom entity by drag and drop. Selecting this option disables column sorting.
10.Select the Globally Searchable check box to include the information contained in the custom entity in global searches of Streamline content. The more entities that you include in global searches, the longer it takes Streamline to report the results of a global search.
11.Click Next.
The next page opens and displays the Icon list for you to select an icon to identify your custom entity.
12.Use the Icon list to select an icon to identify your custom entity and display in the title bar of the Streamline grid associated with the entity.
If the icons in the list are not appropriate for your custom entity, do the following:
a.Use the Icon list to select Upload an Icon.
Streamline displays a Browse button.
b.Click Browse.
The File Upload dialog box opens.
c.Use the File Upload dialog box to select the image file to use as the icon for your custom entity.
d.Click Open.
Streamline adds the image contained in the selected image file to the Icon list as the Uploaded Icon option, and automatically selects the uploaded image as the icon for your custom entity. You can only upload one image to the Icon list at a time. Uploading another image to the Icon list replaces the current uploaded image with the new image.
13.Click Save.
Streamline adds the new custom entity to the Configured Entities page.
14.To view the new custom entity, select it from the  Custom list on the main toolbar.
Streamline automatically adds the ID, Modified, Modified By, Created, and Created By attributes to all custom entities. You can also add your own custom attributes to your new custom entity.
For More Information on...
•creating custom attributes for entities, refer to the sections Plan Custom Attributes and Create Custom Attributes.