 Perspectives icon.
To create a new perspective for your own use
1.Log in to your Inception Server as an Inception administrator.
For information about Inception Server log in, refer to the procedure To access the Inception Server Configuration window.
2.Open one of each type of panel you want to include in the new perspective.
3.Rearrange the panels to the positions you want them to occupy in the perspective.
For more information about repositioning panels, refer to the Inception User Guide.
4.In Running Order, Playlist, and Social Polls panels, display the panel columns to include in the perspective.
For more information about displaying panel columns, refer to the Inception User Guide.
5.On the main toolbar, point to the Perspectives icon.
A list of saved perspectives opens.
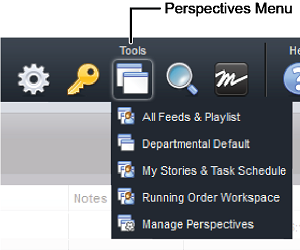
6.In the list, click Manage Perspectives.
The Configuration window opens, showing the Perspectives tab.
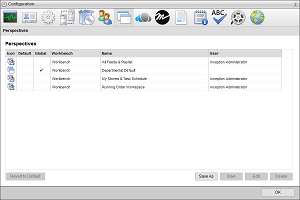
7.Click Save As.
The Save Perspective As page opens.
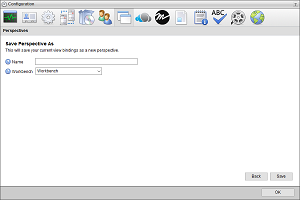
8.In the Name box, enter a name for the new perspective.
9.Use the Workbench list to select the environment in which to use the new perspective. The available options are as follows:
•Workbench — use the perspective in Inception.
•Plugin — use the perspective in the Inception plugin.
10.Click Save.
The Save Perspective As page closes and Inception adds the new perspective to the Perspectives list.
11.Click OK to close the Configuration window.