 Accounts and Feeds icon.
TownNews Account Configuration
TownNews is a free content management system which is widely used to produce online and print products. Follow the procedures in this section to create or edit an account to publish content to TownNews.
You must have a valid TownNews account before you can configure a Frankly publishing account for Inception.
1.On the Configuration window toolbar, click the Accounts and Feeds icon.
The Accounts and Feeds panel opens.
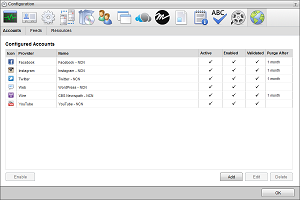
2.Click the Accounts tab.
The Accounts tab opens.
3.Click Add.
The Create New Account settings open.
4.Use the Account list to select TownNews.
5.Click Next.
The Create TownNews Publishing Account settings open.
6.In the Name box, enter a unique name for the TownNews account.
TownNews account names must be unique on an Inception Server.
7.Click Next.
The TownNews connection settings open.
8.In the API Key box, enter your TownNews account API key.
9.In the API Secret box, enter your TownNews account API secret.
10.In the Website URL box, enter the URL of your TownNews web site, staring with http://.
11.Click Save.
Inception adds the new TownNews account to the list of accounts.
By default, only users with roles that include permission to manage ALL TownNews accounts can publish content using the new account. You can assign account management permissions to other user roles.
1.On the Configuration window toolbar, click the  Accounts and Feeds icon.
The Accounts and Feeds panel opens.
2.Click the Accounts tab.
The Accounts tab opens showing the list of available accounts.
3.In the Configured Accounts list, select the TownNews account to edit.
4.Click Edit.
The Edit TownNews Publishing Account settings open.
5.Edit account settings as required.
6.Click Next and Back to access the available account settings.
7.After completing the required account setting edits, click Save on the last page of account settings.
For More Information on...
•account management permissions, refer to the section New Account Role Permissions.
•enabling or disabling accounts, refer to the section Enable or Disable an Account
•deleting accounts, refer to the section Delete an Account