 Custom Managers list on the main toolbar. A manager can contain one or more custom entities. From a manger users can create and manage custom entity content.
After you create your custom entities and forms you must add them to a manager so that Inception users can access them from the  Custom Managers list on the main toolbar. A manager can contain one or more custom entities. From a manger users can create and manage custom entity content.
To associate custom entities with a manager
1.On the Configuration window toolbar, click the  Metadata icon.
The Metadata panel opens.
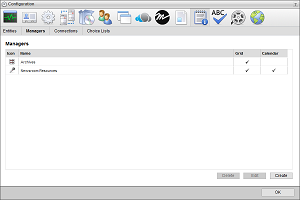
2.Click the Managers tab.
The Managers tab opens.

3.Click Create.
The Create Manager page opens.
4.In the Name box, enter the name to display for the manager in the  Custom Managers list on the main toolbar and in the title bar of the Manager panel.
5.Use the Icon list to select an icon to identify the manager and display in the title bar of the Inception grid associated with the manager.
If the icons in the list are not appropriate for your manager, do the following:
a.Use the Icon list to select Upload an Icon.
Inception displays a Browse button.
b.Click Browse.
The File Upload dialog box opens.
c.Use the File Upload dialog box to select the image file to use as the icon for your manager.
d.Click Open.
Inception adds the image contained in the selected image file to the Icon list as the Uploaded Icon option, and automatically selects the uploaded image as the icon for your manager. You can only upload one image to the Icon list at a time. Uploading another image to the Icon list replaces the current uploaded image with the new image.
6.Select the Show in Main Toolbar check box to place the icon used to access the Manager panel in the main toolbar Custom section instead of in the Custom list. Clear this check box to place the Manager panel icon in the Custom list.
When you place all Manager icons in the main toolbar Custom section Inception removes the Custom list icon from the main toolbar.
7.Click Next.
The Entity Selection page opens.
Inception adds a new blank entity to the Entity Association List box.
![]()
To delete an entity from the Entity Association List box, click the  icon in the upper right corner of the entity to delete.
9.Use the Entity list to select the entity to add to the manager.
Inception adds the Create Form and Edit Form lists to the entity.
10.Use the Create Form list to select the form that Inception users use to create new custom entity records. This list only displays the forms created for the custom entity selected in the Entity list. Select None to use the Manager grid to create records.
11.Use the Edit Form list to select the form that Inception users use to edit custom entity records. This list only displays the forms created for the custom entity selected in the Entity list. Select None to use the Manager grid to edit records.
12.When you selected an Edit Form, use the Open In list to set the location to open the edit form. The available options are as follows:
•Dialog — open the selected form in a pop-up dialog box.
•View — open the selected form in an Editor panel.
13.To add another entity to the manager, repeat step 8 to step 12.
14.Click Next.
The Displays page opens.
15.Select the Enable Grid check box to enable the manager and add it to the  Custom Managers list on the main toolbar. Clear this check box to remove the Grid view from the panel.
This check box is only available after selecting the Enable Calendar check box.
16.Select the Manual Sort check box to manually sort entity information in the manager by drag and drop. Clear this check box to enable automatic column sorting for the manager.
This check box is only available after selecting the Enable Grid check box.
17.Select the Paged Grid check box to use pages to display the information contained in the custom entities associated with the manager. When you select this option, Inception adds paging controls to the bottom of the Manager panel. Clear this check box to scroll the information contained in the manager.
This check box is only available after selecting the Enable Grid check box
18.Select the Enable Calendar check box to enable the Calendar view for the Manager panel. Clear this check box to remove the Calendar view from the panel.
This check box is only available after selecting the Enable Grid check box.
19.Use each Entity Type list to select the attribute that contains the date used by the Calendar view to display instances of the associated entity type. The Enable Calendar section contains an Entity Type list for each entity associated with the manager.
Entity Type lists are only available after selecting the Enable Calendar check box.
20.Click Save.
Inception adds the new manager to the Managers page and to the  Custom Managers list on the main toolbar.