 Configuration icon.
Facebook Account Configuration
Facebook is a social utility that connects people with friends and others who work, study, and live around them. Follow the procedures in this section to create or edit an account to publish content to Facebook.
1.Log in to your Inception Server as an Inception administrator.
2.On the main toolbar, click the Configuration icon.
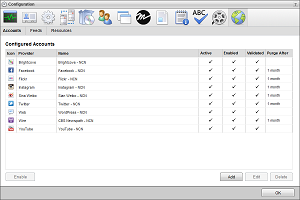
The Configuration window opens.
3.On the Configuration window toolbar, click the  Accounts and Feeds icon.
The Accounts and Feeds panel opens.
4.Click the Accounts tab.
The Accounts tab opens.
5.Click Add.
The Create New Account settings open.
6.Use the Account list to select Facebook.
7.Click Next.
The Create Facebook Account settings open.
8.In the Name box, enter a unique name for the Facebook account.
Facebook account names must be unique on an Inception Server.
9.In the Purge After box, enter the amount of time after which to delete old content from the associated Facebook managed feed.
The purge after time must be greater than or equal to 15 minutes and less than or equal to 180 days.
10.Use the list to the right of the Purge After box to select the time unit (Days, Hours, or Minutes) for the time entered in the Purge After box.
11.Click Next.
The authorize your Facebook account settings open.
12.Click Authorize Your Facebook Account.
The Facebook Login web page opens in a new window.
If you have previously authorized your Facebook account with the Inception Facebook App, proceed to step 17.
13.Log in to your Facebook account.
The Ross Inception Receive dialog box opens.

14.Click Okay.
The Ross Inception Facebook Post dialog box opens.
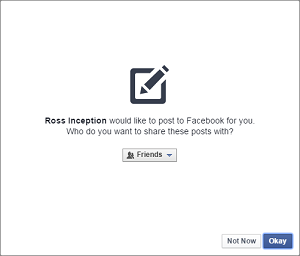
15.Use the Friends list to select Public.
16.Click Okay.
The Ross Inception Facebook Manage Pages dialog box opens.

The Facebook Authentication for Inception Successful web page opens and displays an Access Code for the Inception Facebook App.
18.Copy the Access Code for the Inception Facebook App.
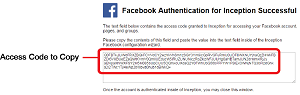
19.In Inception, paste the copied content into the Access Code box.
20.Click Save.
The Edit Facebook Account settings open.
21.Use the Account Type list to select the Facebook Page or Facebook Group to publish content.
When you do not select a specific page or group, Inception publishes stories to the Facebook News feed of the authenticated user.
22.Click Save.
Inception adds the new Facebook account to the list of accounts and creates an identically-named managed feed.
By default, only users with roles that include permission to manage ALL Facebook accounts can publish content using the new account. You can assign account management permissions to other user roles.
1.On the Configuration window toolbar, click the  Accounts and Feeds icon.
The Accounts and Feeds panel opens.
2.Click the Accounts tab.
The Accounts tab opens showing the list of available accounts.
3.In the Configured Accounts list, select the Facebook account to edit.
4.Click Edit.
The Edit Facebook Account settings open.
5.Edit account settings as required.
6.To edit grayed out settings, click Deauthorize.
Click Next and Back to access the available account settings.
You cannot use deauthorized Facebook accounts until you re-establish authentication credentials.
7.After completing the required account setting edits, click Save on the last page of account settings.
For More Information on...
•account management permissions, refer to the section New Account Role Permissions.
•enabling or disabling accounts, refer to the section Enable or Disable an Account
•deleting accounts, refer to the section Delete an Account