 Configuration icon.
Brightcove Account Configuration
Brightcove is a leading global provider of cloud content services and provides a family of products you can use to publish and distribute the digital media. Follow the procedures in this section to create or edit an account to publish content to Brightcove.
To create a Brightcove account
1.Log in to your Inception Server as an Inception administrator.
For information about Inception Server log in, refer to the procedure To access the Inception Server Configuration window.
2.On the main toolbar, click the Configuration icon.
The Configuration window opens.
3.On the Configuration window toolbar, click the  Accounts and Feeds icon.
The Accounts and Feeds panel opens.
4.Click the Accounts tab.
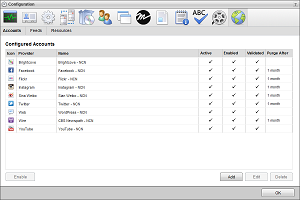
The Accounts tab opens.
5.Click Add.
The Create New Account settings open.
6.Use the Account list to select Brightcove.
7.Click Next.
The Create Brightcove Account settings open.
8.In the Name box, enter a unique name for the Brightcove account.
Brightcove account names must be unique on an Inception Server.
9.Select the Transcode to Multiple Resolutions check box to create multiple renditions of a media file using varying encoding rates and dimensions. Clear this check box to create a single VP6 rendition of a media file using the standard encoding rate and dimensions.
10.Select the Preserve Source Rendition check box to retain the H.264 source as a rendition. Along with selecting this check box, you must also do the following to preserve source rendition:
•Select the Transcode to Multiple Resolutions check box.
•Select a source media file that uses H.264 encoding.
Inception creates multiple VP6 renditions of the source media file and retains the H.264 source media file as an additional rendition.
11.Select the Disable H.264 Processing check box to not transcode H.264 media files.
This check box is not available after selecting the Transcode to Multiple Resolutions check box.
12.Click Next.
The Brightcove account settings open.
13.Click the Brightcove Video Cloud portal link.
The Brightcove sign in web page opens.
14.Sign in to your Brightcove Pro or Brightcove Enterprise account.
15.In Brightcove, navigate to Account Settings, API Management.
16.In Brightcove, generate API keys for read and write access.
We recommend you generate a unique set of read/write tokens for each Brightcove account you create.
17.In Brightcove, click Copy in the Manage column to copy the Read token data to the clipboard.
18.In Inception, paste the copied read token into the Read Token box.
19.In Brightcove, click Copy in the Manage column to copy the Write token data to the clipboard.
20.In Inception, paste the copied read token into the Write Token box.
21.Click Save.
Inception adds the new Brightcove account to the list of available accounts.
By default, only users with roles that include permission to manage ALL Brightcove accounts can publish content using the new account. You can assign account management permissions to other user roles.
1.On the Configuration window toolbar, click the  Accounts and Feeds icon.
The Accounts and Feeds panel opens.
2.Click the Accounts tab.
The Accounts tab opens showing the list of available accounts.
3.In the Configured Accounts list, select the Brightcove account to edit.
4.Click Edit.
The Edit Brightcove Account settings open.
5.Edit accounts settings as required.
6.Click Next and Back to access the available accounts settings.
7.After completing the required account setting edits, click Save on the last page of account settings.
For More Information on...
•account management permissions, refer to the section New Account Role Permissions.
•enabling or disabling accounts, refer to the section Enable or Disable an Account
•deleting accounts, refer to the section Delete an Account