 Playlists icon.
1.From the main toolbar, click or tap the Playlists icon.
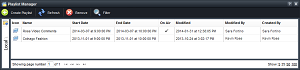
The Playlist Manager panel opens.
2.To filter the Playlists table, complete the following steps:
a.Click or tap the  Filter icon in the Playlist Manager toolbar.
The Filter box opens below the toolbar.
b.In the Filter box, enter a portion of the name of the playlist you are looking to open.
You do not need to enter the start of a playlist name, just any portion of the name filters the Playlists table. The Playlists table automatically updates to display only the playlists with names that contain the text entered in the Filter box.
c.To close the Filters box, click or tap the  Filter icon.
Closing the Filters box clears the entered filter and displays all the available playlists in the Playlists table.
3.In the Playlists table, double-click or double-tap the playlist to open.
The selected playlist opens in a Playlist panel. You can have multiple playlists open at the same time. To switch to a different playlist, click its playlist tab.

For descriptions of the columns in the Playlist table, refer to the Playlist Table section in the Playlist panel Online Help topic.
4.To change the columns displayed in the Playlist panel, complete the following steps:
a.In the Playlist panel, right-click the title of any table column.
The Columns list opens.

b.Select Playlist columns as follows:
•To include a column, select the check box to the left of the column name.
•To remove a column, clear the check box to the left of the column name.
c.Select the Force fit columns check box to automatically resize column widths to the table content.
d.Click Close.
e.Click and drag columns to reposition columns in the Playlist table.
f.Click and drag column dividers to manually resize the width of individual columns.
For More Information on...
•creating items, refer to the section Create Content Items in a Playlist.
•adding items from a Feed Viewer, refer to the section Add Content Items to a Playlist.
•deleting items, refer to the section Remove Selected Playlist Items from a Playlist.