 Configuration icon.
 Inception MOS Device for Streamline
Inception NCS uses MOS to enable journalists to see, use, and control your Streamline Server inside of a Broadcast story. Journalists use the Streamline Server web plugin to insert and control assets from you Streamline Server in a Broadcast story.
To add a Streamline Server MOS device to your Inception Server
1.Log in to your Inception Server as an administrator.
2.On the main toolbar, click the Configuration icon.
The Configuration window opens.
3.On the Configuration window toolbar, click the  MOS icon.
The MOS panel opens.
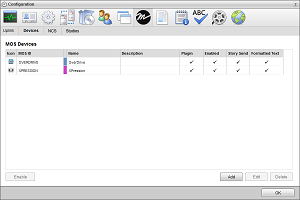
4.Click the Devices tab. If the Devices tab is not visible, you do not have an NCS license for your Inception Server and you cannot add MOS devices to the server.
The Devices tab opens.
5.Click Add.
The Create MOS Device page opens and displays the Device Settings section for the new MOS device.
6.Use the Device list to select Ross Streamline.
7.In the MOS ID box, enter the MOS ID of your Streamline Server.
8.In the MOS ID Mask box, enter a pattern of characters and the * wild card to match the MOS ID of one or more MOS devices of the same type in different locations. The * wild card matches zero or more characters in a MOS ID. Leave this box blank for devices that do not support MOS redirection.
Profile 6 of the MOS Protocol recommends using the following naming convention for MOS IDs for MOS redirection:
<family>.<machine>.<location>.<enterprise>.mos
MOS redirection example,
|
MOS Device 1 |
MOS Device 2 |
|---|---|
|
•MOS ID: Ross.CG.Ottawa.CBC.mos •MOS ID Mask: Ross.CG.*.CBC.mos |
•MOS ID: Ross.CMS.Ottawa.CBC.mos •MOS ID Mask: none |
|
•The Device 1 MOS plugin opens for MOS objects with the MOS ID Ross.CG.Ott.CBC.mos. •The Device 1 MOS plugin opens for MOS objects with the MOS ID Ross.CG.Van.CBC.mos. •The Device 2 MOS plugin opens for MOS objects with the MOS ID Ross.CMS.Ott.CBC.mos. •A MOS plugin does not open for MOS objects with the MOS ID Ross.CMS.Van.CBC.mos. |
|
9.In the Host box, enter the hostname or IP address of your Streamline Server.
10.Use the MOS Version list to select 2.8.4.
11.In the Name box, enter a name for your Streamline Server MOS device.
12.In the Description, enter a description for your Streamline Server MOS device.
13.Click Next.
The next page opens and displays the MOS Plugin, Web Plugin, and the Advanced Options sections for your Streamline Server MOS device.
14.In the Web Plugin section, enter the URL with which to access the Streamline Server MOS device web plugin in the URL box.
15.Select the Use Web Proxy check box to enable Inception to attempt to proxy the base HTML5 plugin for your Streamline MOS device. This setting can enable drag and drop for certain web browsers that do not support drag and drop.
16.Select the Use Single Sign-On check box to enable users with matching logins on Inception and MOS device systems to automatically log in to MOS device when they use the MOS device web plugin with Inception.
17.Click Next.
The next page opens and displays the Appearance and the MOS Settings sections for your Streamline Server MOS device.
18.In the MOS Settings section, select the Enable Story Send check box to send story text and MOS items in a Broadcast story to your Streamline Server MOS device.
19.Select the Send Formatted Text check box to include HTML markup with story text sent to your Streamline Server MOS device.
20.Select the Enable Placeholders check box to enable users to add placeholders to Broadcast stories for MOS objects that do not yet exist on your Streamline Server MOS device.
Inception exchanges the placeholder with the requested MOS object when the MOS object is created on your Streamline Server MOS device.
21.Select the Require Item Status check box for MOS devices that send RO Element Status messages to display the status of your Streamline Server MOS device in the MOS Status and MOS Device columns of the table in the Running Order panel.
22.Click Save.
Inception adds your Streamline Server MOS device to the MOS Devices list.