Inception enables you to create Frankly stories from the following panels:
•Running Order — while working with a running order in the Running Order panel you can add a new Frankly story directly to the open running order.
•Story Browser — when you do not want to immediately add a new Frankly story to a running order, you can create your new Frankly story from your Story Browser panel. You can add your Frankly story to a running order at any time.
•Story Editor — while editing a story in the Story Editor panel, you can use the content of the current story to create a new Frankly story. When you create a Frankly story from an existing Inception story, Inception produces a story family that includes the original and new story. All new stories created in such a manner inherit the Slug and the content of the original.
•Assignment — while working on an assignment in the Assignment Editor panel, you can create new Frankly story for the assignment. When you create a story from an assignment, Inception automatically makes the Slug for new stories the same as the assignment Slug. Changing the Slug of a new story does not change the assignment Slug.
1.Open the Story Editor panel to create a new Frankly story. For information about opening the Story Editor from a specific panel to create a new story, refer to the following procedures:
•Running Order — To create a story from the Running Order Panel.
•Story Browser — To create a story from the Story Browser panel.
•Story Editor — To create a story from the Story Editor Panel.
•Assignment — To create a story from the Assignment Editor Panel.
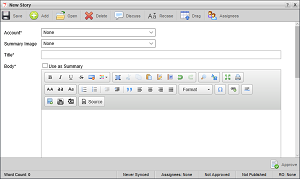
The Story Editor panel opens for you to create a Frankly story.
2.In the Account list, click or tap the Frankly account to which you want to publish the story.
The Story Editor view refreshes to show all available options for Frankly stories.
3.Use the Summary Image list to select the media source that contains the image to represent the contents, mood, or theme of the story.
4.Use the Media Source list to select the media source that contains the summary image for the story.
The available types of media sources are as follows:
•Upload — previously-uploaded media files. You can also upload new media files to an Upload media source.
•Directory — media files held in a directory share.
•MOS — media files store on MOS devices connected to the Inception Server.
•QuickTurn — video segments that are automatically created by the Ross Video OverDrive QuickTurn application from QuickTurn tagged shots in an OverDrive rundown.
•Streamline — media files stored in a Ross Video Streamline asset management system.
5.Use the selected media source to select a summary image for the story.
Upload Media Source: Upload a New File
a.To the right of the Upload a File, click Browse or tap Choose File. If neither of the buttons are not visible, click or tap the  Upload A File icon to show appropriate button.
b.Upload a media file to the selected media source as follows:
•On a desktop computer, do the following:
›Browse to the media file to upload.
›Select the media file.
›Click Open.
•On a mobile device, upload an existing media file as follows:
›Tap Photo Library.
›Browse to the media file to upload.
›Select the media file.
›Tap Use.
•On a mobile device, record and upload a new video file as follows:
›Tap Take Video.
›Record a new video.
›Tap Use Video.
The uploaded media file is also selected as the media file to include with the story.
c.Go to step 6.
Upload Media Source: Existing File
a.Use the File list to select the media file to include with the story. If the File list is not visible, click or tap the  View Uploaded Files icon to show the list.
b.Go to step 6.
Directory Media Source
a.Use one of the following methods to select the media file to include with the story:
•Click or tap the  Browse icon to use the File list to select a media file.
•Click or tap the  Filename icon to use the File list to enter the name of a media file.
b.Go to step 6.
MOS Media Source
a.Open the MOS Objects panel or MOS Favorites panel.
b.In the MOS Objects panel or MOS Favorites panel, locate the MOS object that contains the media file to include with the story.
c.Drag the icon of the MOS object that you want to include with the story from the MOS Objects panel or MOS Favorites panel to the Asset box in the Story Editor panel, then release the MOS object.
d.Go to step 6.
QuickTurn Media Source
a.Use the Segment list to select the QuickTurn segment video file that you want to include with the story.
b.Go to step 6.
Streamline Media Source
a.Drag the asset that contains the media file that you want to include in the story from the MOS Objects panel, the Streamline Plugin panel, or Streamline to the Asset box.
If you dragged the wrong asset into the Asset box, click or tap the  Remove icon to remove the asset.
b.Go to step 6.
6.If you are on a desktop computer, you can preview the selected image by clicking the  Preview icon. Previews are not available on mobile devices.
The image opens in the Video Player panel.
7.In the Title box, enter a title for the story.
8.In the Body box, enter or edit the body text for the story.
The Word Count field at the bottom of the Story Editor indicates how many words the story contains.
The Body box includes many popular text formatting tools to help you define the visual appearance of the story. The Text Formatting toolbar contains the following tools:
|
Tool |
Description |
|---|---|
|
|
Bold — click or tap this icon to make the selected text bold. |
|
|
Italic — click or tap this icon to italicize the selected text. |
|
|
Underline — click or tap this icon to underline the selected text. |
|
|
Strike-through — click or tap this icon to draw a line through the middle of the selected text. |
|
|
Remove Format — click or tap this icon to remove Bold, Italic, Underline, Strike-through, and Text Color formatting from the selected text. |
|
|
Text Color — click or tap this icon to change the color of the selected text. Select Automatic to use the default text color. Select More Colors to open the Select color dialog box and use HTML color codes to select the text color. |
|
|
Select All — click or tap this icon to select all the content in a story |
|
|
Cut — click or tap this icon to remove the selected text from the story and place it on the clipboard. |
|
|
Copy — click or tap this icon to place a copy of the selected text on the clipboard. |
|
|
Paste — click or tap this icon to paste the contents of the clipboard into the story at the cursor location. |
|
|
Paste as Plain Text — click or tap this icon to paste the contents of the clipboard into a story without any text formatting. |
|
|
Paste from Word — click or tap this icon to paste formatted text selected from a Word file into a story and retain text formatting. |
|
|
Undo — click or tap this icon to reverse your last edit. |
|
|
Redo — click or tap this icon to recover the last edit that you canceled with the Undo tool. |
|
|
Find — click or tap this icon to find text in a story. |
|
|
Replace — click or tap this icon to replace text in a story. |
|
|
Maximize — click or tap this icon to expand the Body to fill the Story Editor Panel. When expanded, click or tap this icon to contract the Body. |
|
|
Print — click or tap this button to print the current story. |
|
|
Convert to Upper Case — click or tap this icon to change the selected text to all upper-case letters. |
|
|
Convert to Lower Case — click or tap this icon to change the selected text to all lower-case letters. |
|
|
Convert to Body Case — click or tap this icon to change the selected text to mixed case letters. Review the resulting text carefully, because the case adjustment tool cannot account for all situations. Stories imported from an NCS rundown may contain text in ALL UPPER-CASE letters. Click or tap this icon to change the text to mixed case. Review the resulting text carefully, as the case adjustment tool cannot account for all situations. |
|
|
Insert/Remove Bulleted List — click or tap this icon to add bullets to start of the of each selected paragraph. Bullets are removed from bulleted paragraphs. |
|
|
Insert/Remove Numbered List — click or tap this icon to add sequential numbers to start of the of each selected paragraph. Numbers are removed from numbered paragraphs. |
|
|
Decrease Indent — click or tap this icon to decrease the indent level of the selected numbered list or bulleted list. |
|
|
Increase Indent — click or tap this icon to increase the indent level of the selected numbered list or bulleted list. |
|
|
Block Quote — click or tap this icon to indent the selected text to highlight it as an extended quotation. |
|
|
Align Left — click or tap this icon to align the selected text to the left side of the text box. |
|
|
Align Center — click or tap this icon to center the selected text in the text box. |
|
|
Align Right — click or tap this icon to align the selected text to the right side of the text box. |
|
|
Justify — click or tap this icon to align the selected text to both the left and right sides of the text box, adding extra space between words as necessary. |
|
|
Format Paragraph — use this list to select the paragraph style to apply to the selected text. The visual appearance of the story when published may vary from the appearance you define in Inception. The final visual appearance of each style is controlled by a cascading style sheet (CSS) on your Frankly website. |
|
|
Insert Special Character — click or tap this icon to use the Select Special Character dialog box to insert characters that are not your keyboard. |
|
|
Link Insert/Edit — click or tap this icon to use the Link dialog box to add a URL, anchor, or E-Mail link to the selected text. |
|
|
Insert Horizontal Line — click or tap this icon to insert a horizontal line at the cursor location. |
9.Select the Use as Summary check box to use the first 500 characters of the story text entered in the Body box as the story summary. Clear this check box to enter a story summary in the Summary box.
10.In the Summary box, edit the story summary that was generated from the story Body. Frankly story summaries are limited to 500 characters. The Character Count field below the Summary box indicates how many characters the summary contains.
This box is only available went the Use as Summary check box is cleared.
11.Use the Content Classification list to select the Frankly content classification for the story.
12.Use the Bylines list to select the author byline for a story.
Ctrl-click bylines to select multiple bylines for a story. To select a range of bylines for a story, click the first byline in the range and then Shift-click the last byline in the range.
13.Use the Categories list to select the Frankly categories to associate with the story.
Ctrl-click categories to select multiple categories for a story. To select a range of categories for a story, click the first category in the range and then Shift-click the last category in the range.
14.Click or tap the  Save icon.
Inception saves the story on your Inception Server and to your Frankly account. On Frankly, new stories are saved with Draft status. You can use Inception or Frankly to edit the story. Story edits are synchronized between both Inception and Frankly. Publishing a Frankly story from Inception or Frankly makes the story available as a post on your Frankly website.
When changes were made in Frankly to a Frankly story open in Inception, an alert opens when you use Inception to save the story. Click Yes to save the Inception version of the story, click No to retain the Frankly version of the story.
For More Information on...
•blacklisted content, refer to the section Find Blacklisted Content in Your Stories.
•editing Frankly stories, refer to the section Edit a Frankly Story.
•adding stories to a running order, refer to the chapter Editing the Running Order.
•approving and publishing stories, refer to the chapter Approving and Publishing Stories.


