 Configuration icon. If the Configuration icon is not visible, you are not an administrator and cannot configure the server.
Add a Single Sign-On Trust Relationship to Both Servers
Single sign-no requires a trust relationship be added to both the Inception Server and the Streamline Server. On the Inception server you need to add a single sign-on trust relationship with the Streamline Server. On the Streamline Server you need to add a single sign-on trust relationship with the Inception Server.
Inception Server
To add a single sign-on trust relationship with the Streamline Server
1.Log in to your Inception Server as an administrator.
2.On the main toolbar, click the Configuration icon. If the Configuration icon is not visible, you are not an administrator and cannot configure the server.
The Configuration window opens.
3.On the Configuration window toolbar, click the  Users icon.
The Users panel opens.
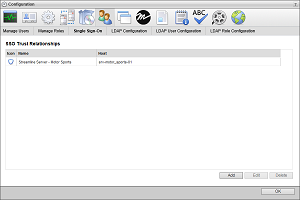
4.Click the Single Sign-On tab.
The Single Sign-On tab opens.
The Create SSO Trust Relationship page opens
6.In the System Name box, enter a name for the Streamline Server to trust.
7.In the Trusted Host box, enter the hostname or IP address of the Streamline Server to trust.
The Create SSO Trust Relationship page closes and Inception adds the new single sign-on trust relationship to the SSO Trust Relationship list.
9.When building a single sign-on trust relationship with a redundant or enterprise Streamline system that contains multiple Streamline Servers, complete the following steps:
a.For each Streamline Server in the Streamline system, repeat step 5 to step 8 to create a single sign-on trust relationship for the Streamline Server.
b.Click Add to open the Create SSO Trust Relationship page.
c.In the System Name box, enter a name for the load balancer in the Streamline system.
d.In the Trusted Host box, enter the hostname or IP address of the load balancer in the Streamline system.
e.Click Save.
10.In the bottom toolbar, click OK.
The Configuration window closes.
11.Exit from the Inception Server.
Streamline Server
To add a single sign-on trust relationship with the Inception Server
1.Log in to your Streamline Server as an administrator.
2.On the main toolbar, click the  Configuration icon. If the Configuration icon is not visible, you are not an administrator and cannot configure the server.
The Configuration window opens.
3.On the Configuration window toolbar, click the  Users icon.
The Users panel opens.
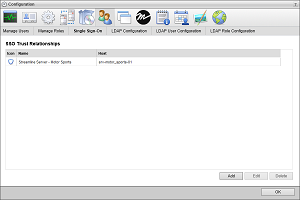
4.Click the Single Sign-On tab.
The Single Sign-On tab opens.
The Create SSO Trust Relationship page opens
6.In the System Name box, enter a name for the Inception Server to trust.
7.In the Trusted Host box, enter the hostname or IP address of the Inception Server to trust.
The Create SSO Trust Relationship page closes and Streamline adds the new single sign-on trust relationship to the SSO Trust Relationship list.
9.When building a single sign-on trust relationship with a redundant or enterprise Inception system that contains multiple Inception Servers, complete the following steps:
a.For each Inception Server in the Inception system, repeat step 5 to step 8 to create a single sign-on trust relationship for the Inception Server.
b.Click Add to open the Create SSO Trust Relationship page.
c.In the System Name box, enter a name for the load balancer in the Inception system.
d.In the Trusted Host box, enter the hostname or IP address of the load balancer in the Inception system.
e.Click Save.
10.In the bottom toolbar, click OK.
The Configuration window closes.