
To Overwrite/Append to a Clip
Add to the end of an existing clip, or overwrite the clip entirely.
- Select the channel transport that you want to record a clip to. This is the channel for the BNC on the back of the server that the audio/video you want to record is coming in on. Not all channels will have an associated input BNC, depending on the model and configuration of your server.
-
Prepare the channel transport for the type of recording you want to do.
- Append — load the clip that you want to append the new recording to.
- Overwrite — load the clip that you want to overwrite and seek to the point in the clip that you want to start the new recording.
-
Click the record button (
 ).
).
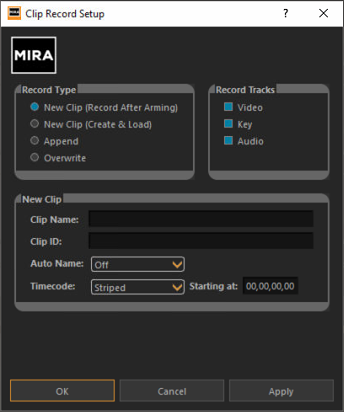
The Clip Record Setup dialog box is shown.
-
In the Record Type area, select the type of recording you want to do.
- Append — arms the channel transport to start recording at the end of the current clip.
- Overwrite — arms the channel transport to start recording at the currently selected point in the exiting clip. Everything after this point in the clip will be overwritten.
-
In the Record Tracks area, select which tracks you want to record.
Note: Audio is recorded depending on how the Audio Input Source is set in Mira Config.
- Video — record the video and any embedded audio coming into the Video In BNC, depending on the audio source.
- Key — record the alpha signal coming into the associated Video In BNC.
- Audio — record the embedded audio on the Video In BNC, depending on the audio source.
-
Click OK.
The channel transport is now armed to record. The video window shows live video coming into the channel, the EE button is on, and the record button (
) is flashing. -
Click the flashing record button (
) when you are ready to record.
The server starts recording, the EE button goes off, the name of the new clip is shown at the top of the channel transport area, and the RECORDING indicator appears.
-
Click the stop (
 ) button to stop recording.