
To Configure Mira Import
The Mira Import configuration menus allow you to change the destination folder, set how the RGB color space is interpreted, the raster size of the imported video, set up a watch folder, and to set an auto start behavior.
- Launch the Mira Import application.
-
In the Import Method list, select the how you want to import the media file.
- Software Transcode — use the software based transcoder to import the media file that is in a different media format than your hardware.
- Native Import Only: No Transcoding — import the media file that is in the native media format for your hardware.
Tip: Select Native Import Only if the file you are importing is one of the following or use the Software Transcoder for any published codec. No channels are consumed for either of these operations.- Abekas JPEG-2000.clip — if your server is equipped with the JPEG-2000 video hardware.
- DVCPRO-HD.mov/.mxf — if your server is equipped with the DVCPRO-HD video hardware.
- AVC-Intra 100.mov/.mxf — if your server is equipped with the AVC-Intra video hardware.
The Mira Import window is shown.
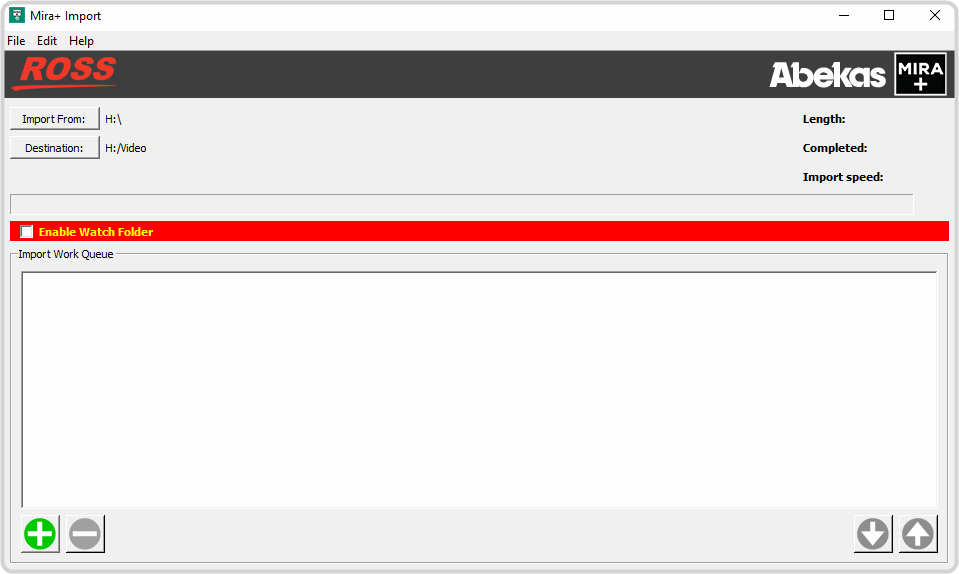
- Click Edit > Configure.
-
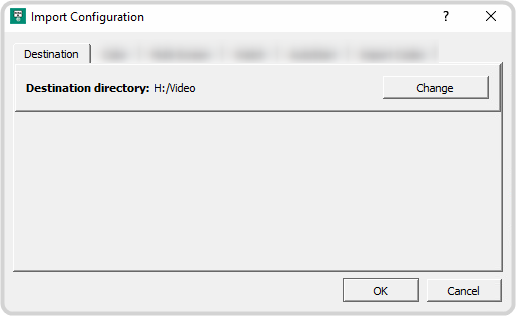
Click the Destination tab and click Change and select a new destination folder for import.
-
Click the Color tab and select how the RGB luminance color range is interpreted when a file is imported.
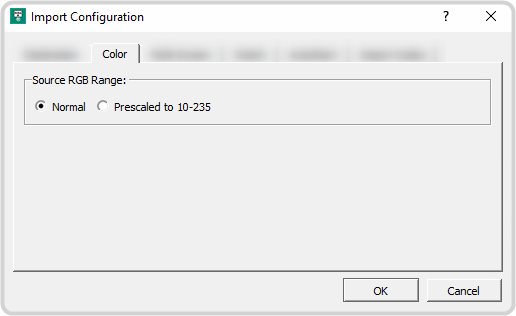
- Normal — color luminance range is scaled from 0 to 255.
- Prescaled to 10-235 — color luminance range is scaled from 10 to 235.
Tip: If the blacks of your imported media files appear crushed or the whites do not appear as bright as expected, try selecting the opposite mode.Tip: Select Normal if you are importing a media file with alpha (key). The alpha may not import properly otherwise. -
Click the Import Codec tab and select codec you want to use when a file is imported.
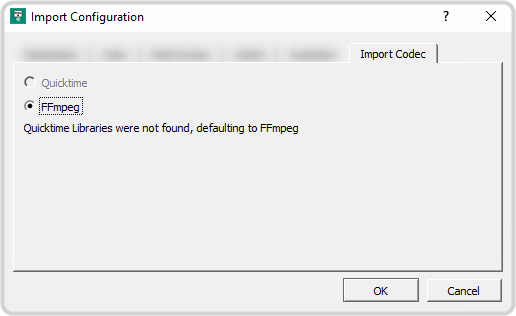
- QuickTime — the Apple® QuickTime® codec is not supported at this time.
- FFmpeg — use the FFmpeg™ codec.