
To Set Up a Chroma Key in Basic Mode
The UltraChrome chroma key tries to automatically adjust for the scene you are trying to chroma key. For the best results, initialize the key first, and then identify the areas where you need to adjust the key.
-
Click Navigation Menu > Live Assist > MEs and select the ME and key that you want to set up.
Tip: You can use the same procedure for a MiniME™ or MultiScreen.
- Click Key Fill and select the video signal you want to use for the key.
-
Click Chroma Key.
Tip: Click Show Alpha to have the preview output of the current ME switch to the alpha signal that is being used by the selected keyer. Show alpha is not available for MiniME™ outputs.
-
Click Basic.
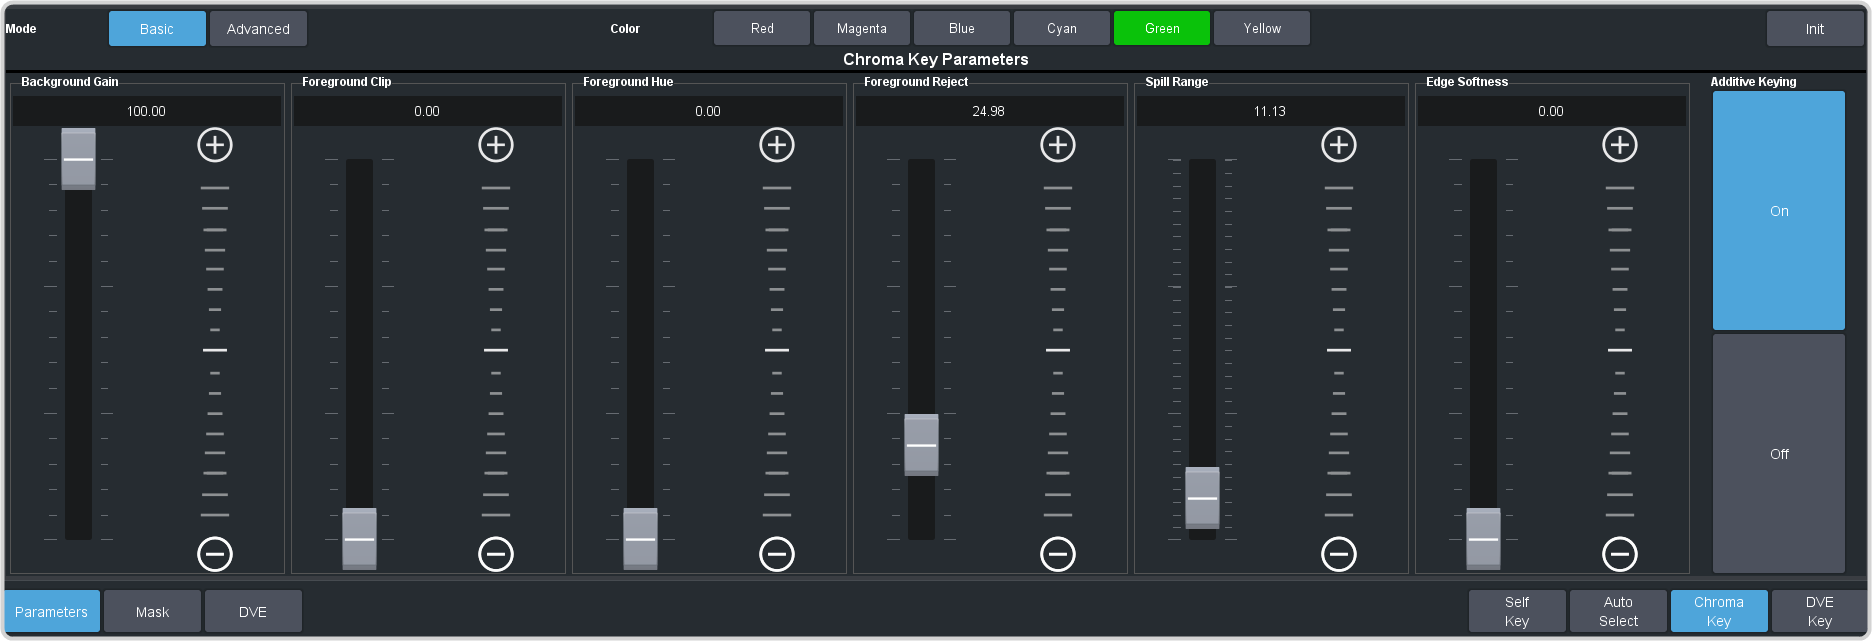
- Click the Color button for the color you want to key out.
-
Click Init to initialize the chroma key.
Every time the key is initialized, the switcher resets all the Chroma Key parameters to their default settings.
-
Click an Additive Keying button to turn it on or off.
- Off — Reduces the level of detail in the edges of the chroma key as well as the overall noise in the key image that can be the result of certain lighting conditions or high detail camera settings. This is the default setting.
- On — Include the maximum detail in the edges of the chroma key.
-
Use the Background Gain slider to adjust the background gain.
- Increasing the gain value causes the background to appear more opaque. This results in less of the background color being removed.
- Decreasing the gain value causes the background to appear more transparent. This results in more of the background color being removed.
-
Use the Edge Softness slider to add or remove edge softening of the foreground image and alpha channel.
- Increasing the softness value increases the amount of softness applied to the foreground edges and alpha channel.
- Decreasing the softness value decreases the amount of softness applied to the foreground edges and alpha channel.
-
Use the Foreground Clip slider to adjust the foreground clipping.
- Increasing the clip value removes lower-saturated colors from the foreground image.
- Decreasing the clip value includes lower-saturated colors in the foreground image.
-
Use the Foreground Hue slider to select the central (base) color for the foreground.
- Increasing the hue value moves counter-clockwise around the color wheel to select a base color.
- Decreasing the hue value moves clockwise around the color wheel to select a base color.
-
Use the Foreground Reject slider to include or reject hues adjacent to the base color
- Increasing the Reject value decreases the amount of adjacent hues that are included in the foreground.
- Decreasing the Reject value increases the amount of adjacent hues that are included in the foreground.
-
Use the Spill Range slider to remove any color cast onto the foreground.
- Increasing the range value causes more of the foreground colors to be corrected for background color spill.
- Decreasing the range value causes fewer of the foreground colors to be corrected for background color spill.
- Click Mask to apply a mask to the key.