
To Set Up a MultiViewer
Note: A MultiViewer must be assigned to a video output to be usable.
Note: The available layouts and feature depend on the video format the switcher is operating in, the MultiViewer output, and the number of boxes in the
layout being used.
-
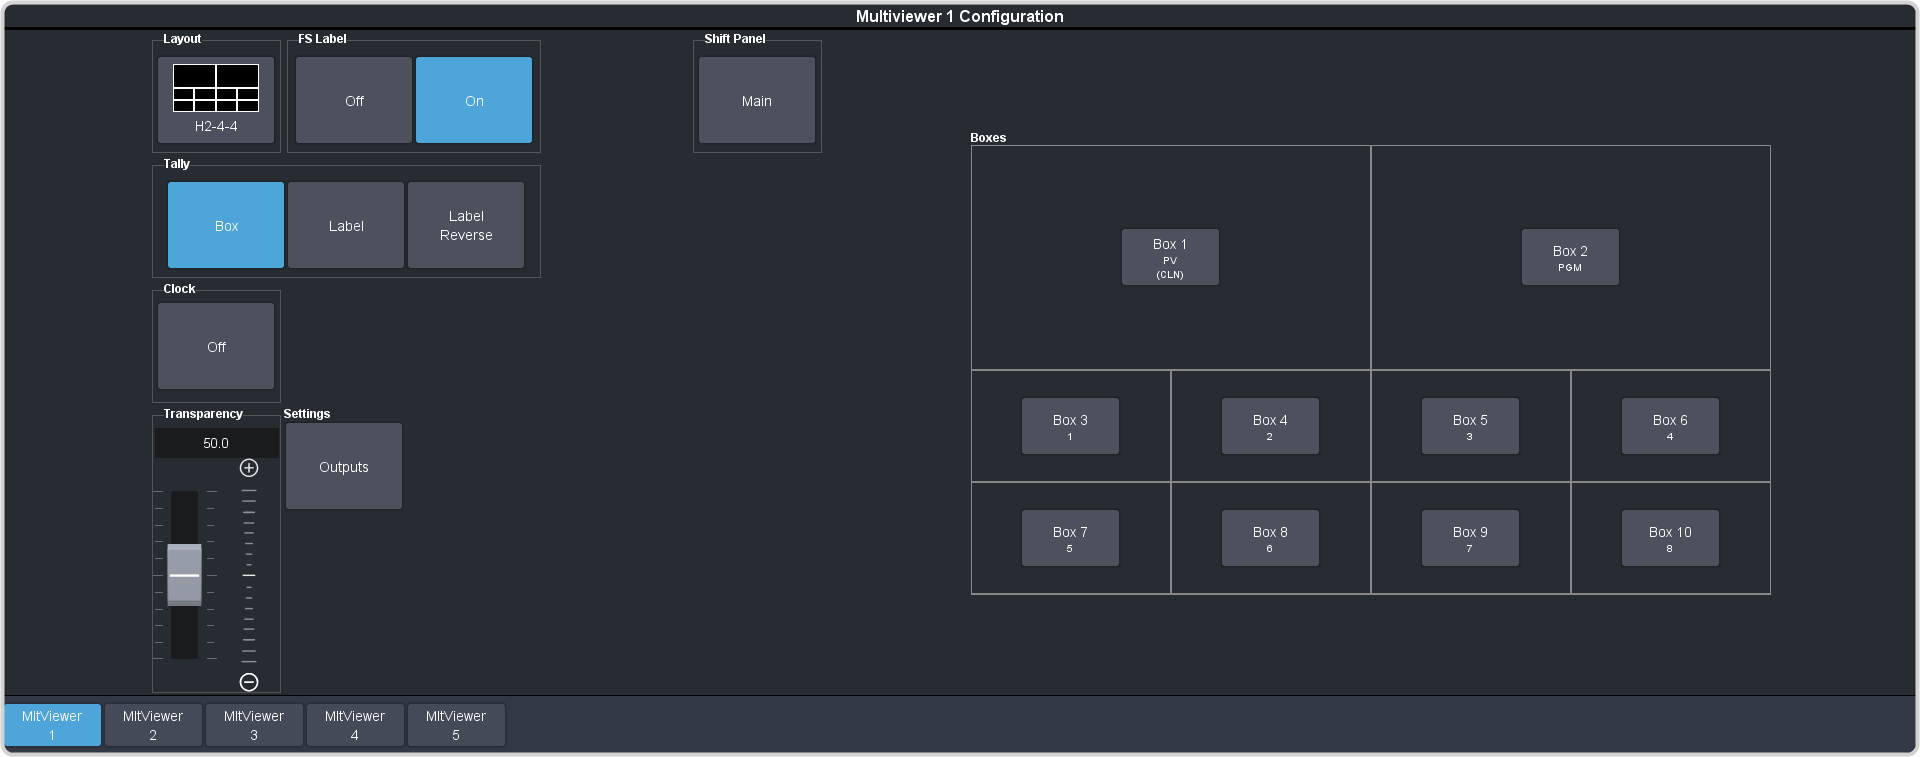
Click Navigation Menu > Configuration > MultiViewers and click the MultiViewer X button for the MultiViewer you want to set up.
Tip: The number of MultiViewers that are available depends on the model of switcher you have.
Note: If the switcher is operating in a 3G video format, click Outputs and select whether outputs 1 and 2 or outputs 3 and 4 are assigned to normal outputs (Outputs), or MultiViewer outputs (MV 1-2). -
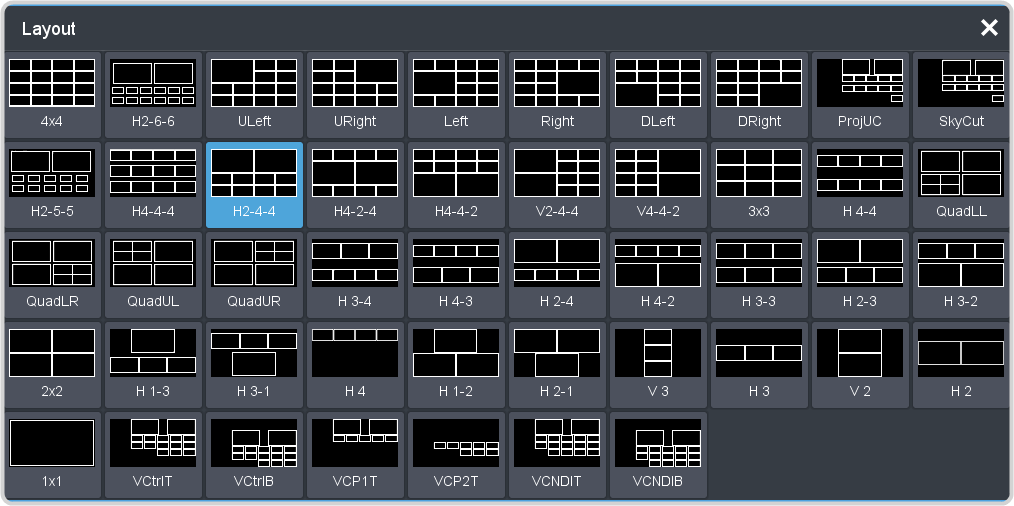
Click the Layout button and select the arrangement of the boxes that you want to use for the selected MultiViewer.
- Use the Transparency slider to adjust the transparency of the background behind the source label for the selected MultiViewer.
-
Apply an overlay to the MultiViewer as follows:
Note: The overlay feature is only available on MultiViewer outputs 1 and 2 when a layout of less than 16 boxes is used and the switcher is not operating in a 3G video format.
-
Click a Tally button to select how boxes on the MultiViewer are tallied.
- Box — red or green border is shown around the outside of the MultiViewer box
- Label — red or green boxes are shown inside the label area of the MultiViewer box
- Label Reverse — the same as Label, but the placement of the tally boxes is swapped
- Click an FS Label button to select whether FSFC is shown on the source labels (On) or not (Off) when a FSFC is applied to the source.
-
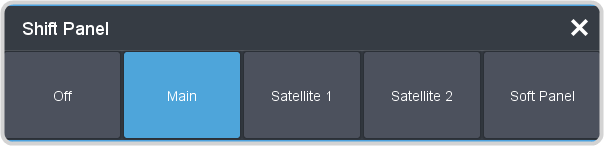
Click Shift Panel and select the panel that you want the MultiViewer shift to be active on. When the Shift
button is pressed on the assigned control panel the MultiViewer shows the shifted sources.
Note: The shift function can only be assigned to a single panel at a time.
Tip: When the MultiViewer Shift is active, the box buttons on the layout show the shifted source in brackets. -
Click on one of the Boxes buttons and set up how that box appears on the MultiViewer in the standard and shifted configuration.
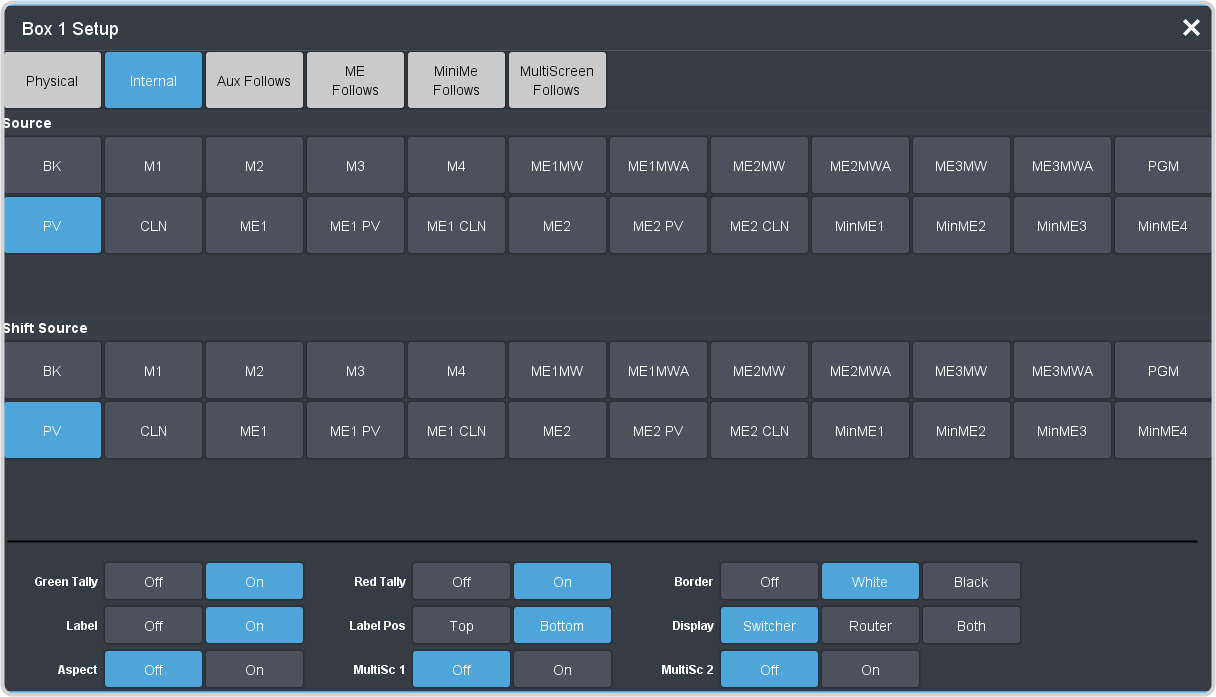
- Physical — the physical inputs to the switcher on the input BNCs.
- Internal — the internally generated sources of the switcher (ME, MiniME™, chroma key outputs, etc.).
- Aux Follows — the aux buses.
- ME Follows — the background, preset, and key buses of each ME.
- MiniME Follows — the background, preset, and key buses of each MiniME™.
- MultiScreen Follows — the background, preset, and key buses of each MultiScreen.
- Green Tally — turn the preview (green) tally for the Video Processor MultiViewer box on or off.
- Red Tally — turn the program (red) tally for the Video Processor MultiViewer box on or off.
- Border — turn the border around the Video Processor MultiViewer box off (Off), white (White), or black (Black). When the border is turned off, some distortion may be visible around the edges of the box.
- Label — turn source labels for the Video Processor MultiViewer box off, or on in a selected position
- Label Pos — select a position for the source label for the Video Processor MultiViewer box(Bottom or Top).
- Display – select whether the source name on the label shows the internal mnemonic name (Swicther), the TSL
UMD name (Router), or both names (Both).Tip: If you select a source on an aux bus that does not have a TSL UMD name, the mnemonic name is used instead on the MultiViewer.
- Aspect — turn aspect ratio markers for the Video Processor MultiViewer box on (Aspect) or off (Off).
- MultiSc X — turn the MultiScreen overlay Off or On. The overlay shows what portions of the image are cropped to fit into the output of the MultiScreen.